Introduction
In Windows or Windows Server environment, SMB (Server Message Block) shares are essential for seamless network file sharing, allowing users and applications to access files remotely. This post explores several methods to create an SMB share, including using Server Manager, File Explorer, PowerShell, and Computer Management.
Understanding Permissions
When creating an SMB share in Windows Server, understanding how permissions work is crucial for securing access to your shared resources. Windows Server uses two types of permissions: NTFS permissions and Share permissions. These permissions control what actions users can perform on the files and folders, both locally and over the network.
NTFS Permissions
NTFS (New Technology File System) permissions are applied directly to the files and folders on the disk and determine what users can do when accessing the folder locally or over the network.
The permissions can be ranked from least restrictive (most permissive) to most restrictive (least permissive) based on the level of access they grant to files and folders. In other words:
- More Actions Allowed = Less Restrictive: The more actions a permission allows, the less restrictive it is.
- Fewer Actions Allowed = More Restrictive: The fewer actions a permission allows, the more restrictive it is.
Here’s the order from least restrictive to most restrictive:
- Full Control: Allows users to do everything, including modifying permissions and taking ownership.
- Modify: Users can read, write, and delete files, but cannot manage permissions.
- Read & Execute: Users can view and execute files, but cannot modify them.
- Read: Users can only view the contents of the folder.
- Write: Users can create and modify files, but cannot delete them.
Share Permissions
Share permissions control what users can do when they access the folder over the network. Unlike NTFS permissions, these are applied only when the folder is accessed as a network share.
Combining NTFS and Share Permissions
Windows Server determines a user’s effective permissions by combining NTFS and Share permissions, with the most restrictive permission applying. For example, if a user has “Read” permission on the Share level but “Modify” permission on the NTFS level, their effective permission will be “Read” when accessing the folder over the network.
Methods to Create an SMB Share
Windows Server provides multiple methods for creating an SMB share, each offering different advantages depending on your administrative needs. Below, we’ll walk through some common approaches:
Using Server Manager
Server Manager is a powerful tool that simplifies the process of managing server roles and features, including creating SMB shares. Here is the step by step guide:
- Make sure you have “File and iSCSI Services” Role installed first.
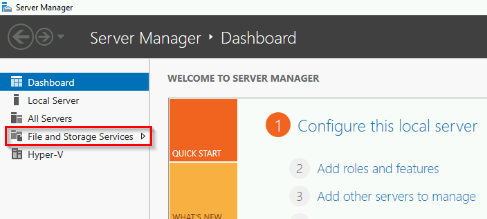
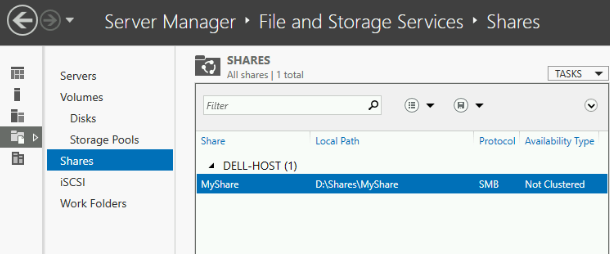
- Open Server Manager and navigate to “File and Storage Services.”
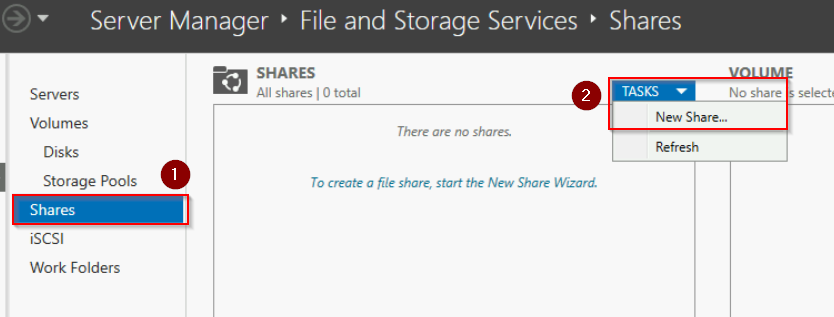
- Select “Shares,” then click on the “Tasks” menu and choose “New Share.”
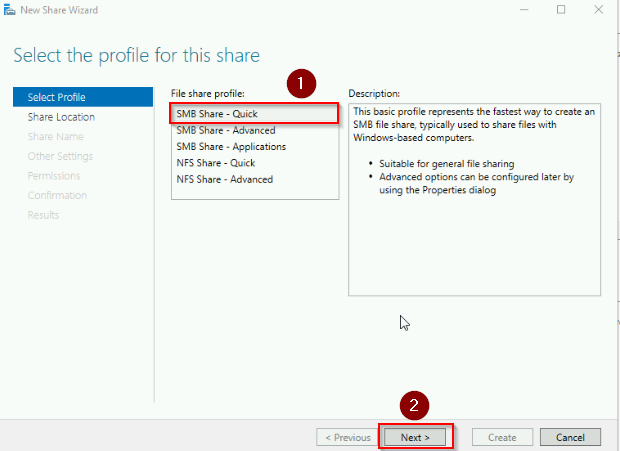
- On the New Share Wizard window, under File share profile section, select “SMB Share – Quick”. Then click “Next”.
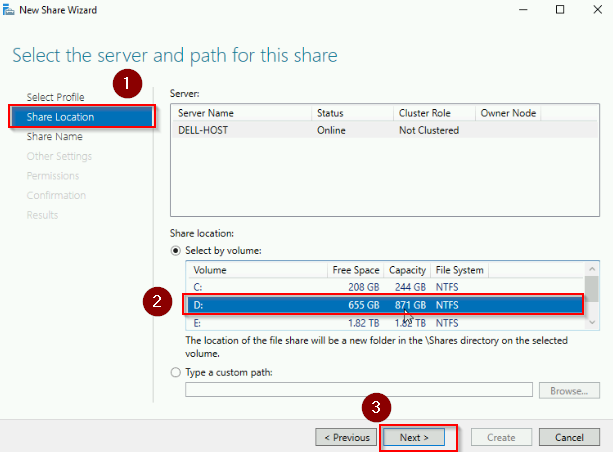
- Under the Share location section, choose the volume you want, in this case, we choose “D” volume. Click “Next”.
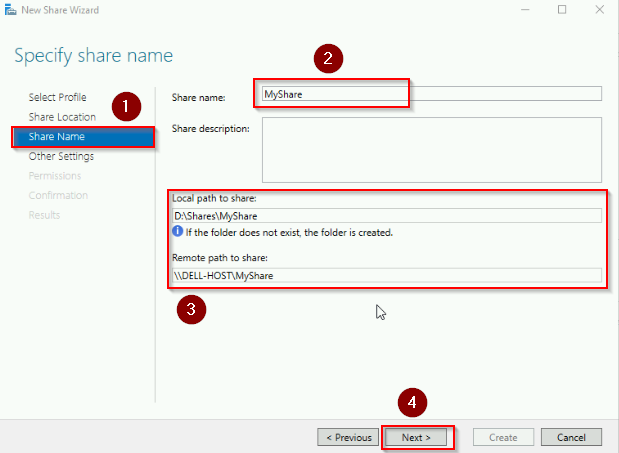
- Under Share Name, give it a name, the “Local path to share” and “Remote path to share” text boxes will automatically filled. Click “Next”.
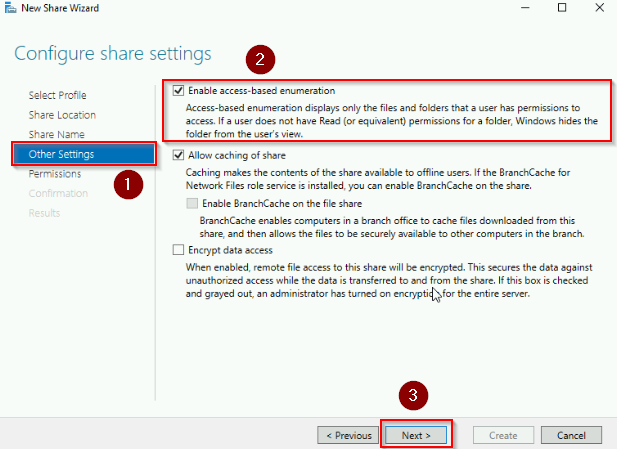
- Under Other Settings , select “Enable access-based enumeration” checkbox. Click “Next”.
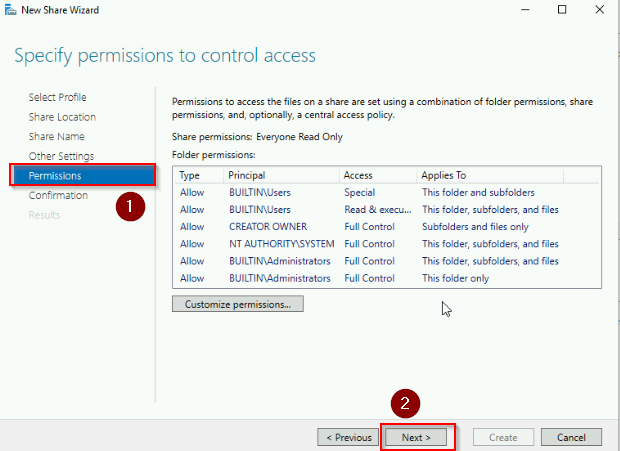
- Under Permission, keep things as default. Click “Next”.
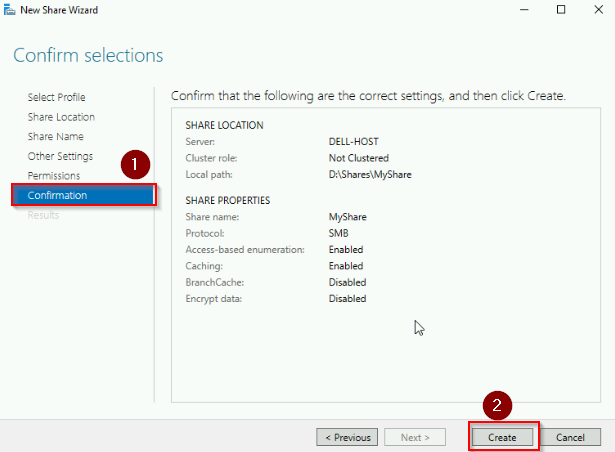
- Under Confirmation, review and click “Create”.
See screenshots of all the steps below:
Using File Explore
File Explorer offers a quick and straightforward way to create an SMB share, making it accessible even for those with minimal server management experience:
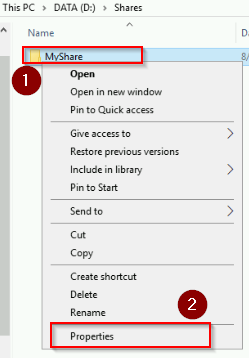
- Right-click on the folder you want to share and select “Properties.”
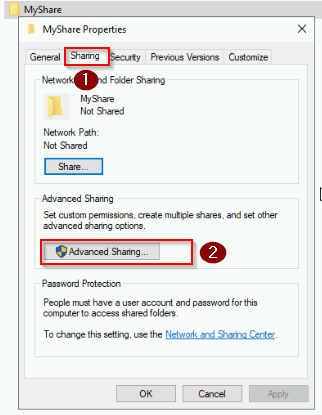
- Go to the “Sharing” tab and click “Advanced Sharing.”
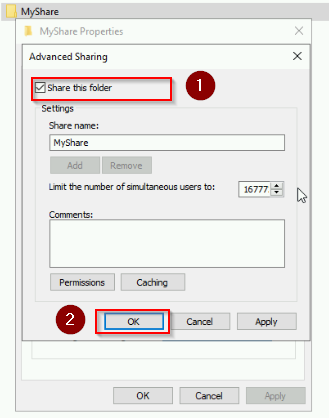
- Check “Share this folder,” set the share name, and configure permissions as needed.
See screenshots below:
Using PowerShell
PowerShell provides a versatile and scriptable method to create and manage SMB shares, perfect for automation or bulk operations:
- Open PowerShell with administrative privileges.
- Use the
New-SmbSharecmdlet to create the share. For example:
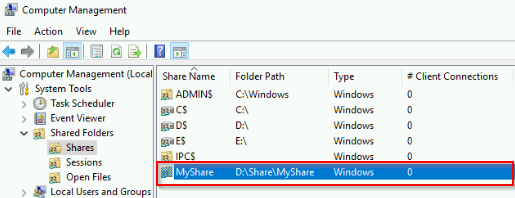
New-SmbShare -Name "MyShare" -Path "D:\Share\MyShare" -Read "Everyone"
PowerShell is excellent for administrators who need to automate tasks or manage shares across multiple servers.
Using Computer Management
Computer Management is a versatile console that allows you to manage system tools, including shared folders, from a single interface. Here are the steps:
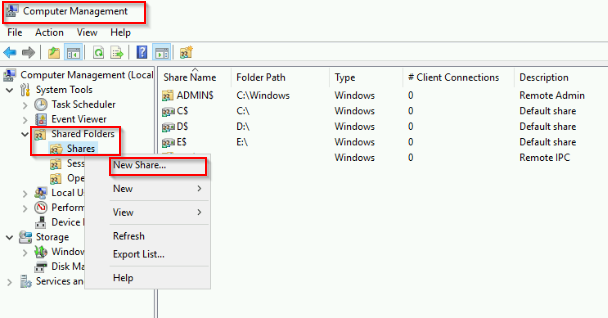
- Open Computer Management and navigate to “Shared Folders” > “Shares.”
- Right-click on “Shares” and select “New Share.”
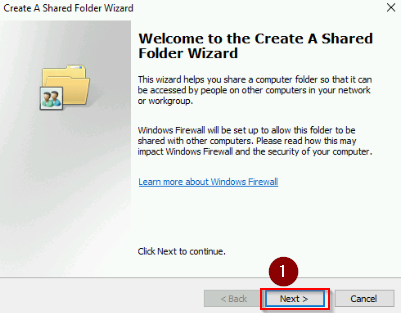
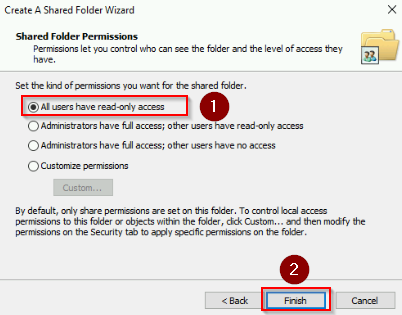
- On the Create a Shared Folder Wizard, Click “Next“.
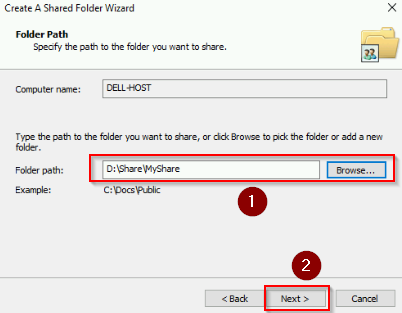
- Choose the path for the folder under “Folder path“. Click “Next“.
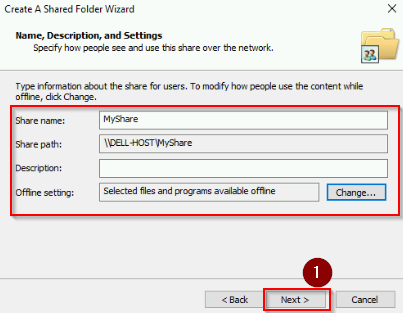
- Next you will specify Name, and Description for the share folder. We keep it as default for this case. Click “Next“.
- On the Shared Folder Permissions. We choose “All users have read-only access“. Click “Finish“.
This method is useful for managing existing shares as well as creating new ones.
See screenshots below:
Conclusion
To sum up, creating and managing SMB shares in Windows Server can be done through various methods, each suited to different administrative needs. Whether you prefer the GUI of Server Manager or the automation capabilities of PowerShell, understanding the interplay between NTFS and Share permissions is key to ensuring your shared resources are both accessible and secure.