Introduction
Windows Deployment Services (WDS) is a server role in Windows Server that primarily focuses on network-based deployments using the Preboot Execution Environment (PXE). WDS enables you to perform network-based installations of Windows, and it’s often used in conjunction with MDT (Microsoft Deployment Toolkit) for a complete deployment solution.
If you’re deploying Windows over the network and want to use PXE boot, you might choose to install WDS. However, it’s not a strict requirement for using MDT. This guide walks you through configuring WDS in 2024, empowering you to deploy and manage Windows images across your network.
Lab Setup
Here is a quick review of the how the lab is set up using Hyper-V:
Server-1
- OS: Windows Server 2019.
- Network: the VM is connected to External V-Switch that binds to the physical network adapter. It allow the VM to communicate on the same network as other devices connected to the Router.
- DHCP Functionality: in the lab we use the a Router that acts as the DHCP server, it will automatically allocating IP addresses to devices during the PXE boot process
PC-1
- PC-1 is a VM. We use this VM for PXE boot after setting up WDS
- We will use WDS to deploy Windows 10 on PC-1 virtual machine
NOTE:
Starting with Windows 11, Windows Deployment Services (WDS) will no longer support workflows that rely on boot.wim from installation media or running Windows Setup in WDS mode. If you PXE-boot from a WDS server using boot.wim from installation media, Windows Setup launching in WDS mode will no longer be supported. For more information, go to this link.
In this lab we choose to deploy Windows 10 and therefore we are able to use boot.wim as the boot image and run Windows Setup in WDS mode.
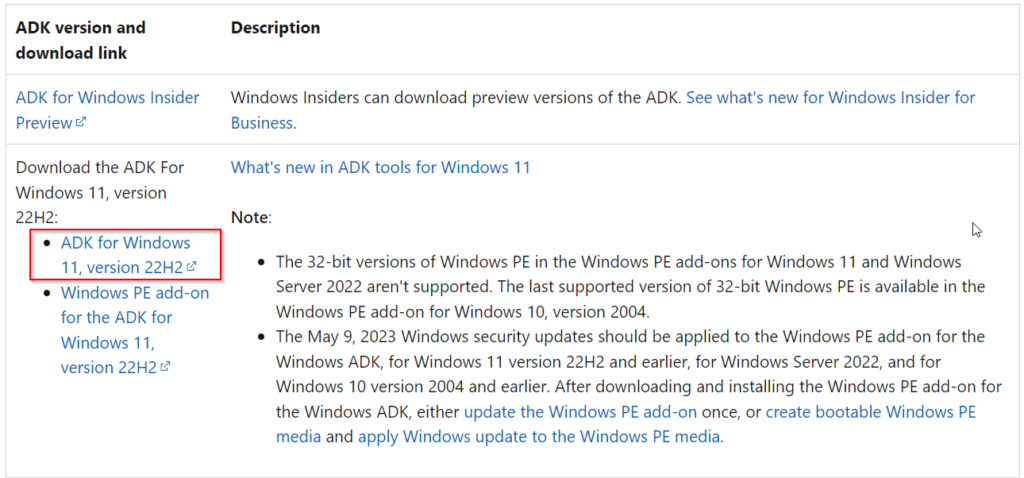
Step 1: Download and Install Windows ADK (Optional)
Note that you do not necessarily need to install the Windows Assessment and Deployment Kit (ADK) to use WDS alone. However, installing the ADK provides several benefits that can significantly enhance your WDS experience such as customize captured Windows images or automate deployment.
Go to this link to Download and Install Windows Assessment and Deployment Kit (Windows ADK). Make sure to select “ADK for Windows 11 version 22H2“
Step 2: Install WDS Role
- Open Server Manager. You can access it by searching for “Server Manager” in the Start menu.
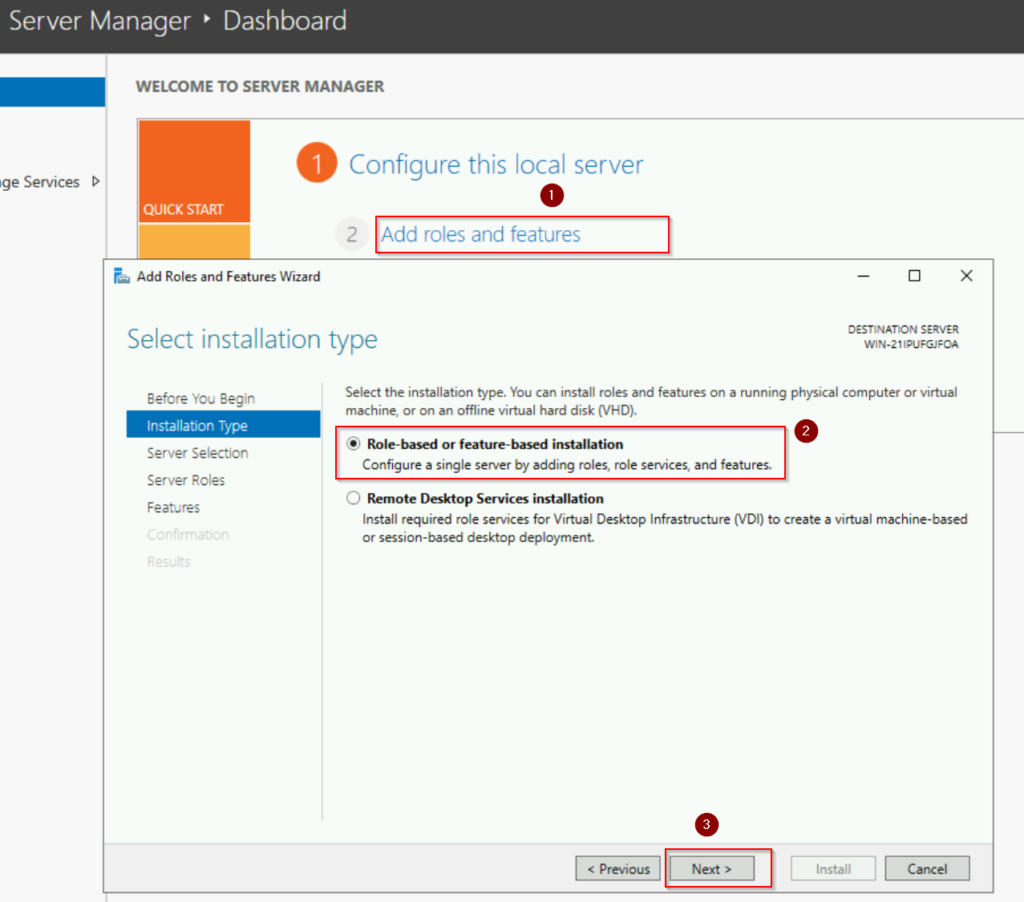
- Click on “Add roles and features” in the right pane.
- Select “Role-based or feature-based installation” and click “Next.”
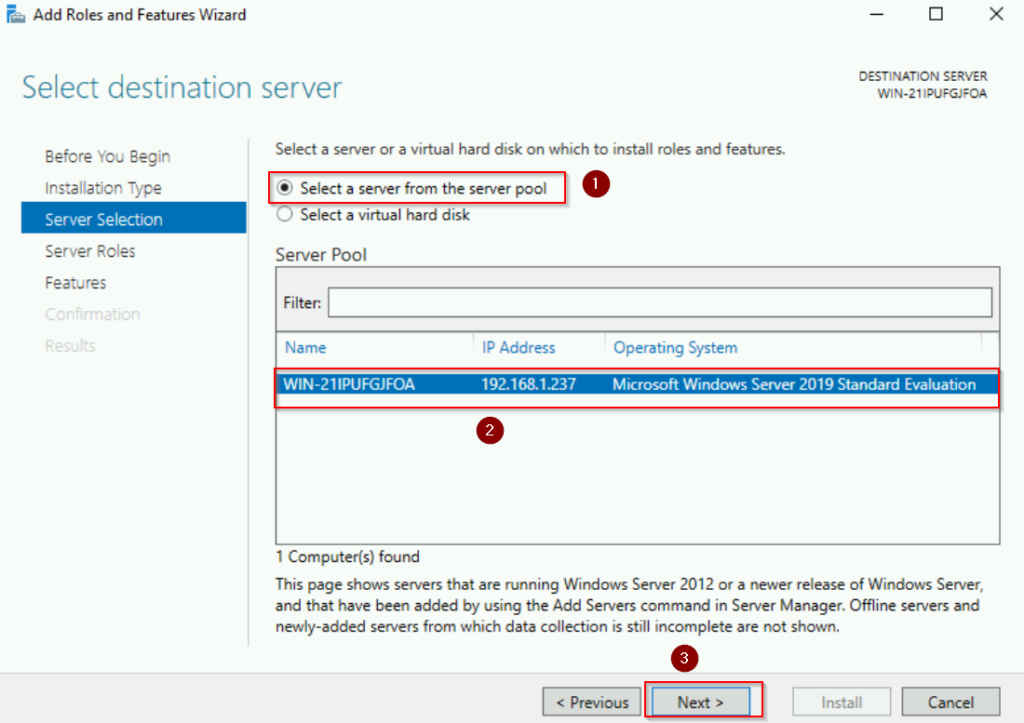
- Choose the server where you want to install WDS and click “Next.”
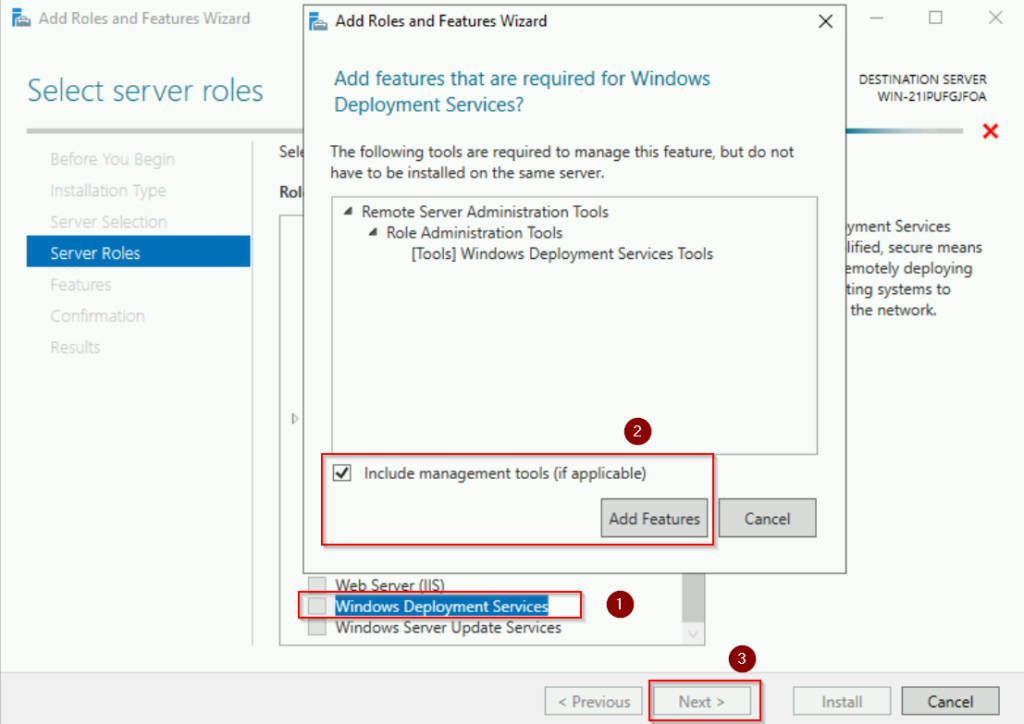
- Expand “Server Roles,” scroll down, and check the box next to “Windows Deployment Services.”
- Click “Next” and then “Add Features” if additional features are required. Click “Next” again.
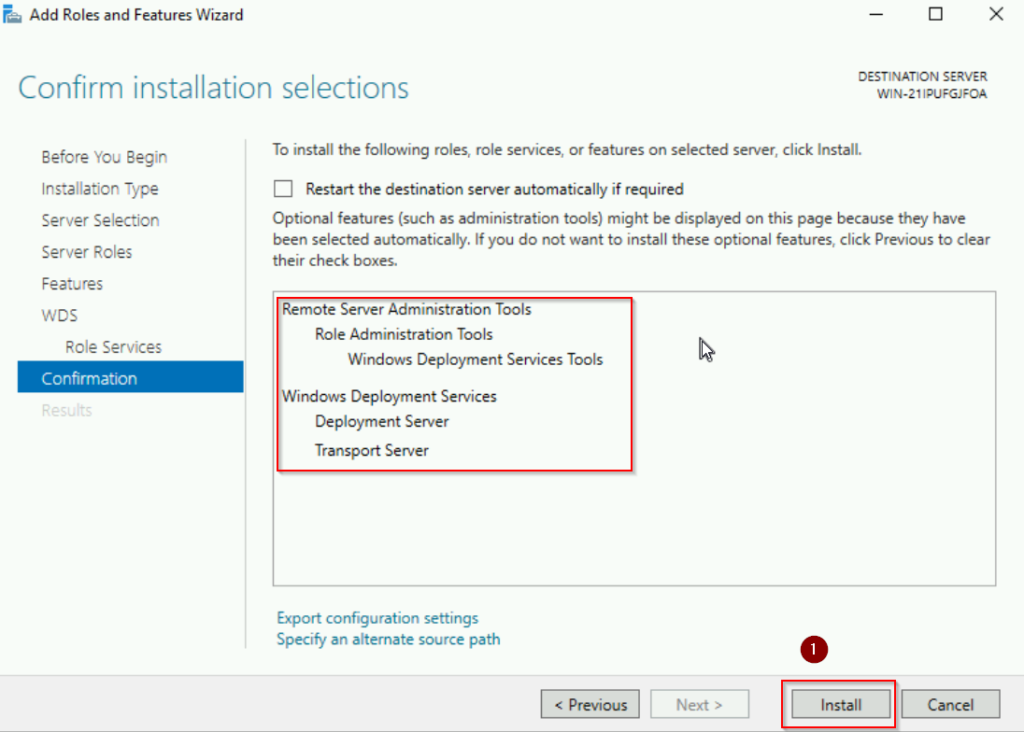
- Review the selections and confirm by clicking “Install.”
Below are screenshots of those steps above:
Step 3: Configure WDS
- Once the installation is complete, open the Server Manager again.
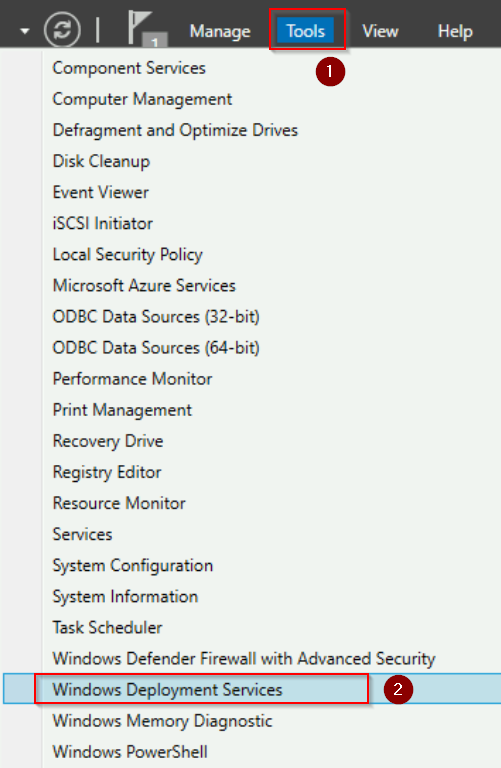
- In Server Manager, click on “Tools” and then “Windows Deployment Services.”
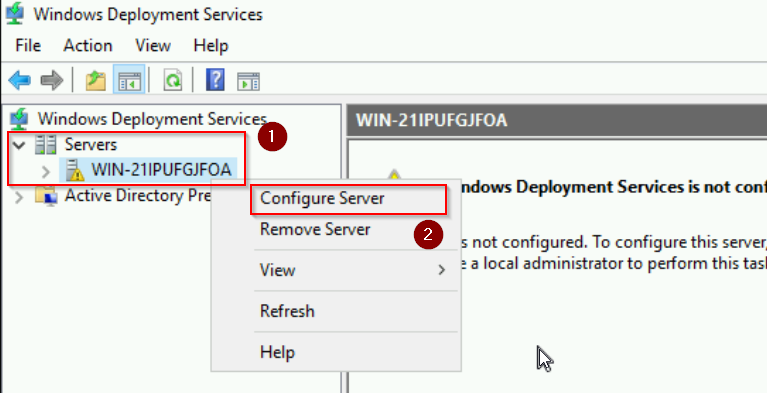
- In the WDS snap-in, right-click on “Server Name” (your server name) and select “Configure Server.”
See screenshots below:
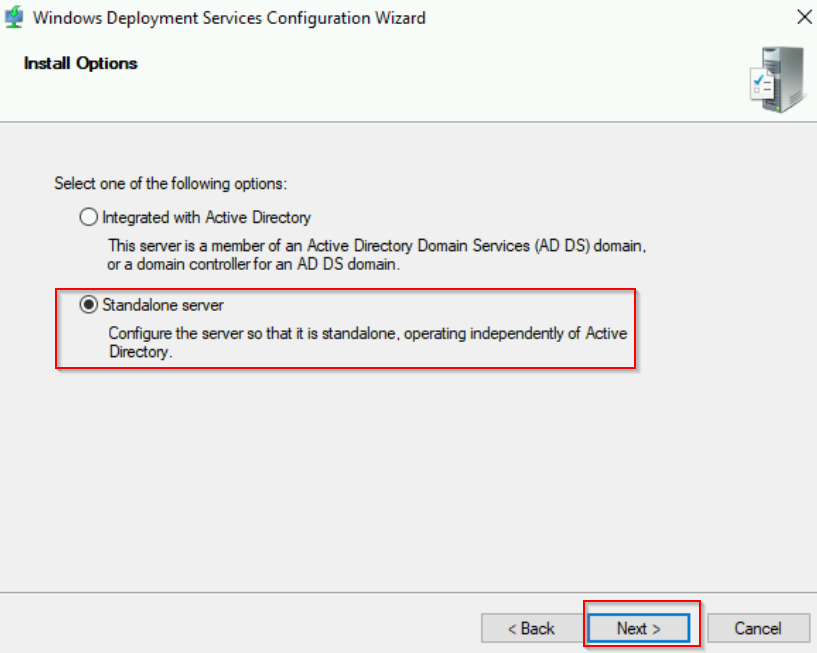
- In the “Windows Deployment Services Configuration Wizard,” choose “Standalone server“. The reason we choose this option is because this server we are working on in this lab is not a member of an Active Directory Domain Services (AD DS) domain. Click “Next.”
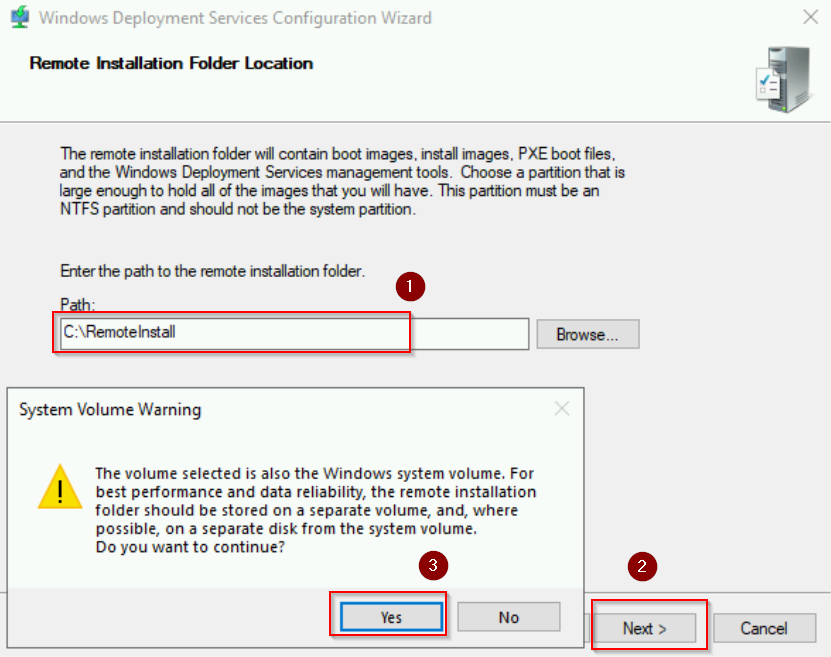
- Next, we select the path for the remote installation folder to store boot images. We will use default location in this case. Then click “Next” and on the warning message pop up, click “”Yes“.
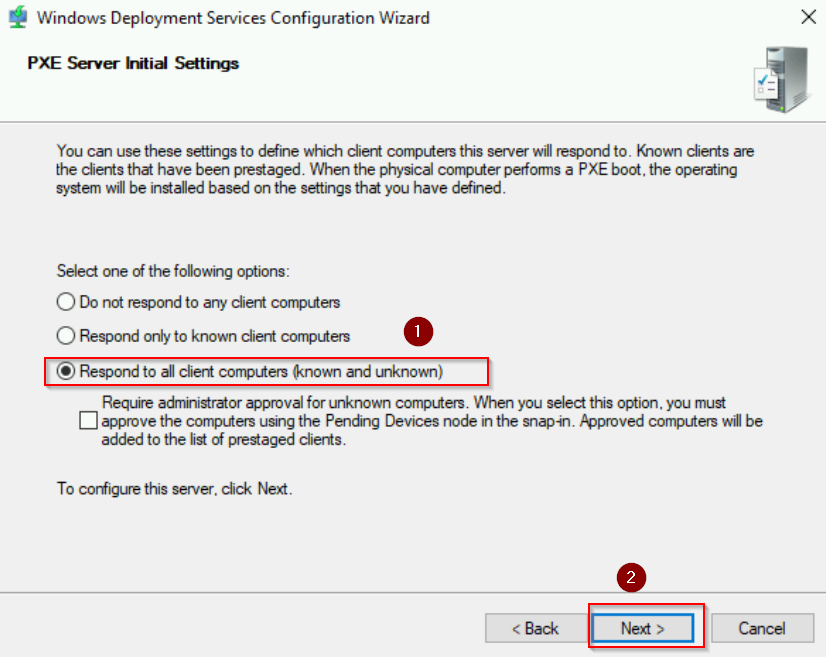
- In the “PXE Server Initial Settings” section, select “Respond to all client computers (know and unknown“. Click “Next“.
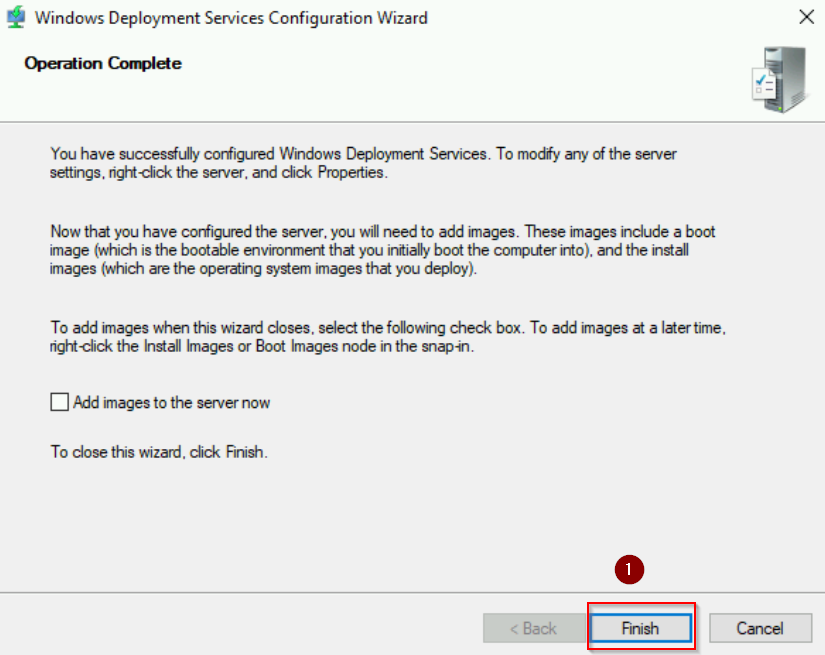
- When the Operation is complete, click “Finish“
Here are the screenshots:
Step 4: Adding a boot image
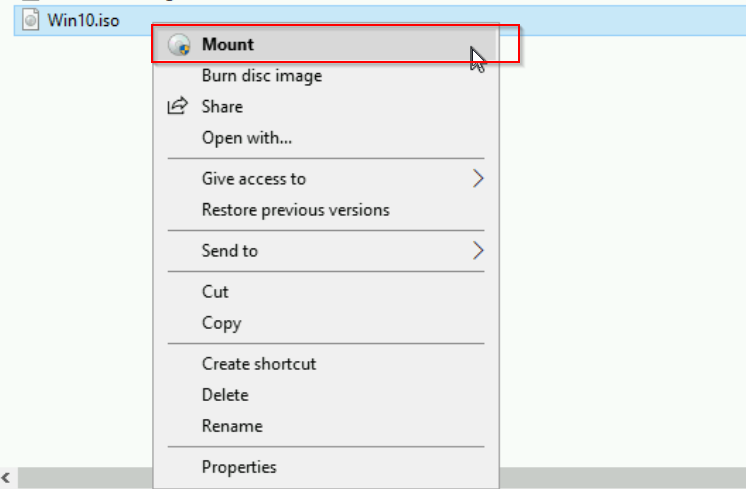
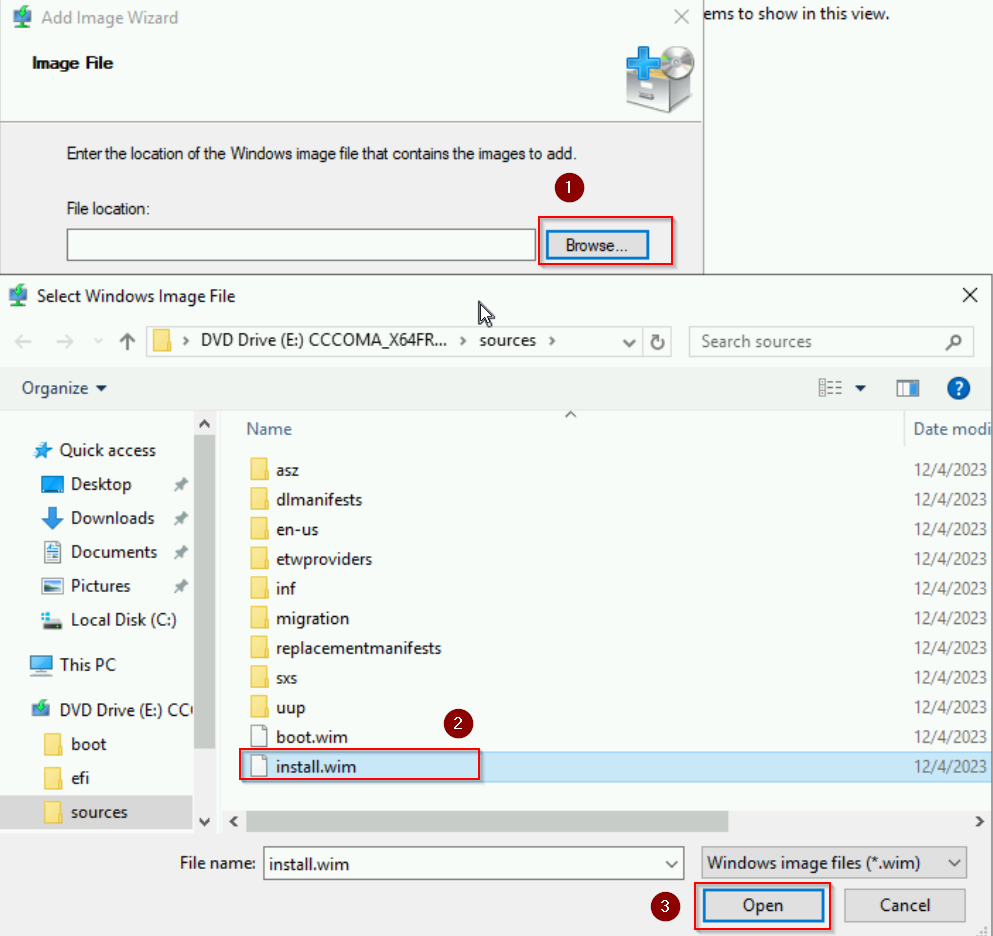
Now you are ready to add a boot image. In this example, we will use a Win10 iso image. First, you need to mount the image then you can add the install.wim file to Windows Deployment Services. See screenshots below:
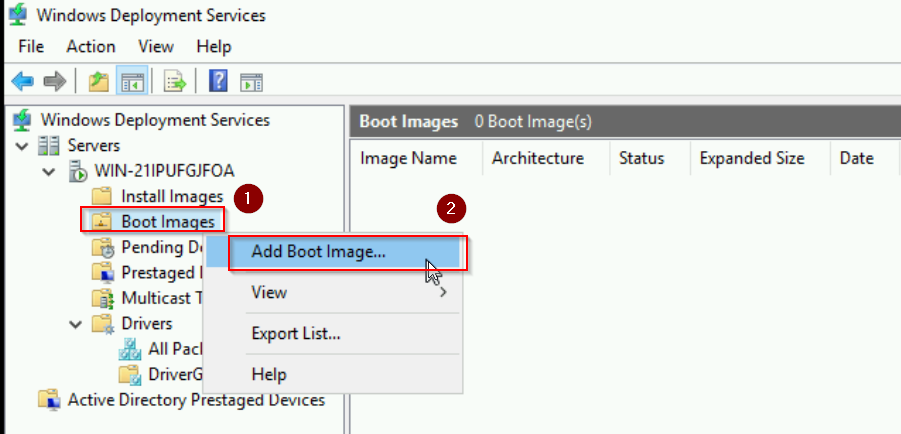
Second, go back to Windows Deployment Services windows, right click on Boot Images folder > Add Boot Image
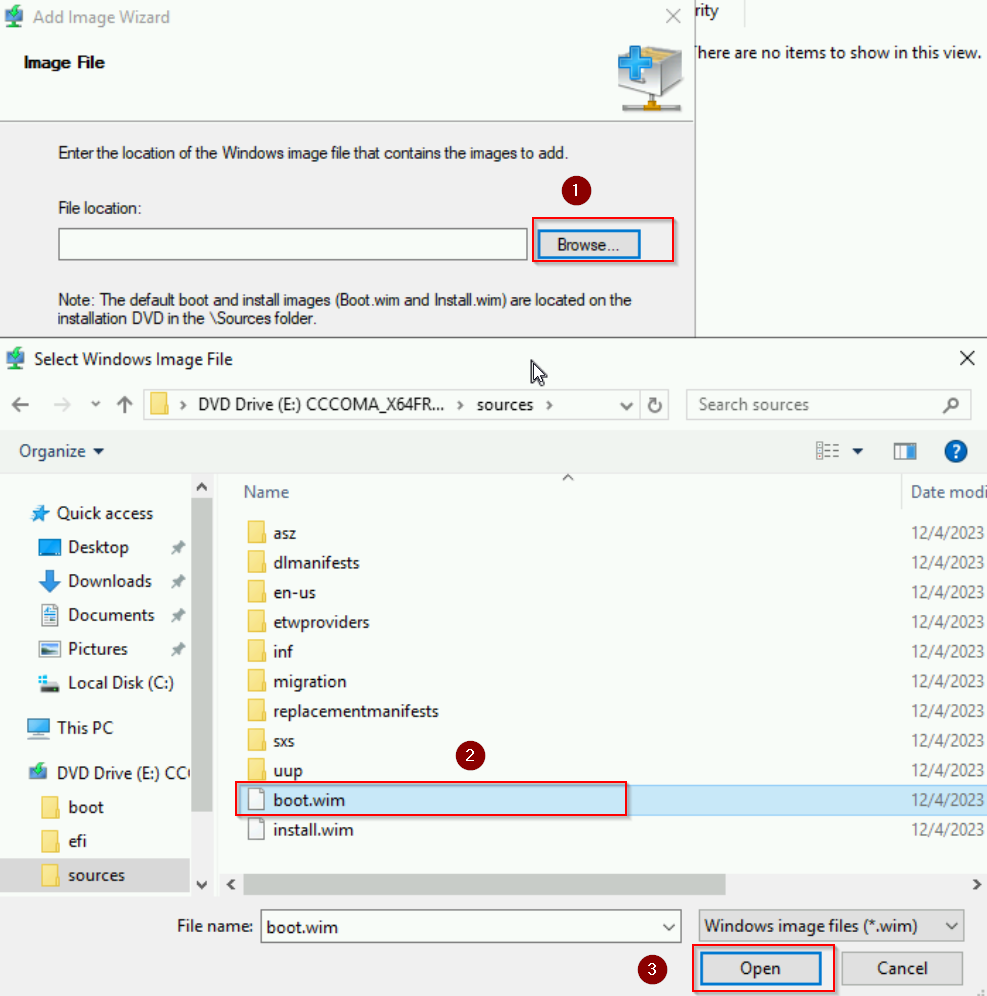
In the Add Image Wizard, Choose the location where the boot.wim file is located. Then click “Next“
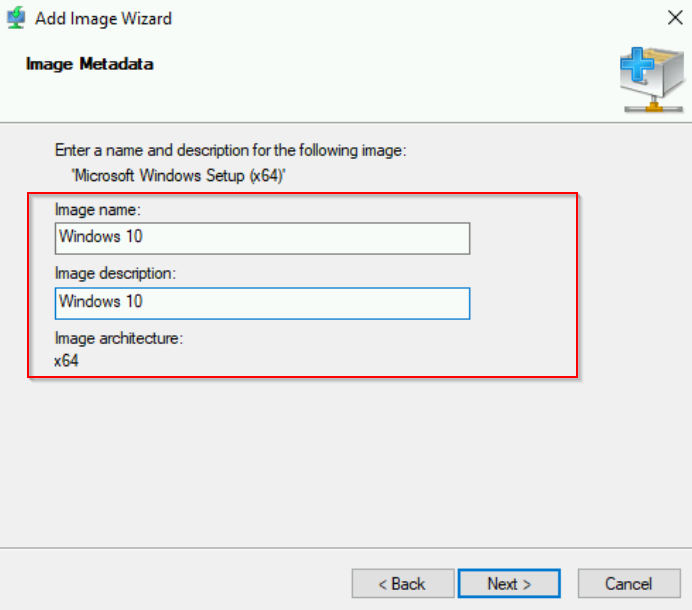
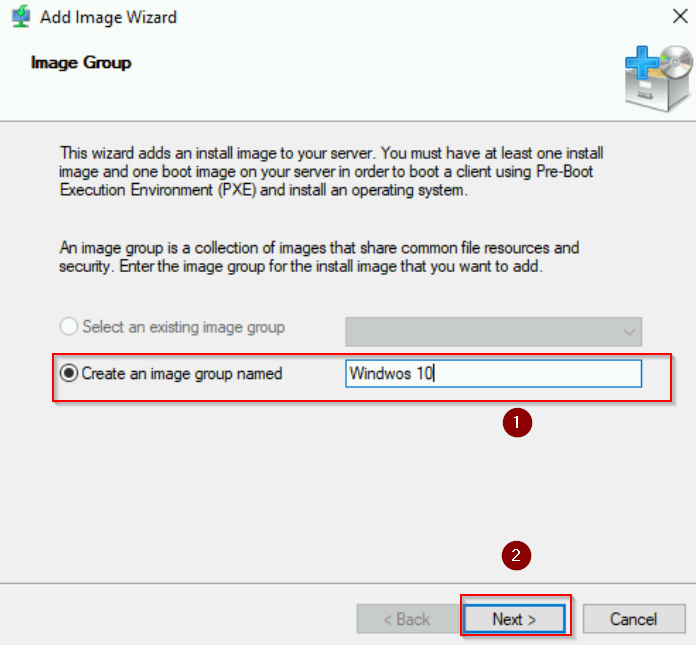
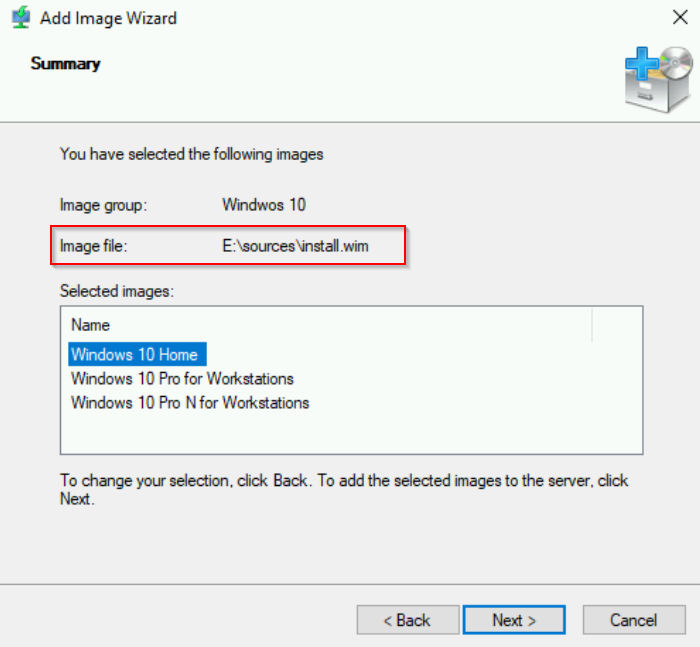
You can give a name for your Image. Here we will name it “Windows 10”. Click “Next” when finish. Under Summary page, review your Image and click “Next” to perform the adding process.
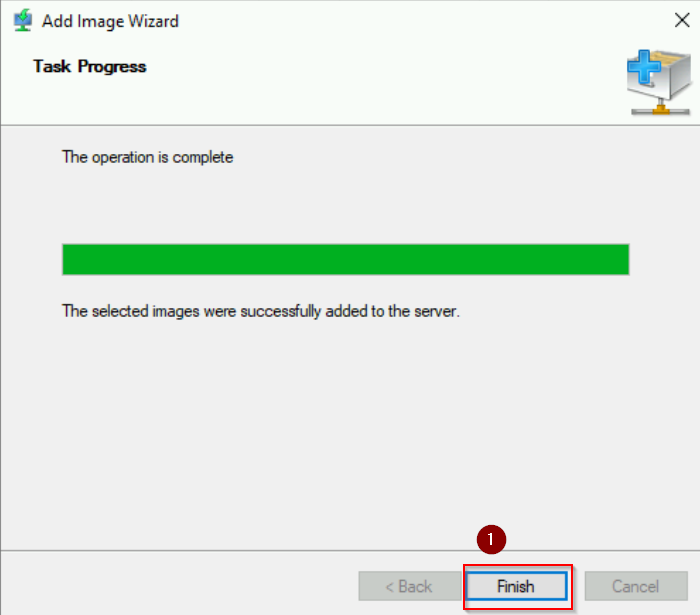
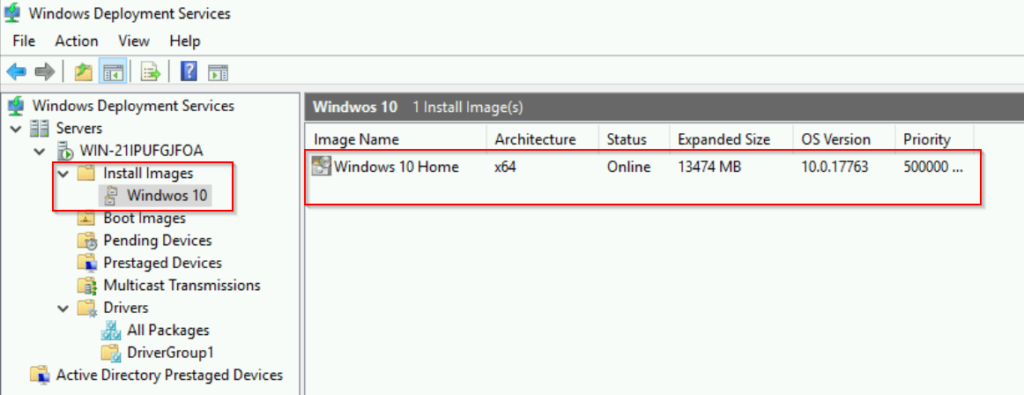
After the operation complete, you will see the Windows 10 boot image appear under Boot Image folder.

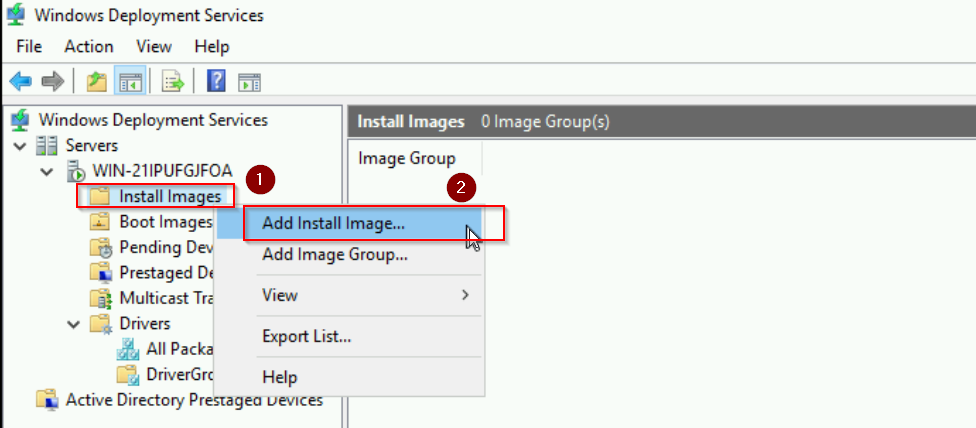
Now we repeat the same process for the Install Images. Note that we will choose install.wim this time. Below are the screenshots:

Step 5: PXE Boot
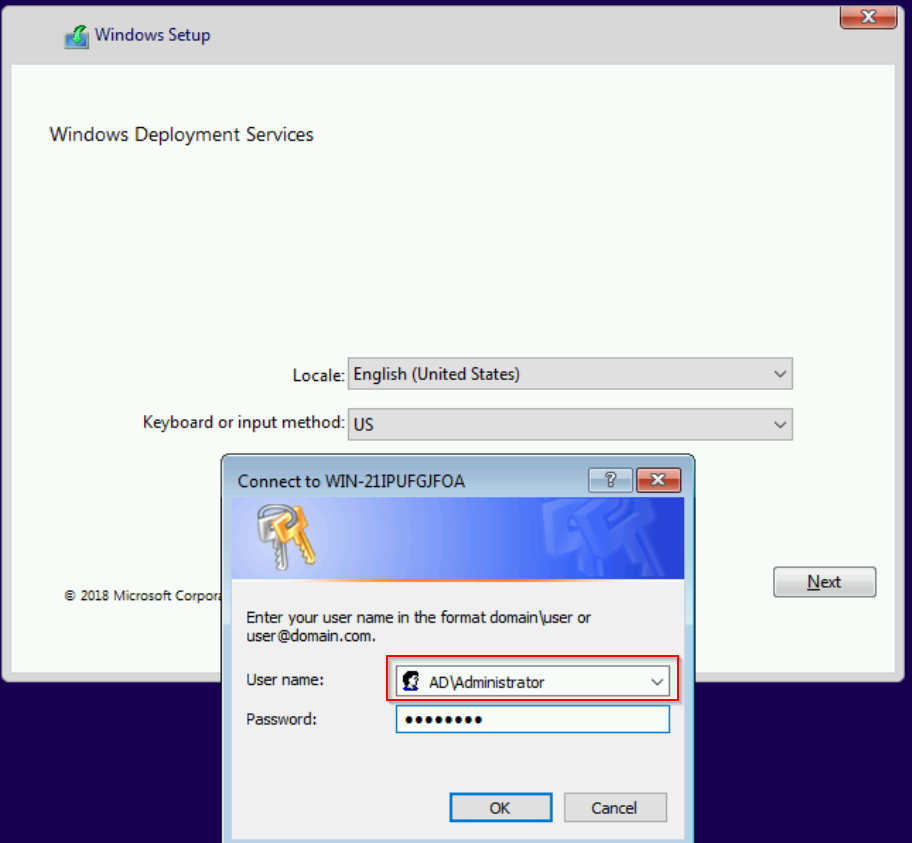
Now, we will try to PXE boot the PC-1 virtual machine. Start the VM and press Enter for network boot service:


When you reach to the Windows Setup- Windows Deployment Services window, it means you have successfully PXE boot using WDS. The username in this example is “AD\Administrator“
Conclusion
To sum up, that is how you deploy Windows 10 over the network using Windows Deployment Services (WDS). Note that if you were using WDS to deploy Windows, be aware that it no longer fully supports Windows 11 and future versions. Consider exploring alternative deployment solutions like Microsoft Endpoint Configuration Manager or Microsoft Deployment Toolkit (MDT).