Introduction
Microsoft Deployment Toolkit (MDT) is a comprehensive deployment solution that allows you to customize and automate the deployment of Windows operating systems, applications, and drivers. In this lab we will learn how to deploy Windows 11 using MDT. We will also go over task sequences and managing deployment shares.
In addition, we also use WDS (Windows Deployment Services). This server role in Windows Server primarily focuses on network-based deployments using the Preboot Execution Environment (PXE). WDS enables you to perform network-based installations of Windows, and it’s often used in conjunction with MDT for a complete deployment solution.
Step 1: Download and Install Requirements
You need to download and install three things before setting up MDT environment:
- Windows ADK for Windows 11, version 22H2. Download link here
- Microsoft Deployment Toolkit. Download link here
- Windows PE add-on for ADK. Download link here. Note that because MDT require 32-bit so we must install the Windows PE version that support it which is the “Windows PE add-on for the ADK version 2004”
Step 2: Install and Configure Windows Deployment Services
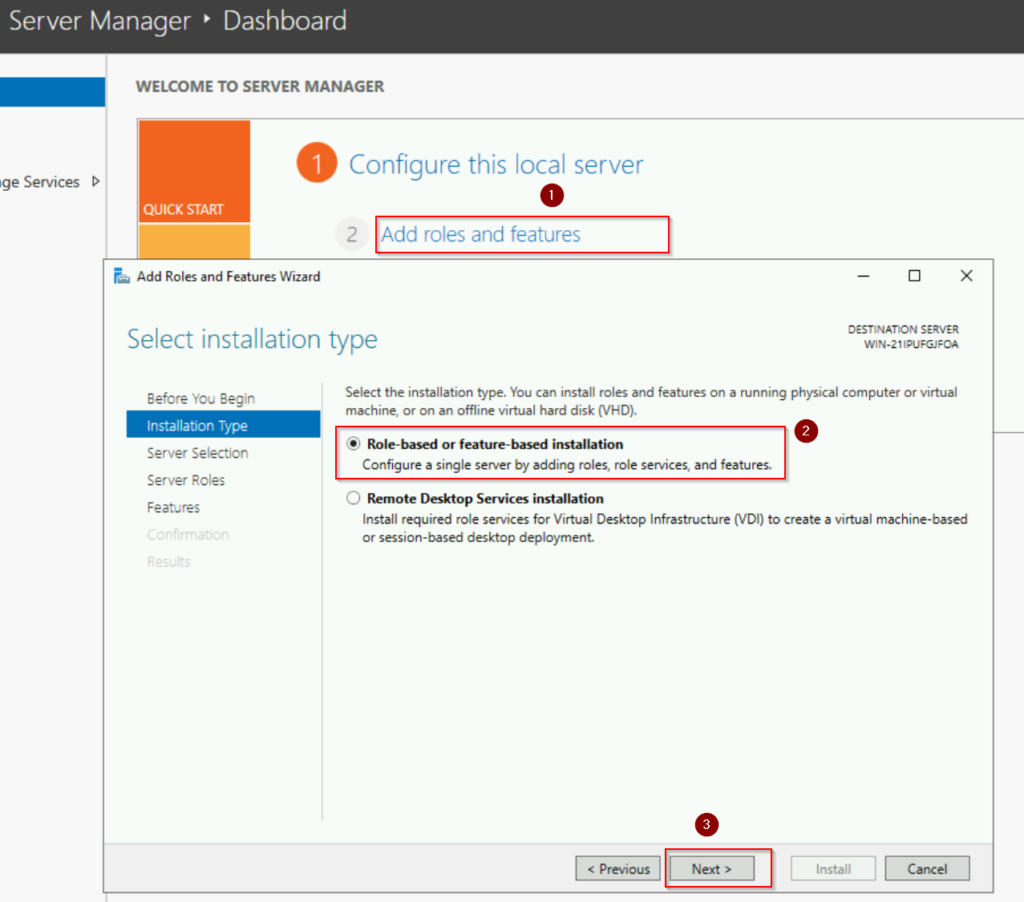
- Open Server Manager.
- Click on “Add roles and features” in the right pane.
- Select “Role-based or feature-based installation” and click “Next.”
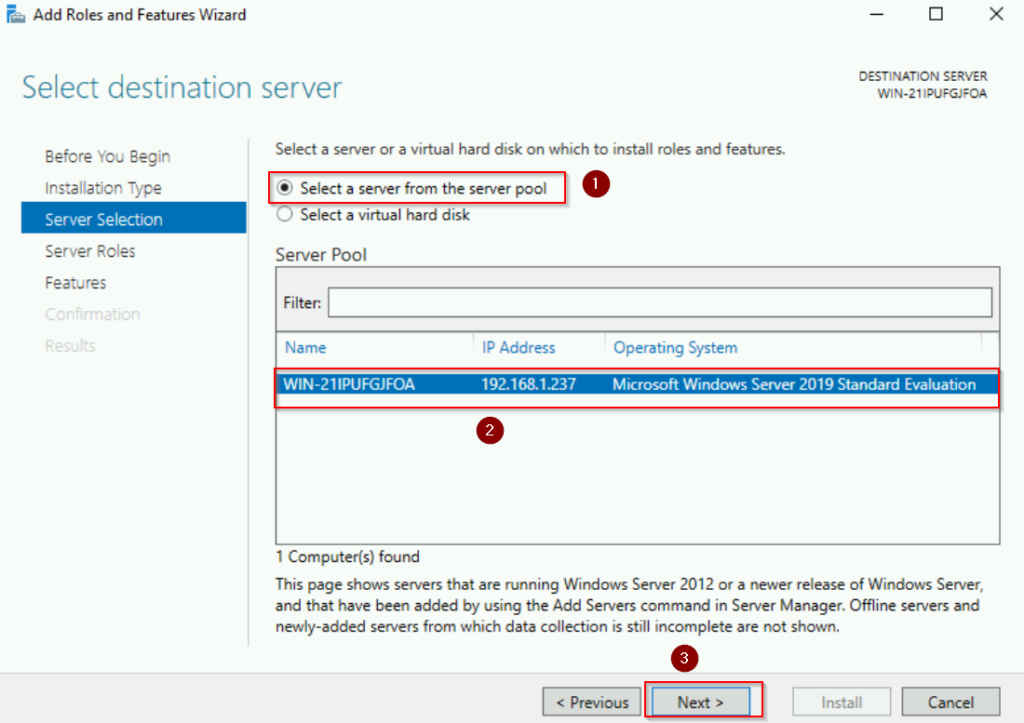
- Choose the server where you want to install WDS and click “Next.”
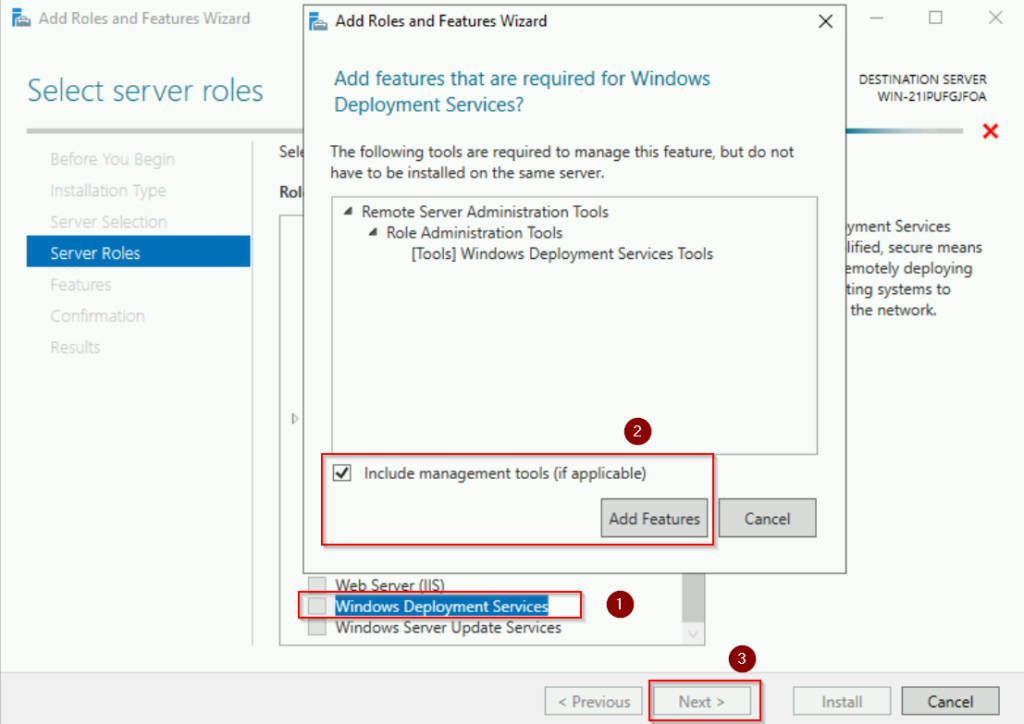
- Expand “Server Roles,” scroll down, and check the box next to “Windows Deployment Services.”
- Click “Next” and then “Add Features” if additional features are required. Click “Next” again.
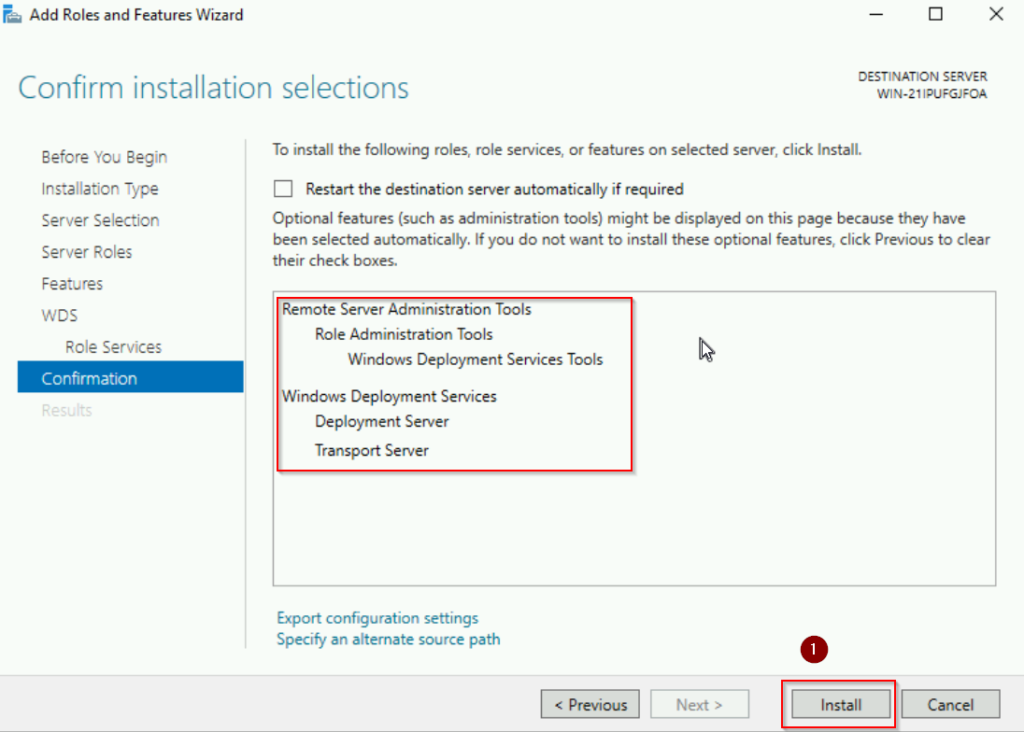
- Review the selections and confirm by clicking “Install.”
Below are screenshots of those steps above:
After the installation, we start to configure WDS:
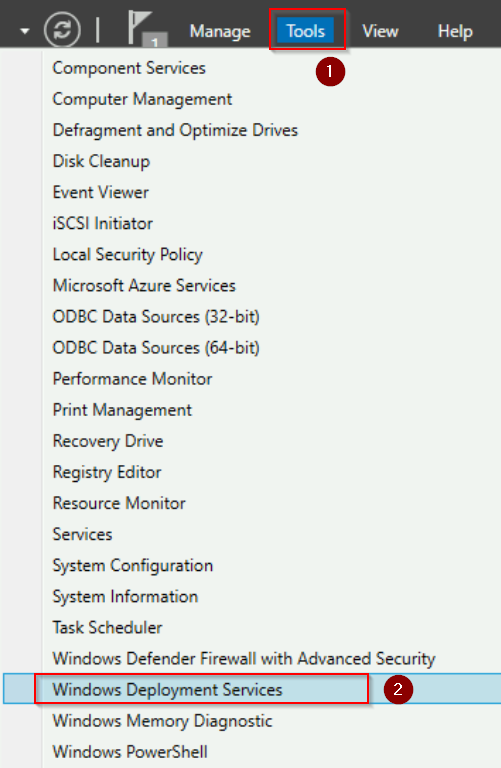
- Go to Server Manager, click on “Tools” and then “Windows Deployment Services.”
- In the WDS snap-in, right-click on “Server Name” (your server name) and select “Configure Server.”
See screenshots below
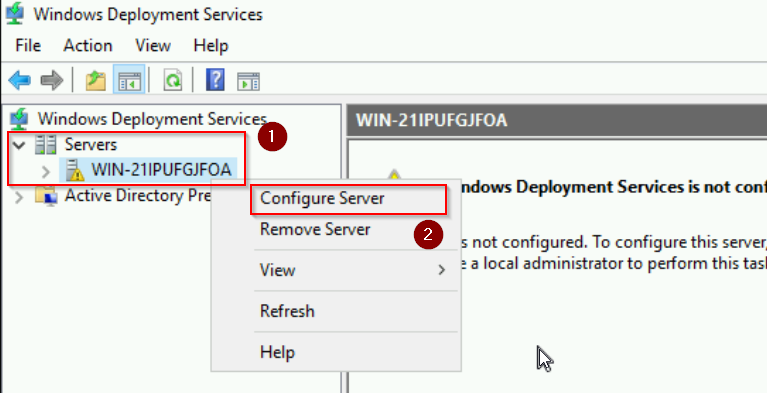
- In the “Windows Deployment Services Configuration Wizard,” choose “Standalone server“. The reason we choose this option is because this server we are working on in this lab is not a member of an Active Directory Domain Services (AD DS) domain. Click “Next.”
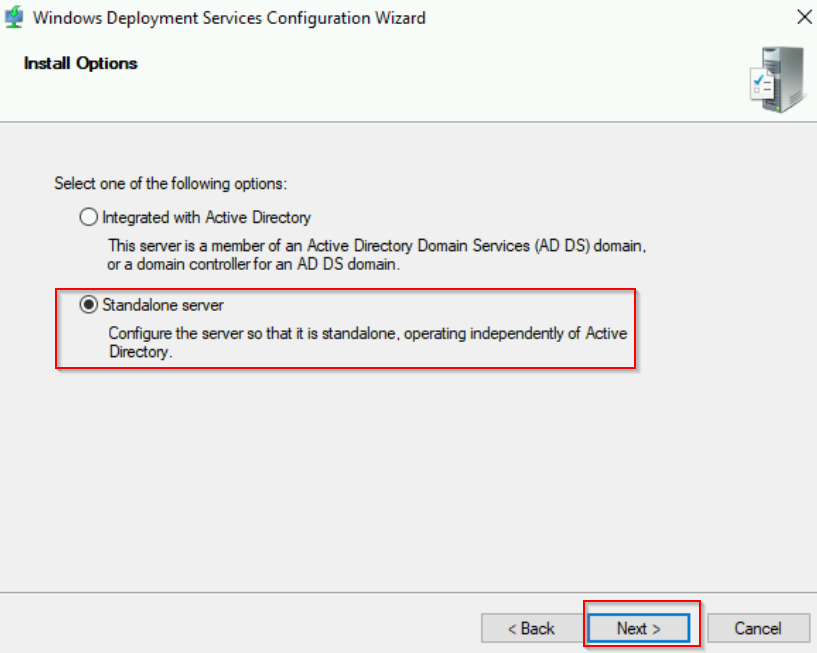
- Next, we select the path for the remote installation folder to store boot images. We will use default location in this case. Then click “Next” and on the warning message pop up, click “”Yes“.
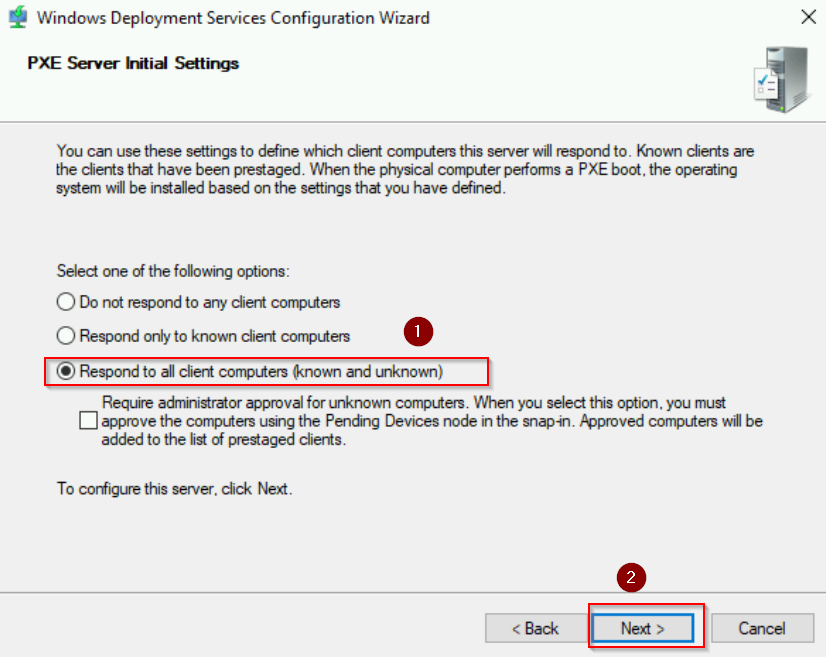
- In the “PXE Server Initial Settings” section, select “Respond to all client computers (know and unknown“. Click “Next“.
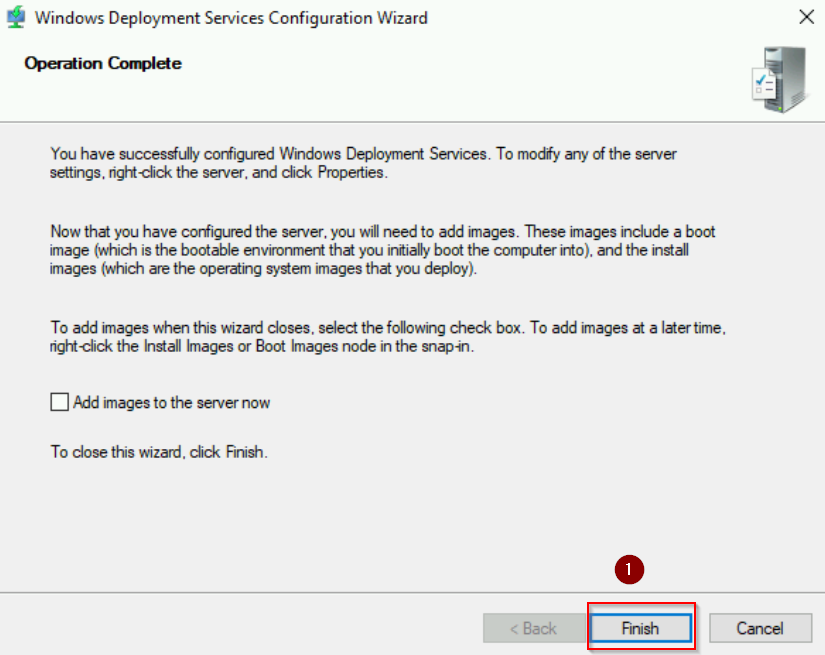
- When the Operation is complete, click “Finish“
See screenshots below:
After configuring WDS, we should add an Image to the server. However, we will do it later. The reason is we want to create an image from MDT. Therefore, in the next steps we will configure Deployment Share for MDT.
Step 3: Configure MDT
First, go to Start and search for “Deployment Workbench“

Create a new Deployment Shares
- Right click on “Deployment Share“, then choose “New Deployment Share“
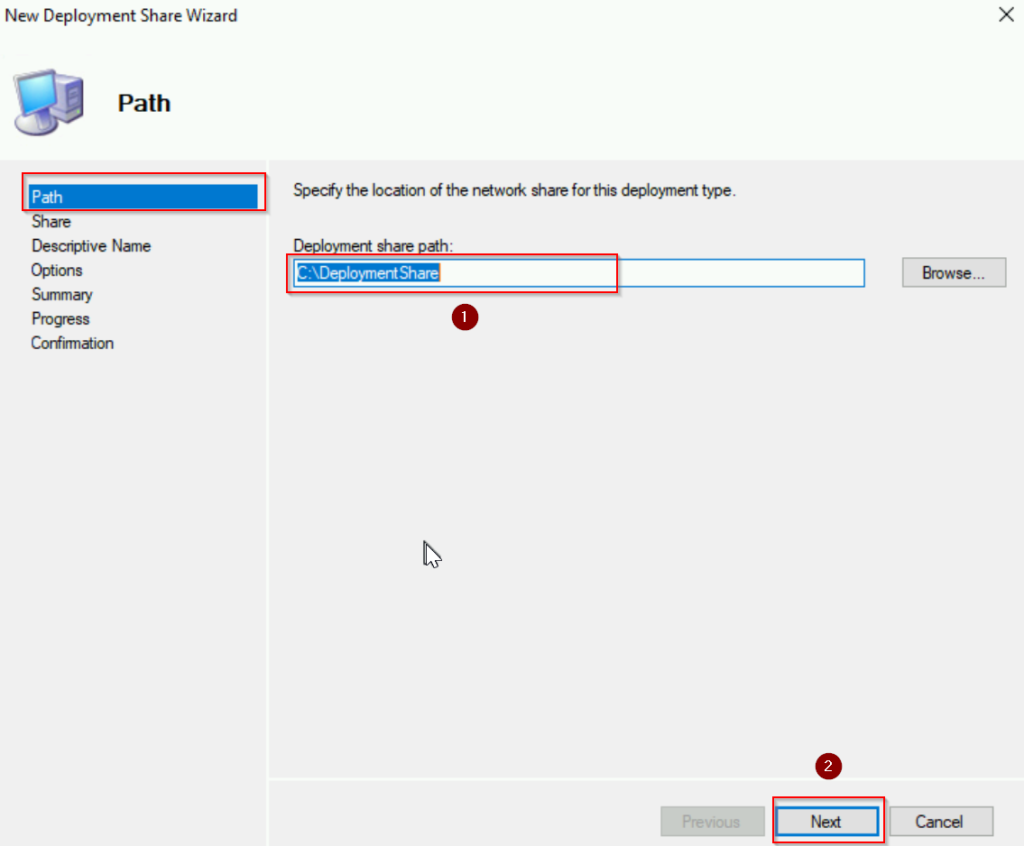
- Choose the path for Deployment Share folder. Click “Next“
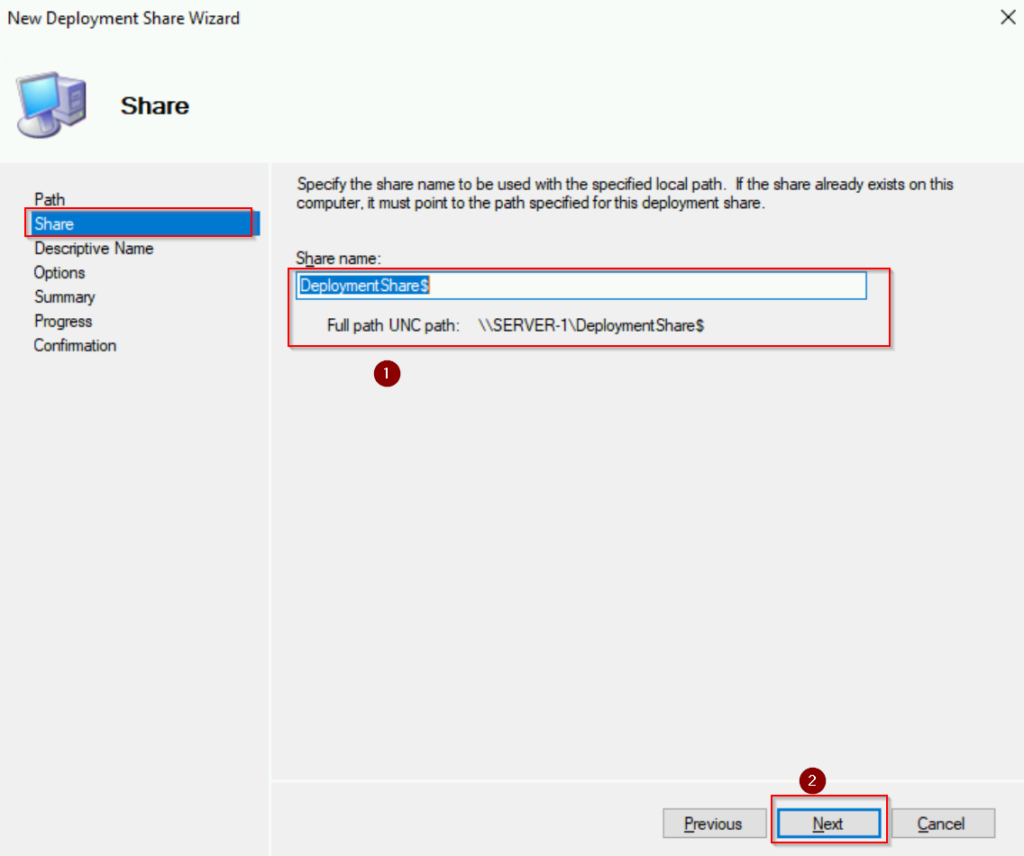
- Name your Share name. We leave default. Click “Next“
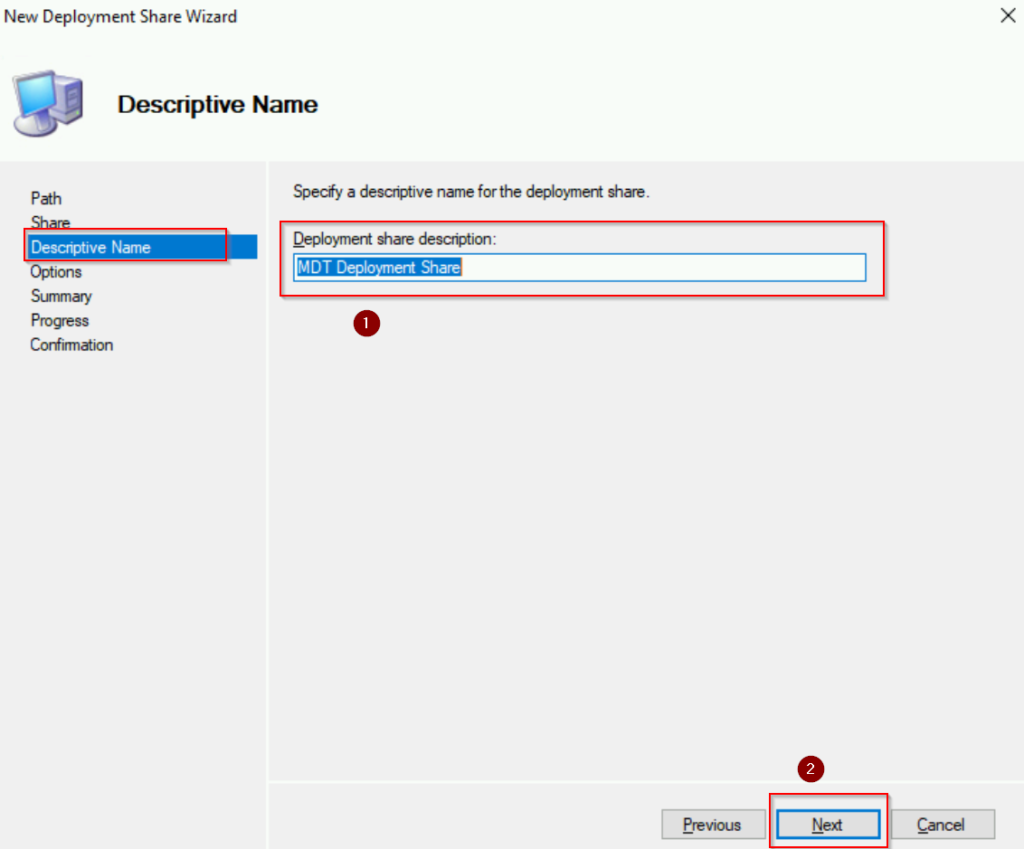
- Leave default for Deployment share description. Click “Next“
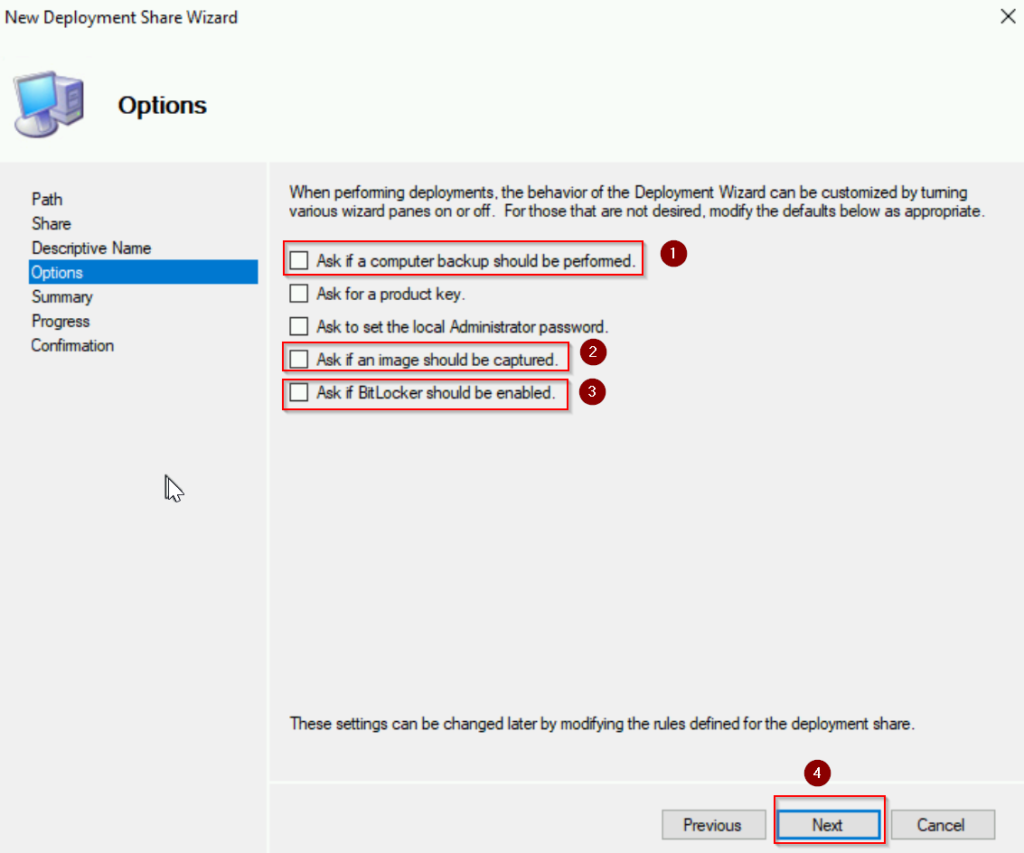
- Under Options section. For the purpose of demonstration, uncheck the following: “Ask if a computer backup should be performed” ; “Ask if an image should be captured”; “Ask if BitLocker should be enabled”. Click “Next“
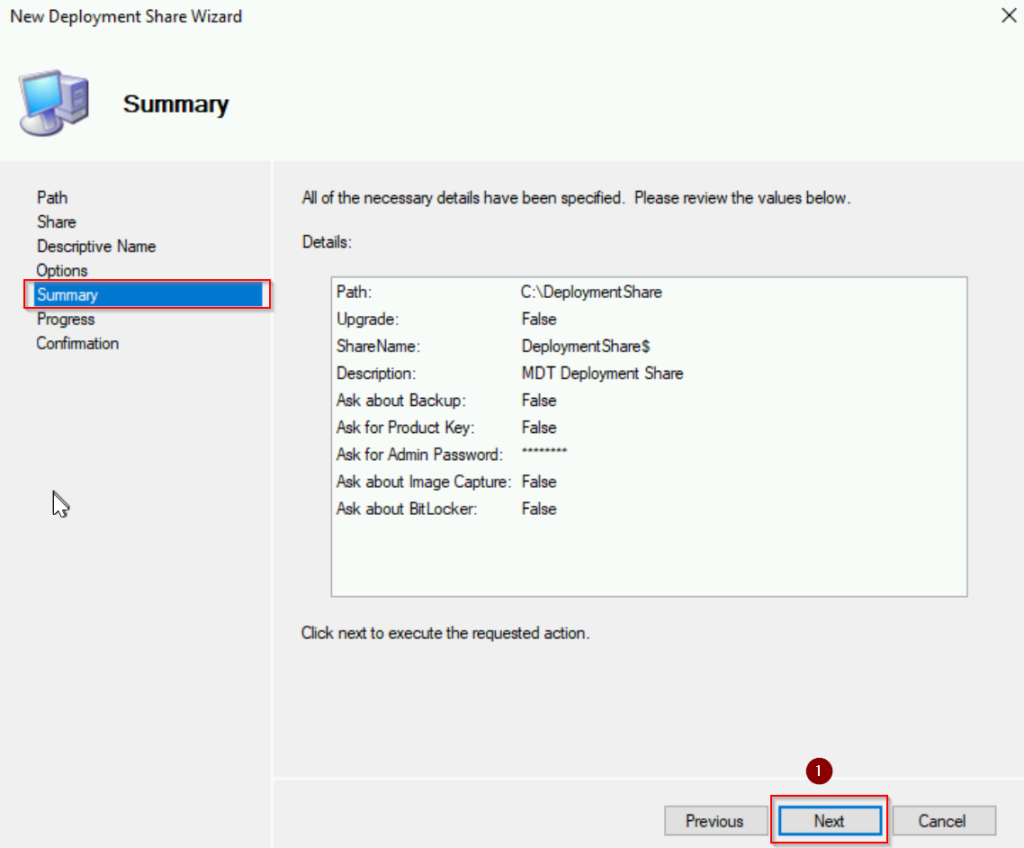
- Click “Next” under Summary section
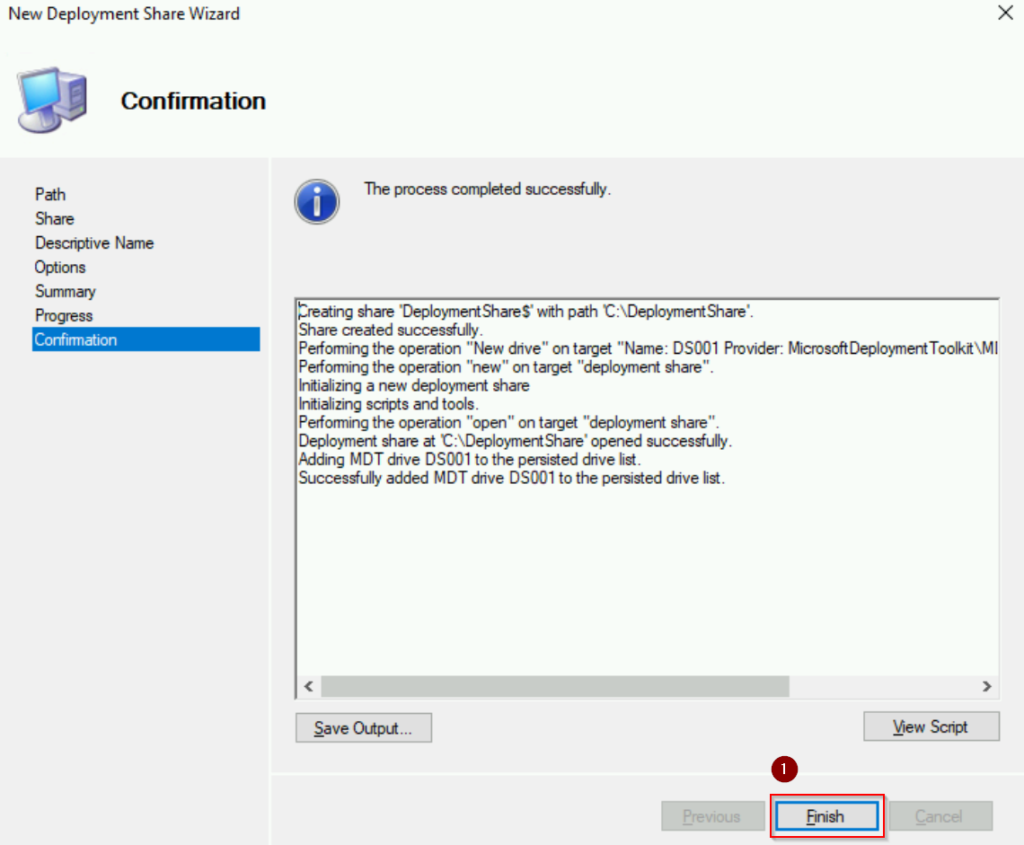
- Wait for the Deployment Share to run and click “Finish” when done
Below are screenshots:

Import Operating System
Here are the steps to import the Operating System:
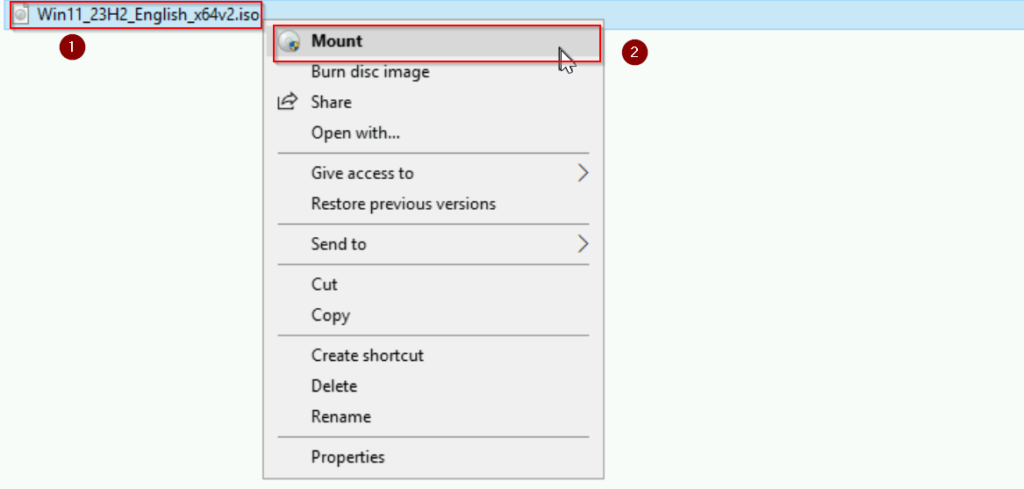
- Right click on your Windows ISO file and choose “Mount“
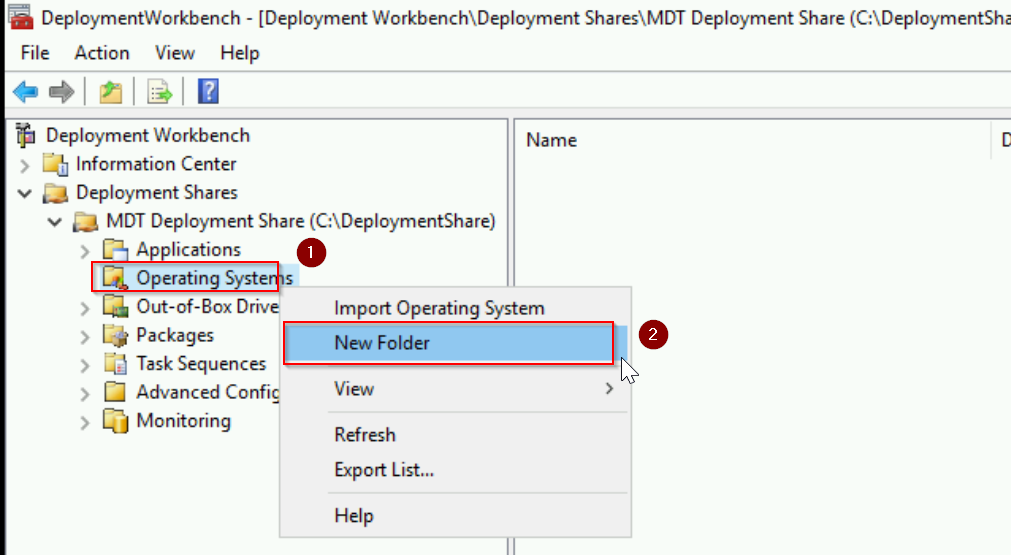
- Go back to Deployment workbench, Right click on “Operating System“, choose “New Folder“
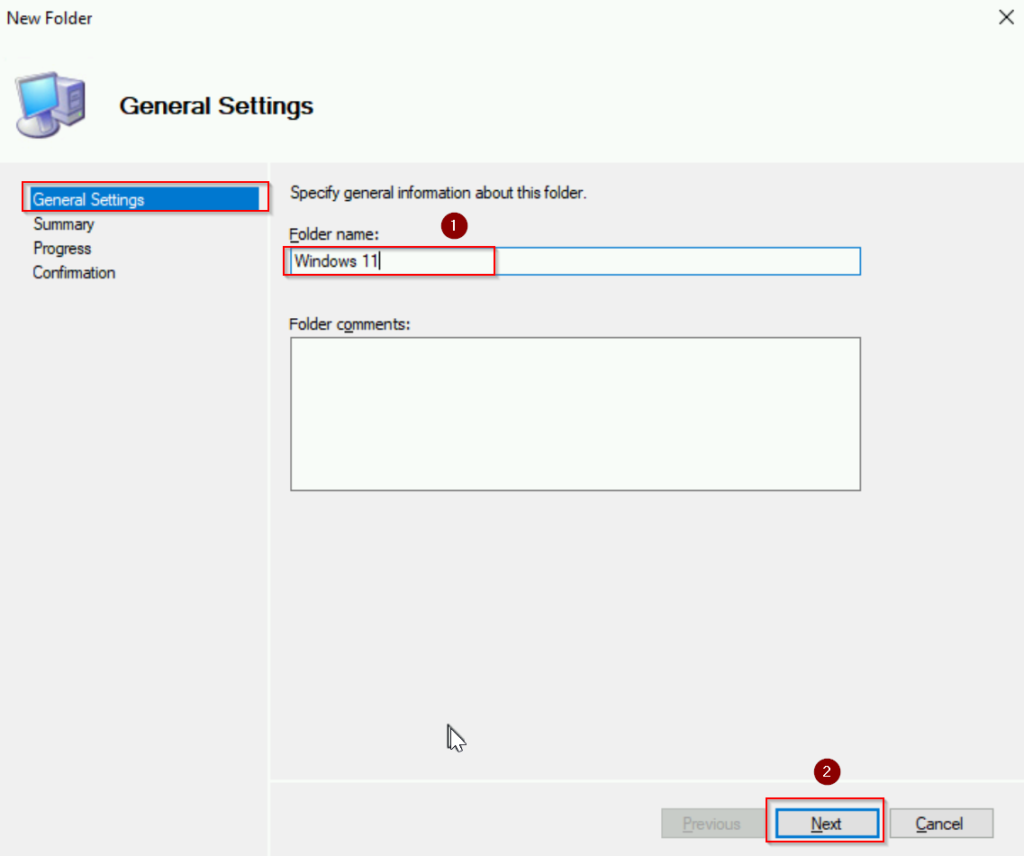
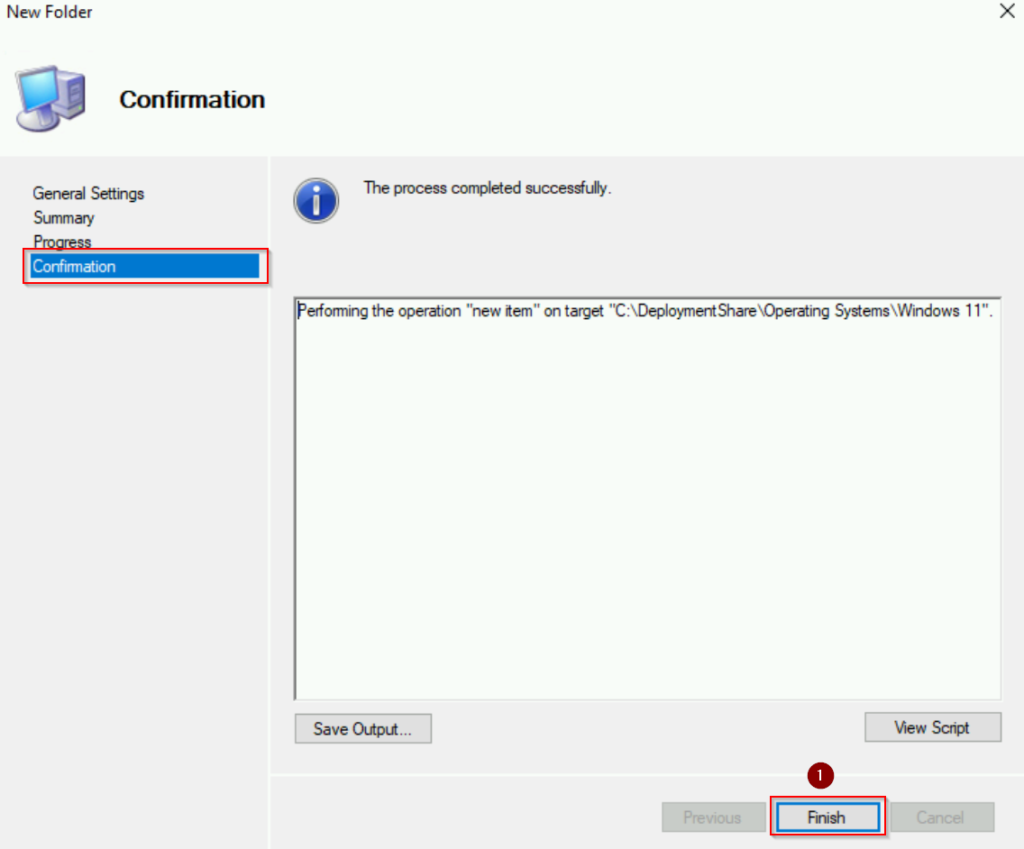
- Under General Setting, name the folder name “Windows 11“. Click “Next“
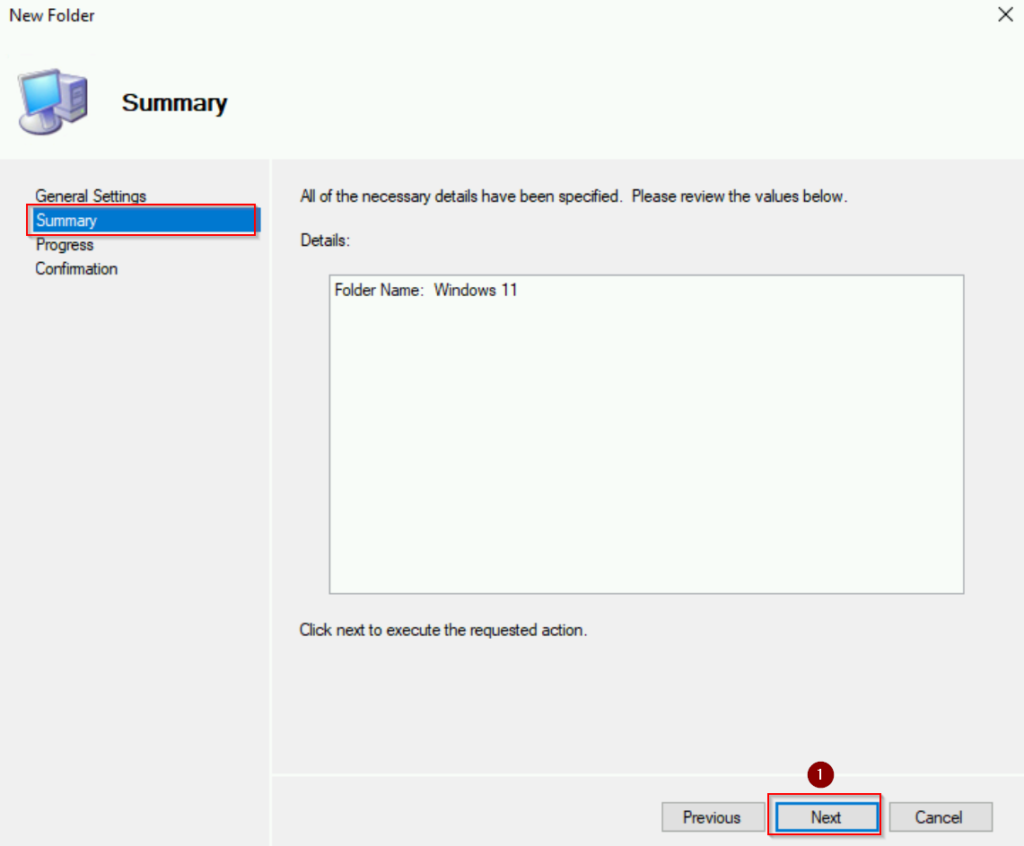
- Review the info under Summary section, click “Next“. When the progress is done, click “Finish“
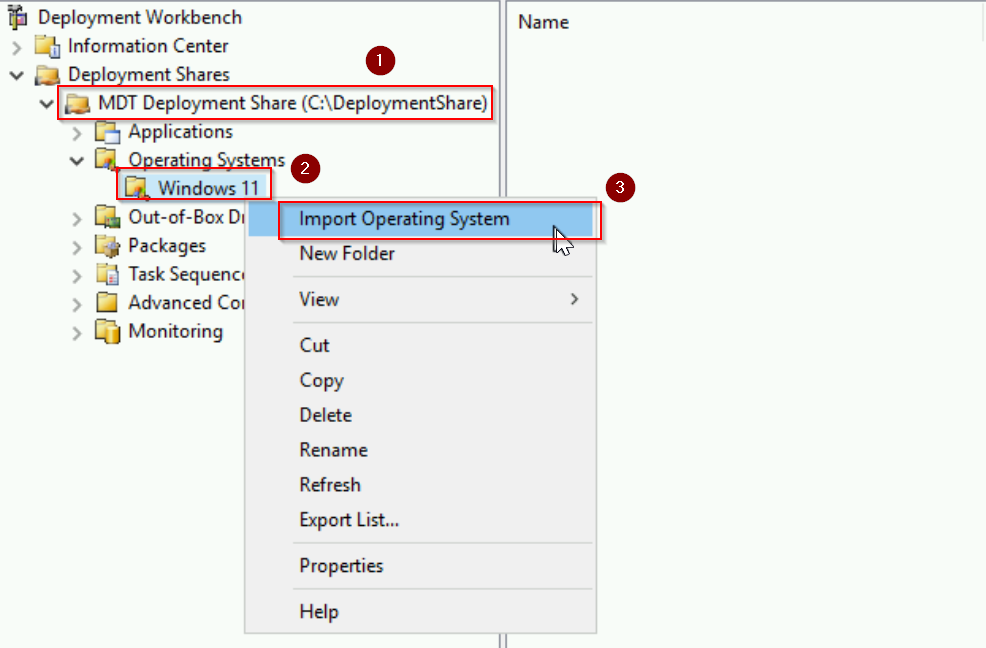
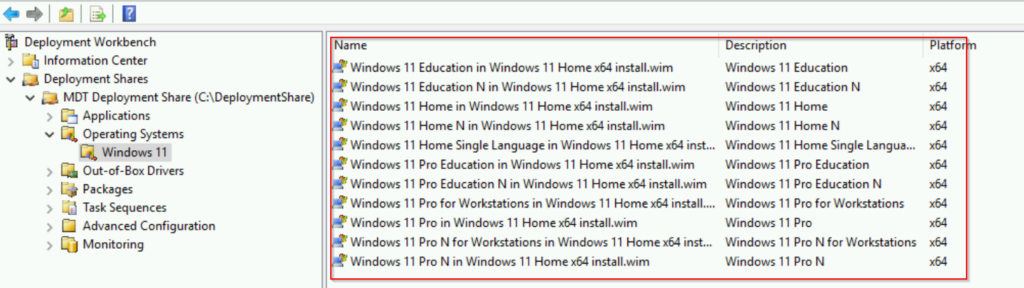
- Expand “MDT Deployment Share” > “Operating System” > “Windows 11“. Right click and choose “Import Operating System“
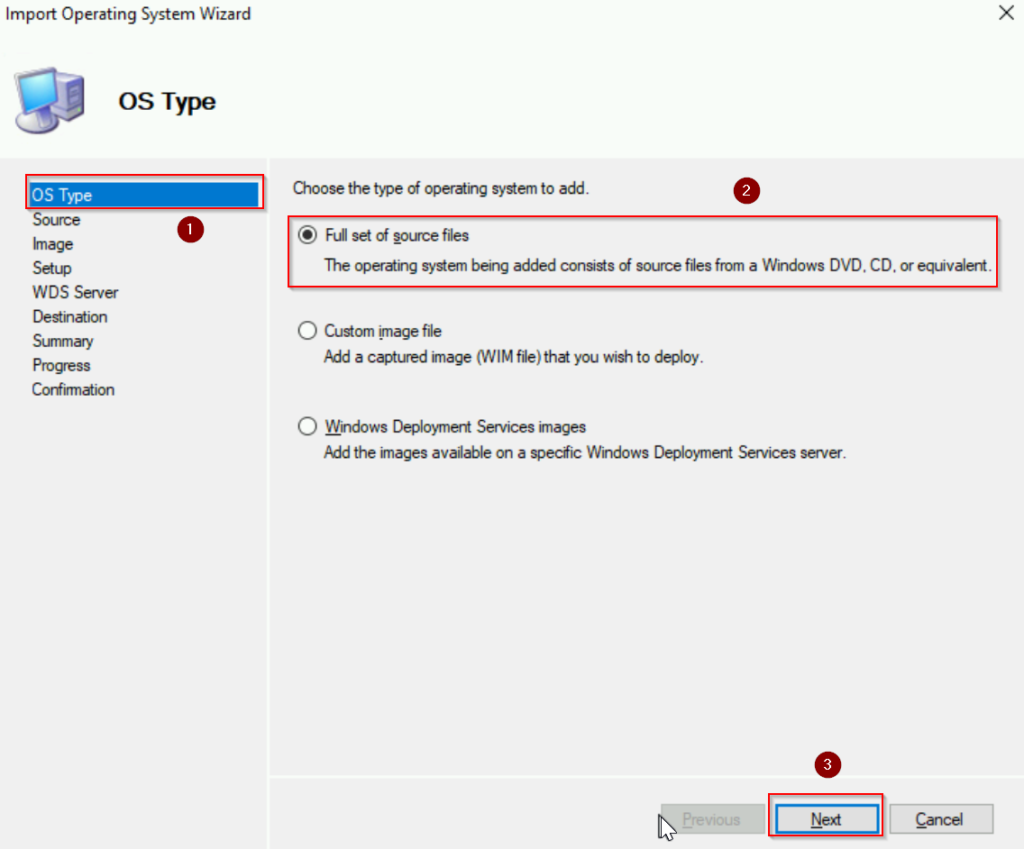
- Under OS Type section, we choose “Full set of source files” for this example. Click “Next“
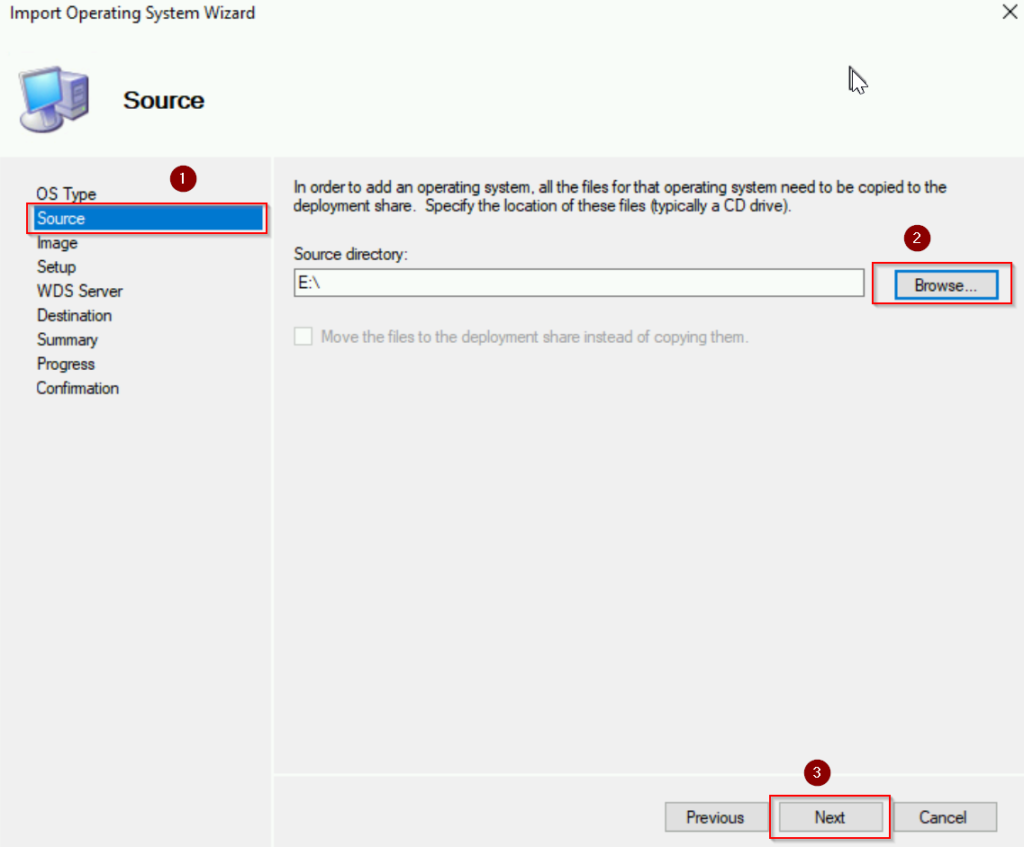
- Under Source, click “Browse“, select the drive letter that we mounted earlier. Click “Next“
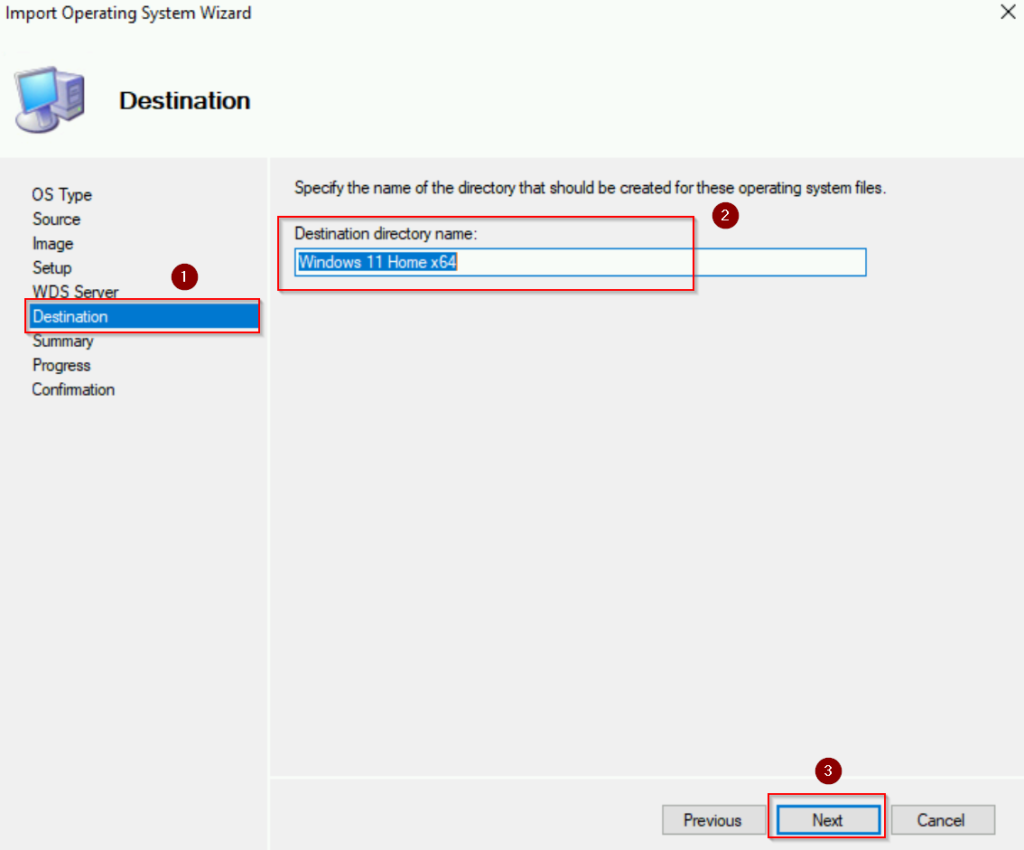
- Under Destination, we leave it by default. Click “Next“
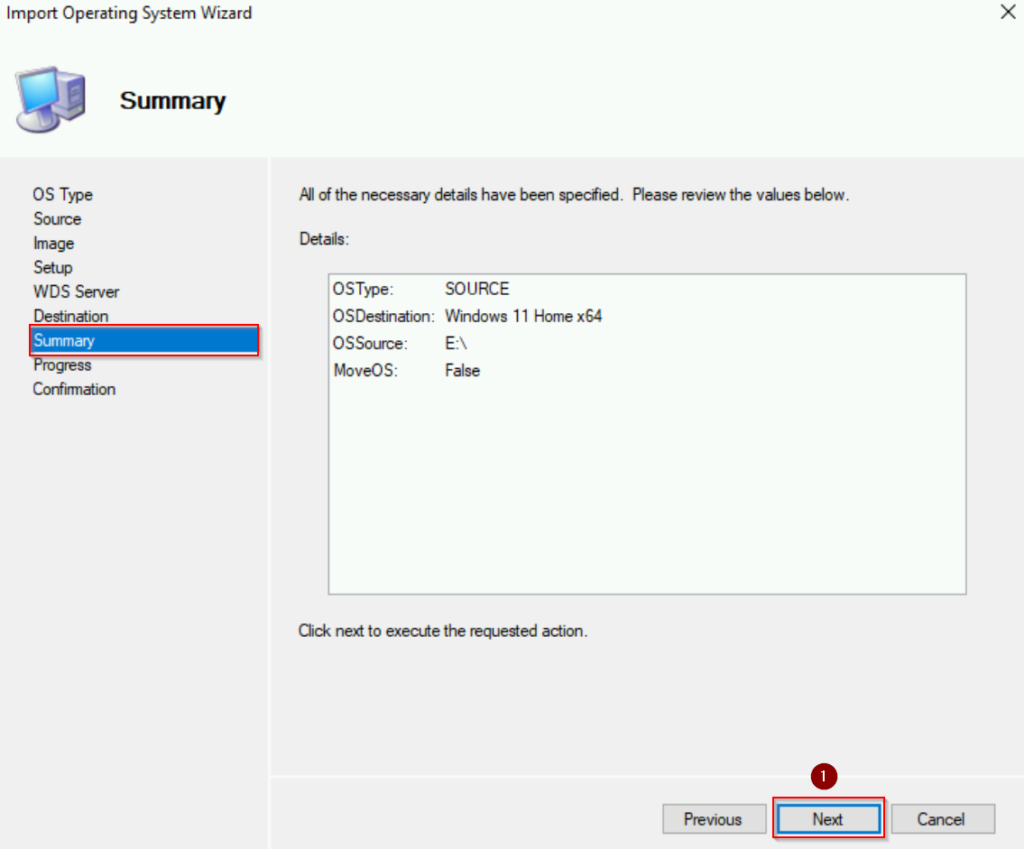
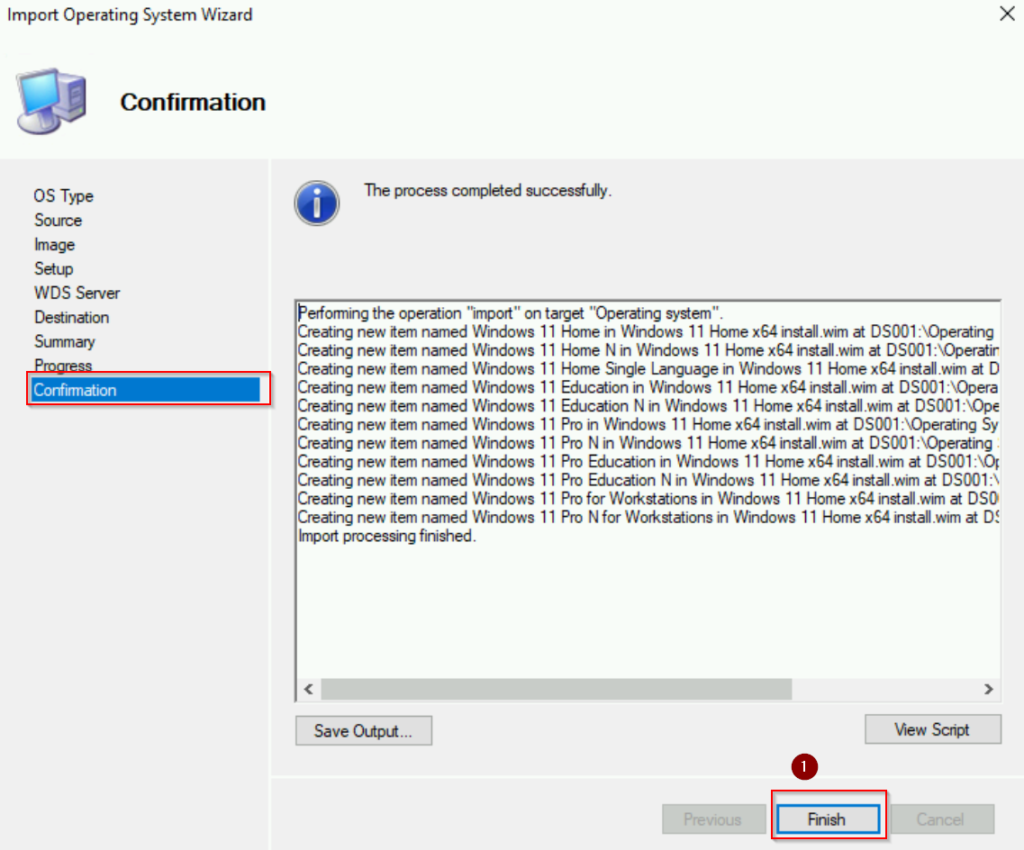
- Click “Next” under Summary section. When the process is done, click “Finish“
- After finish, we can see many Windows 11 versions appear in the Deployment Workbench
Screenshots below:
Import Applications (Optional)
You can also import applications before MDT. This is not required so feel free to follow the steps below if you want. In this example we will add 7zip application to the Deployment Share:
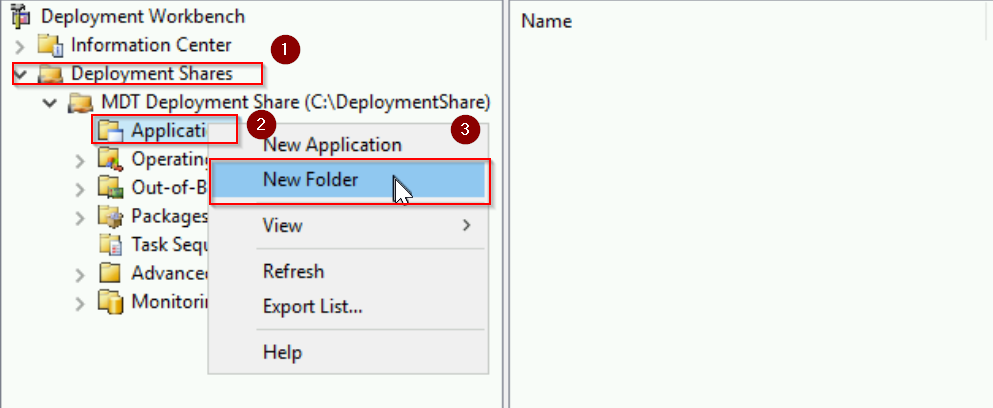
- Under MDT Deployment Share, right click on “Application” and choose “New Folder“
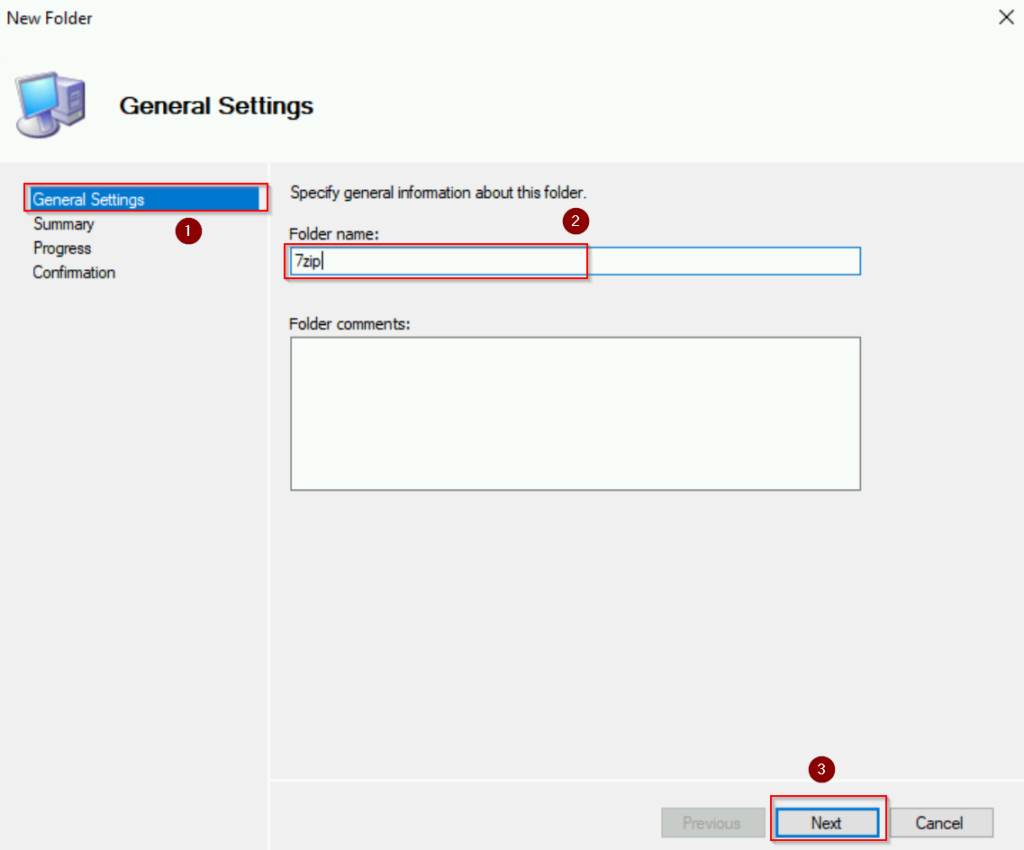
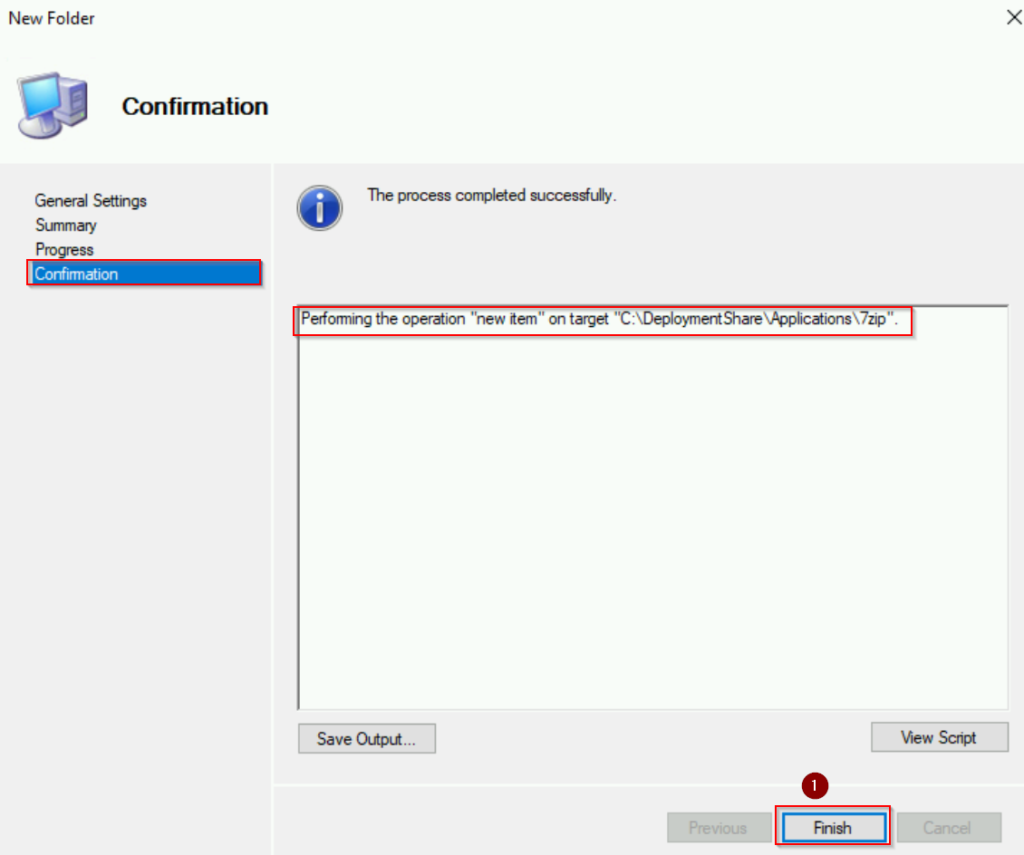
- Under General Settings, give the Folder a name, hit “Next“. Hit “Next” one more time and click “Finish” when done
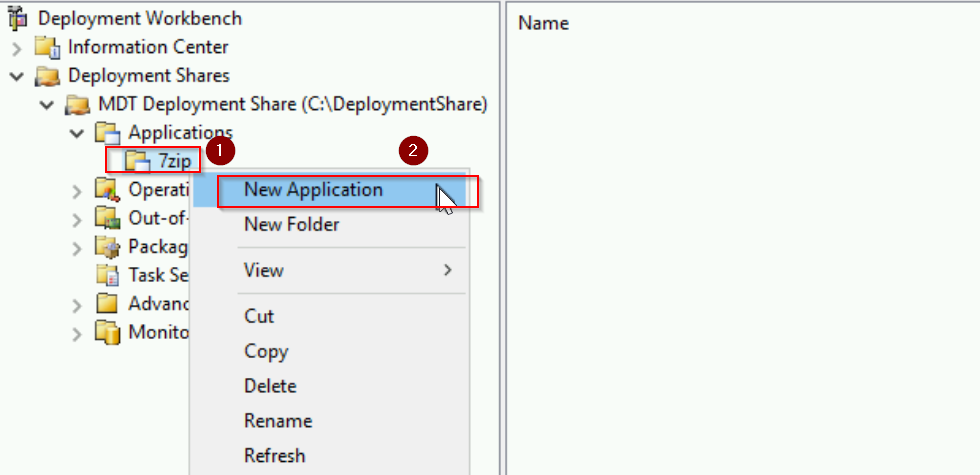
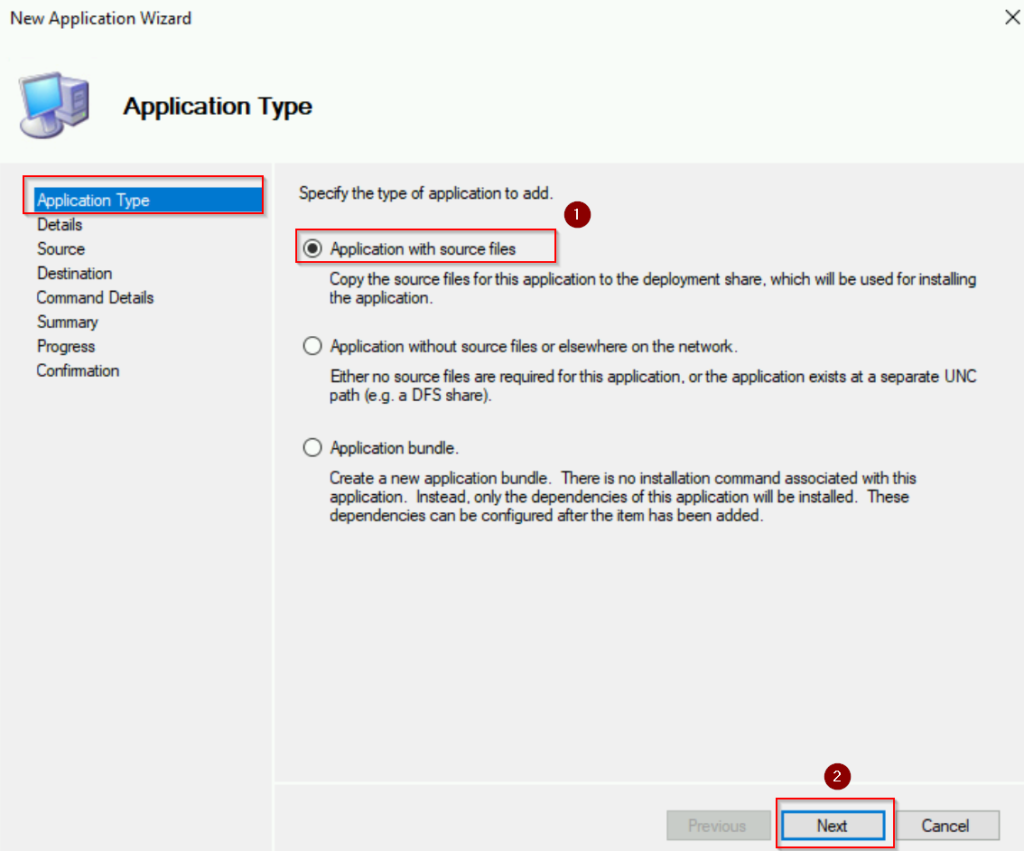
- Now right click on 7zip Folder and choose “New Application“
- Under Application Type, choose “Application with source file“, in this case we want to copy the source file to the deployment share for installing the application. Click “Next“
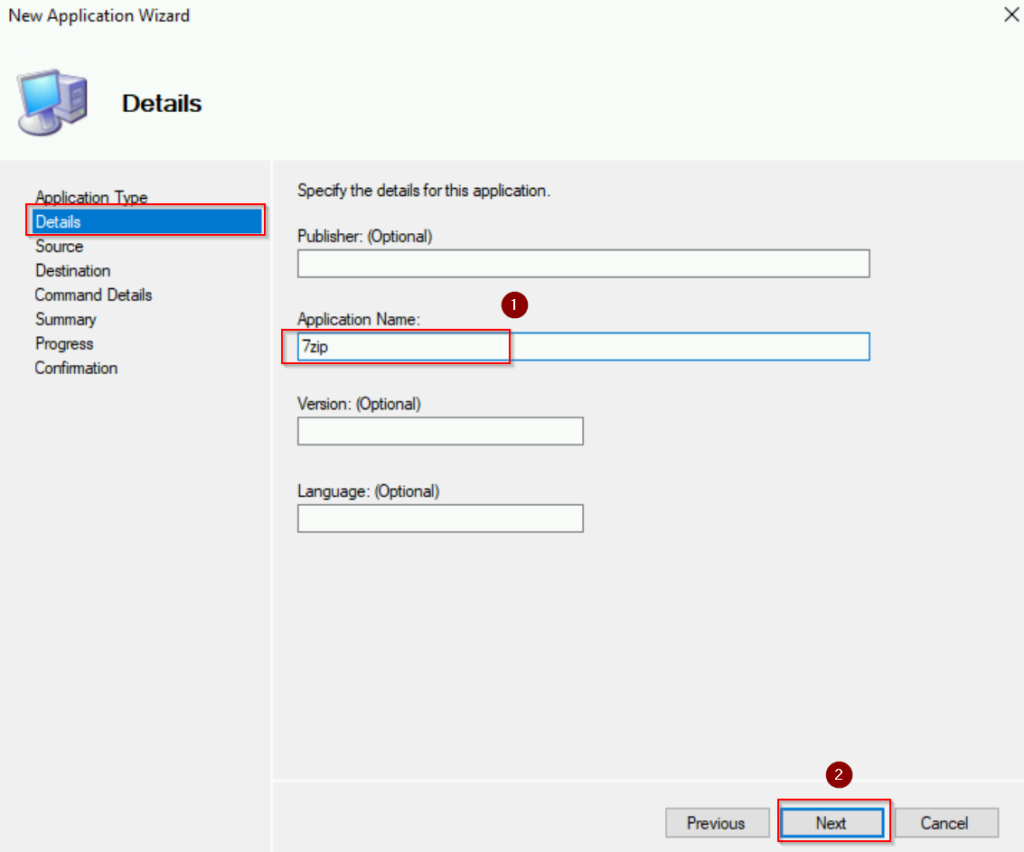
- Under Details, right now we give the application a name “7zip”, you can fill out the other information if you want. Click “Next“
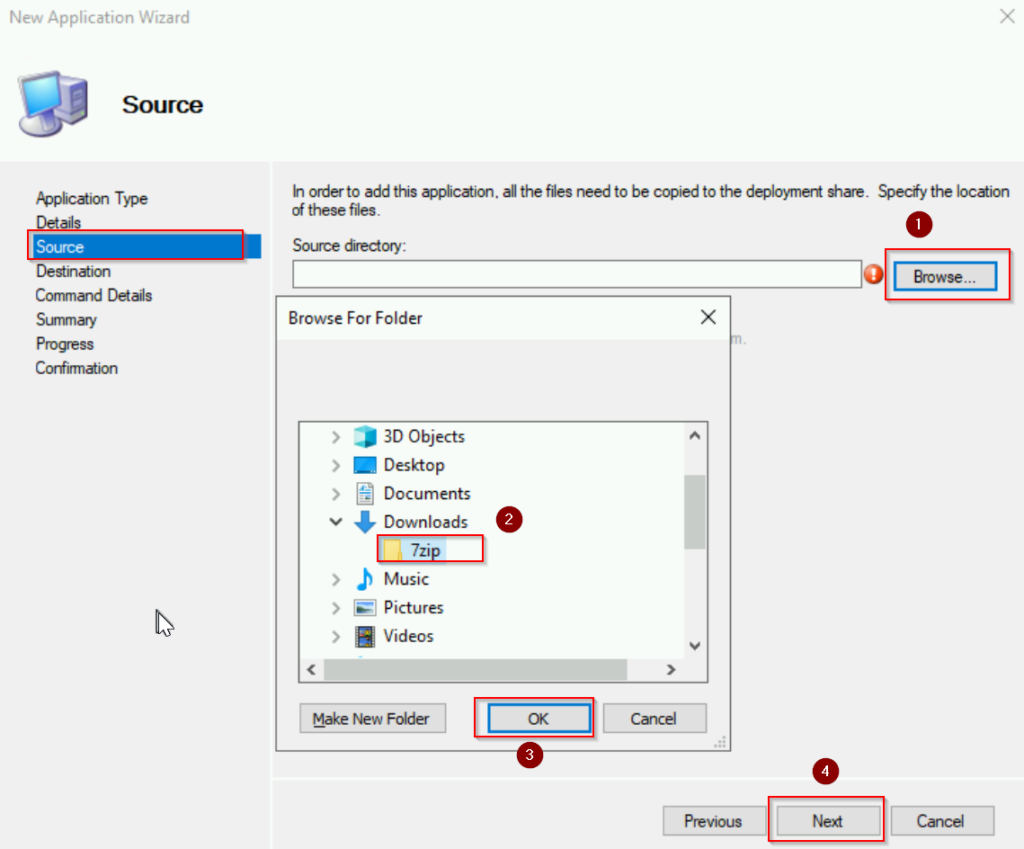
- Under Source, click on “Browse” and choose the folder which has the application in it. Click “OK” then click “Next“
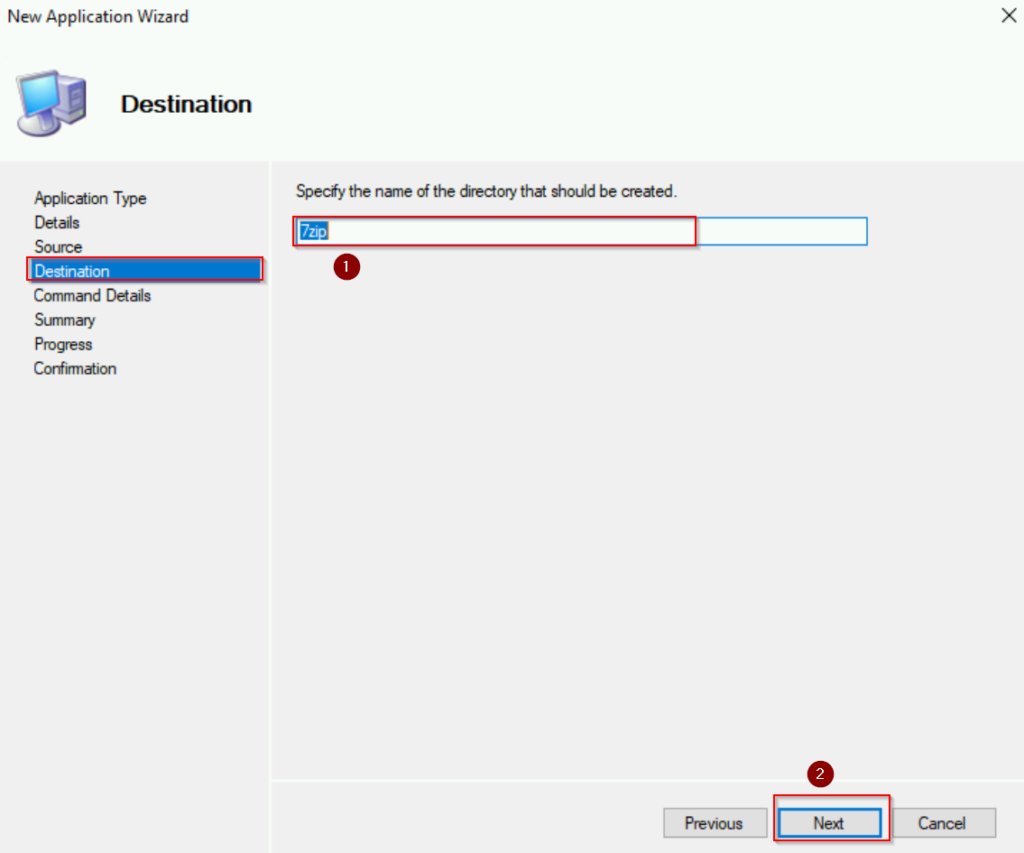
- Under Destination, leave it at default for now and click “Next“
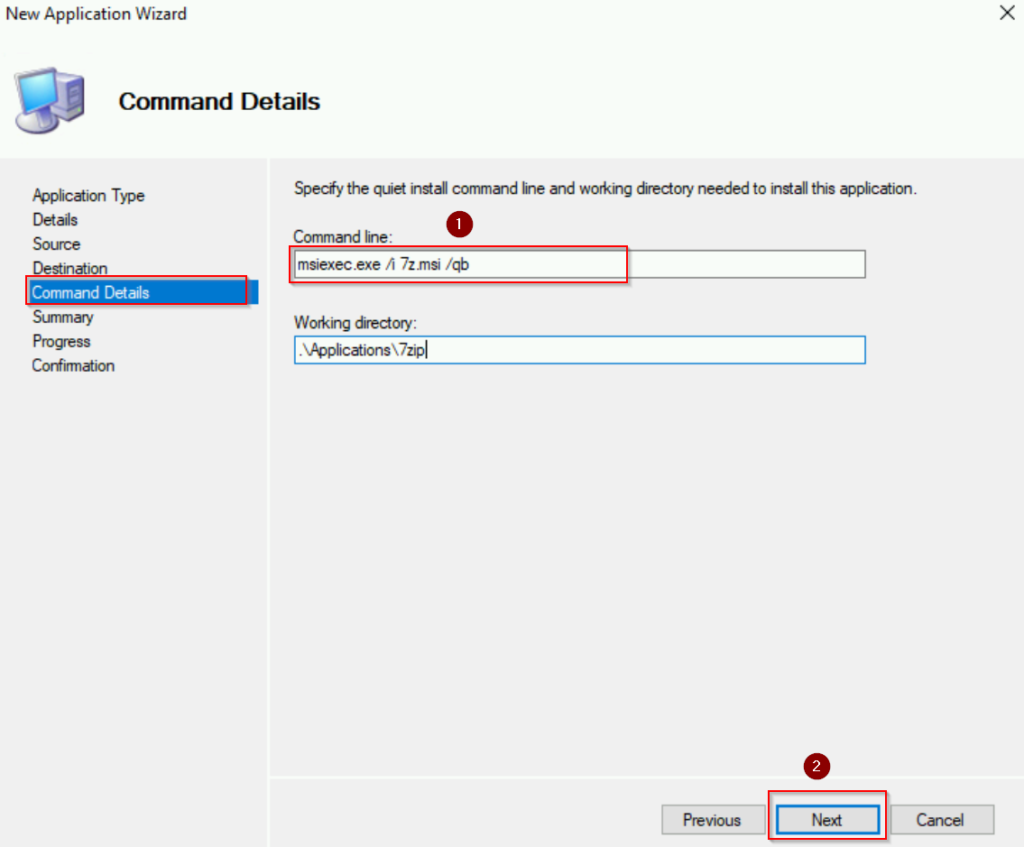
- Under Command Details, type in the command: msiexec /i 7z.msi /qb. This command will attempt to install the MSI package named 7z.msi quietly with a basic user interface. It will display a progress bar and basic installation status messages without any modal dialog boxes that require user interaction. Click “Next” to move to Summary section and click “Next” one more time.
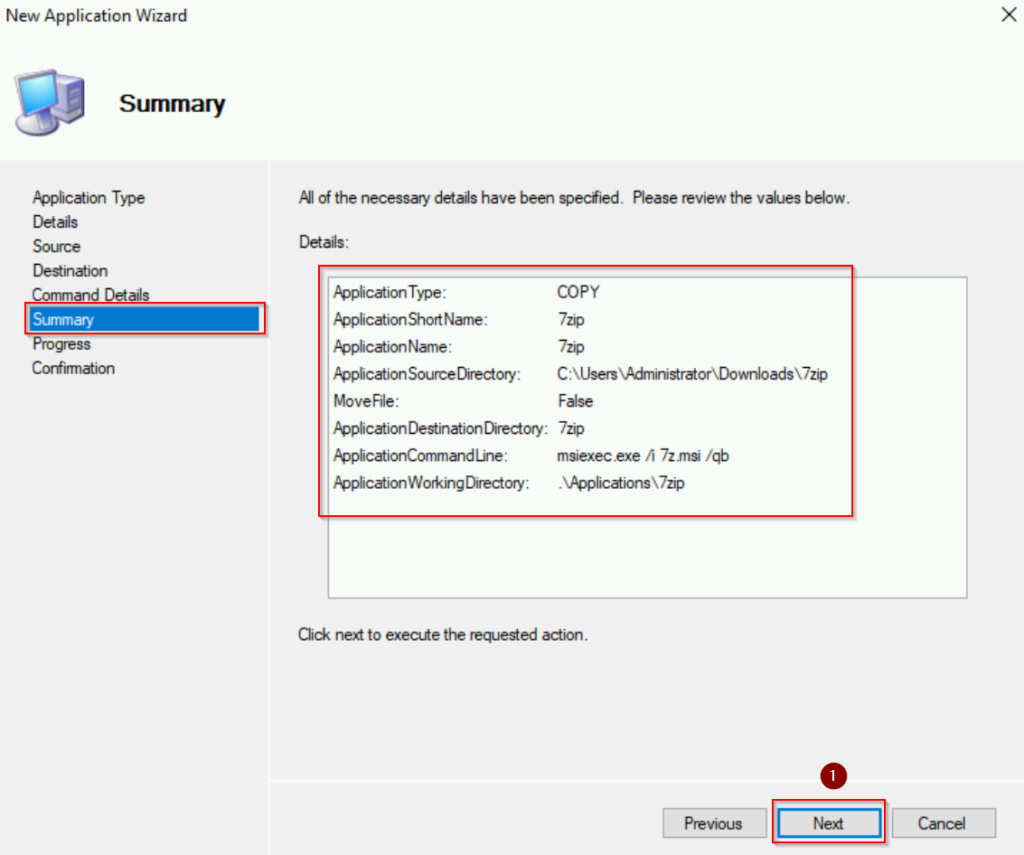
- Click “Finish” after the progress is complete
Here are the screenshots for all the steps above:


Step 4: Create Task Sequences
Creating task sequences will help you to automate the deployment of operating systems to target computers. They allow you to define the steps required to install the operating system, configure settings, install drivers, applications, and perform post-installation tasks.
We will go over briefly how to create task sequences in this lab:
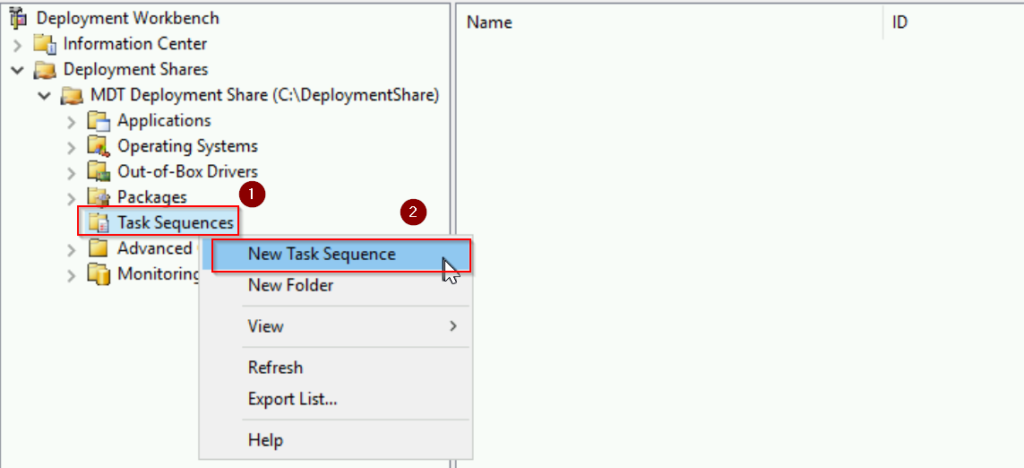
- Right click Task Sequence, choose “New Task Sequence“
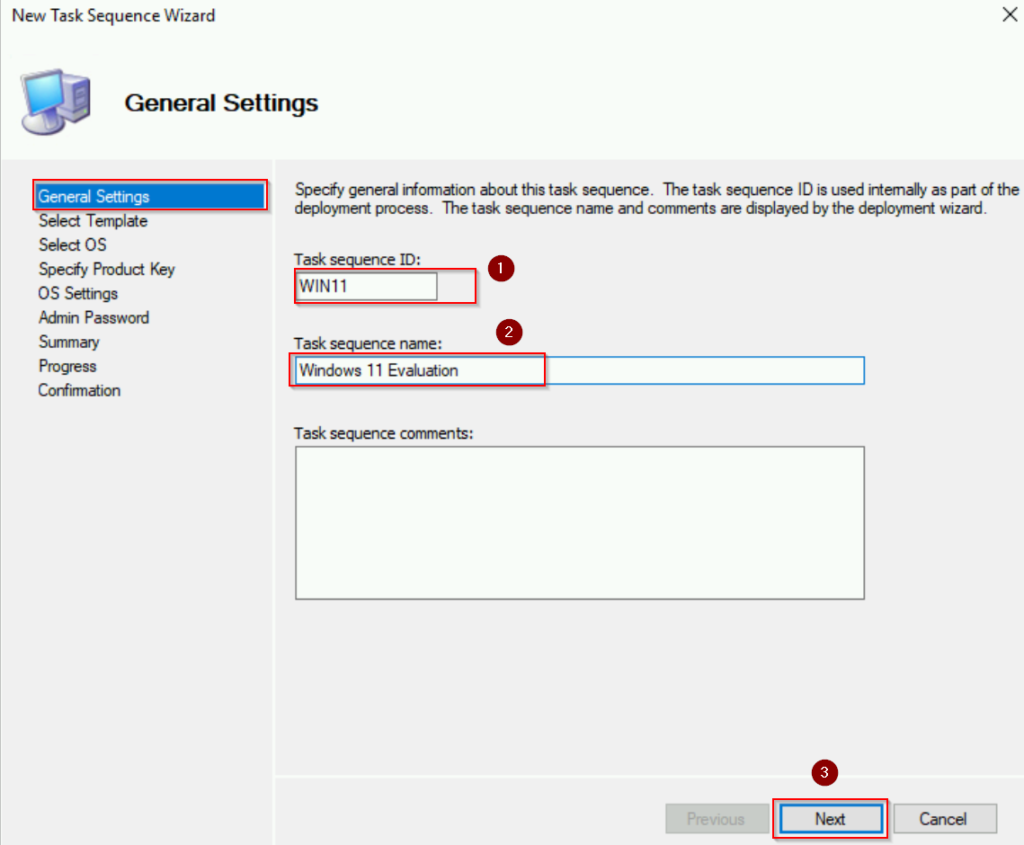
- Under General Settings, we will give Task sequence ID: WIN11; Task sequence name: Windows 11 Evaluation. Click “Next“
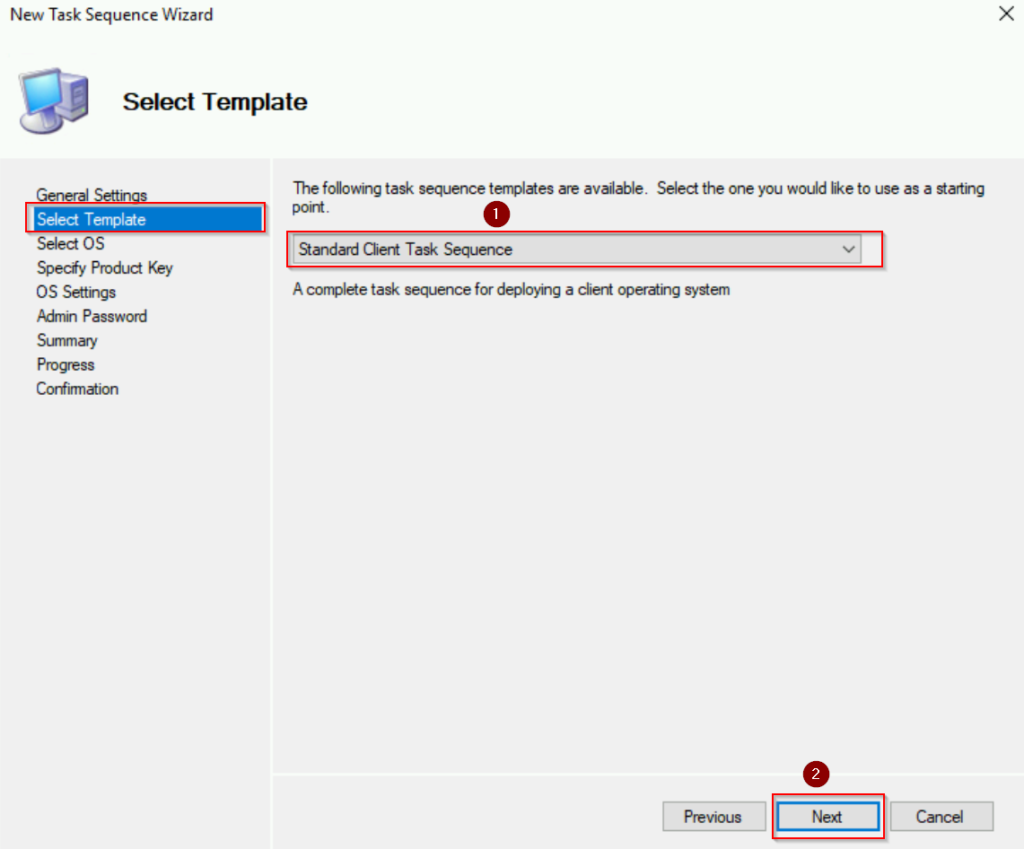
- Under Select Template, in this example we choose “Standard Client Task Sequence“. Click “Next“
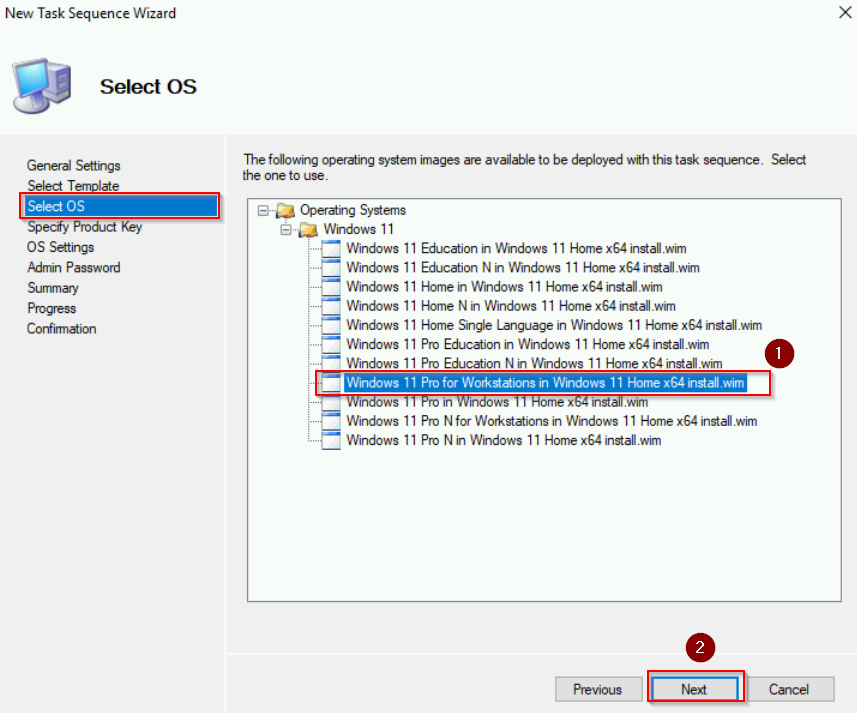
- Under Select OS, choose “Windows 11 Pro for Workstations in Windows 11 Homex64 install.wim“. Click “Next“
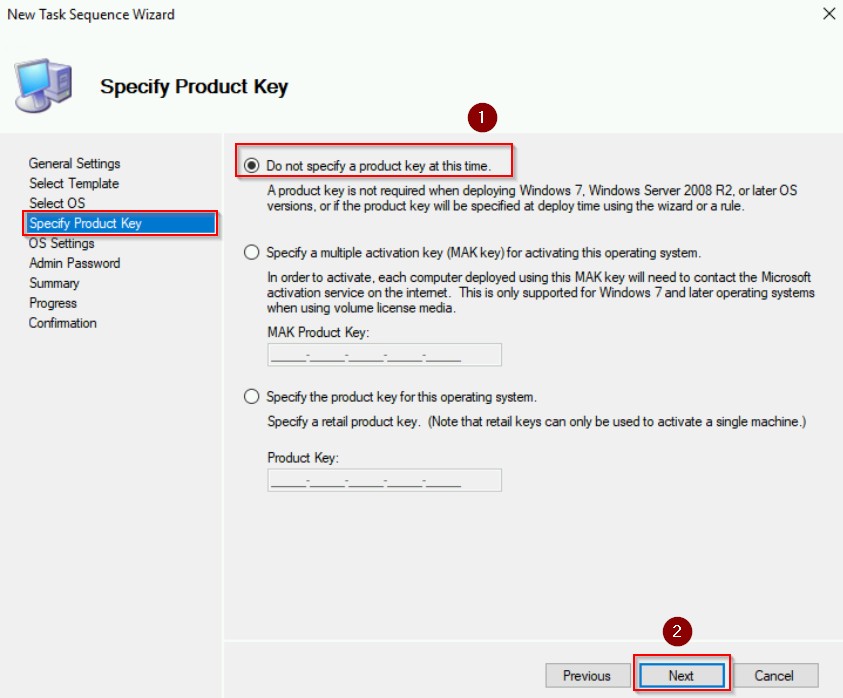
- Under Specify Product Key, select “Do not specify a product key at this time“. Click “Next“
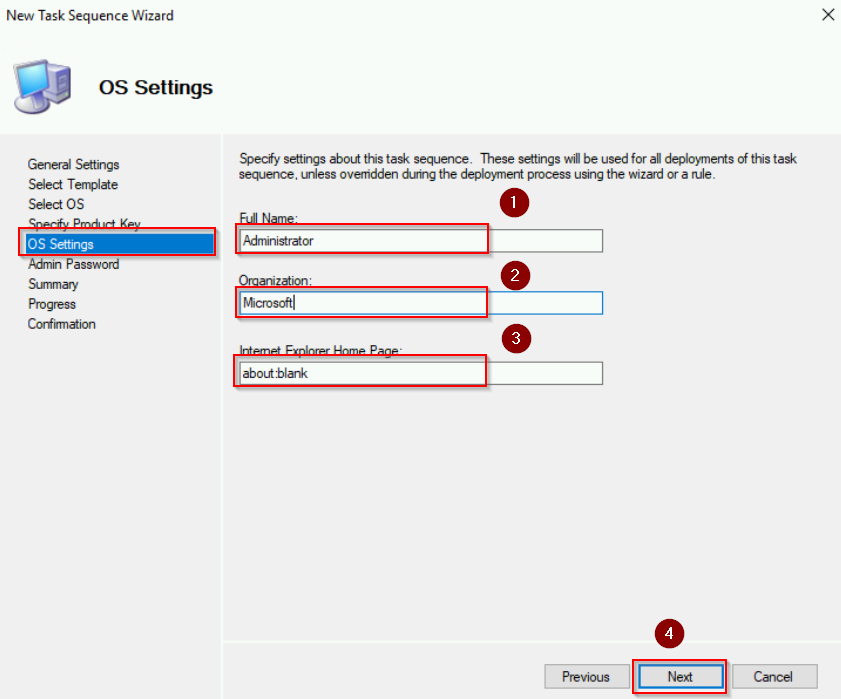
- Under OS Settings, filling the information: Full Name: Administrator; Organization: Microsoft; Internet Explorer Home Page: about:blank. Click “Next“
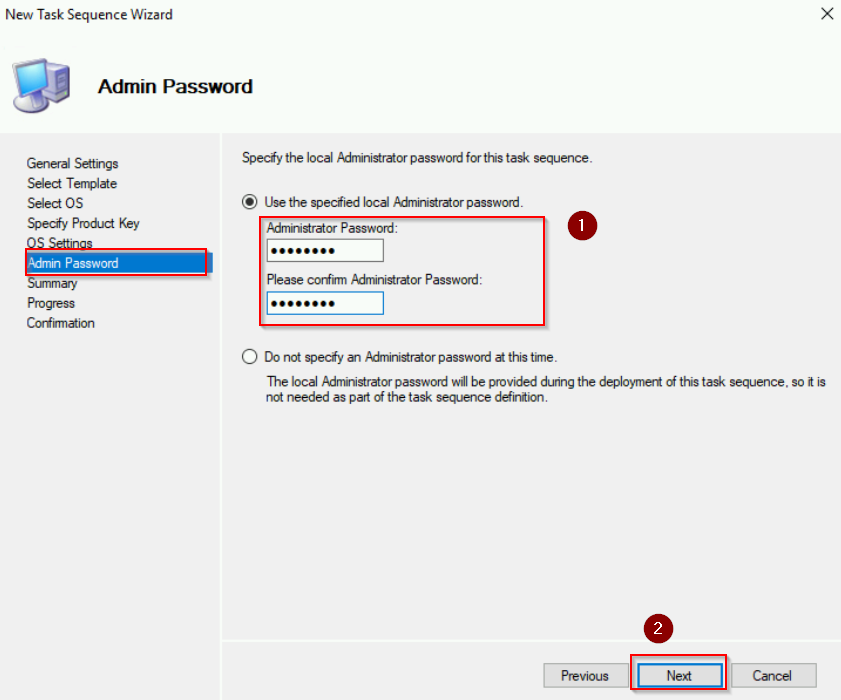
- Under Admin Password, we type in a admin password for the local administrator account. Click “Next“
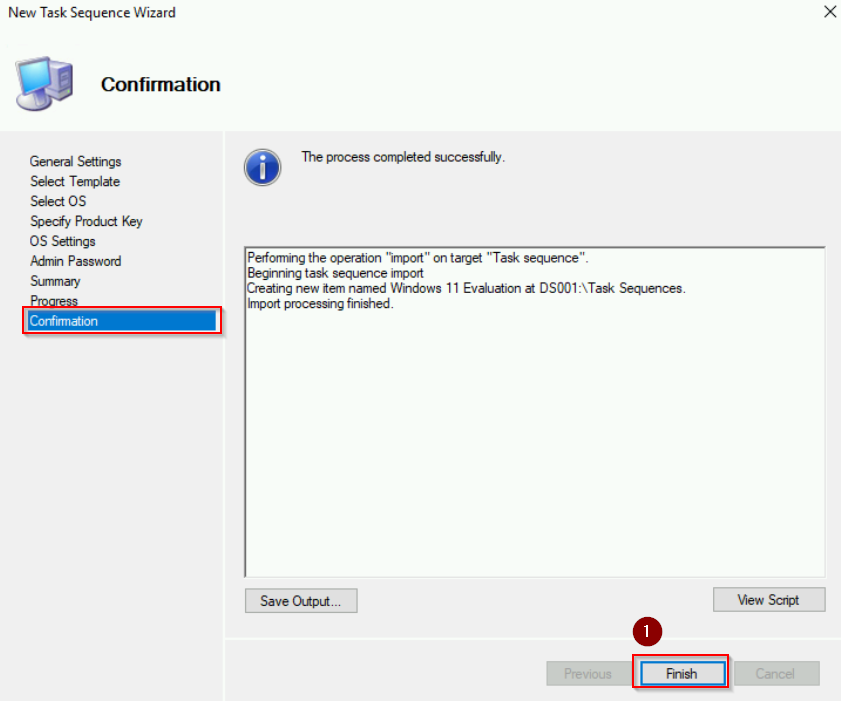
- Click “Next” under Summary and click “Finish” when done.
See screenshots below:

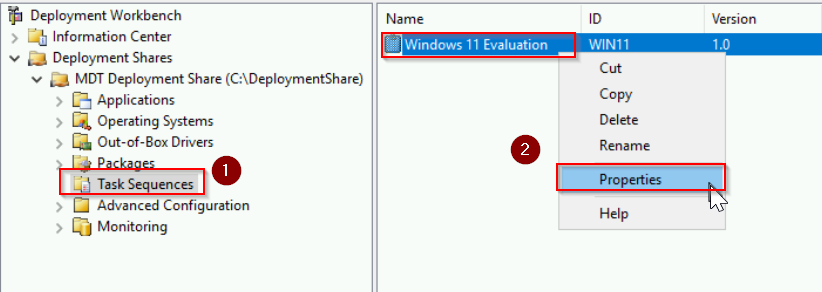
Task Sequence Properties
After creating Task Sequence, you can configure the Task Sequence by right click on the Task Sequence name and choose “Properties“. After that choose “Task Sequence” tab:
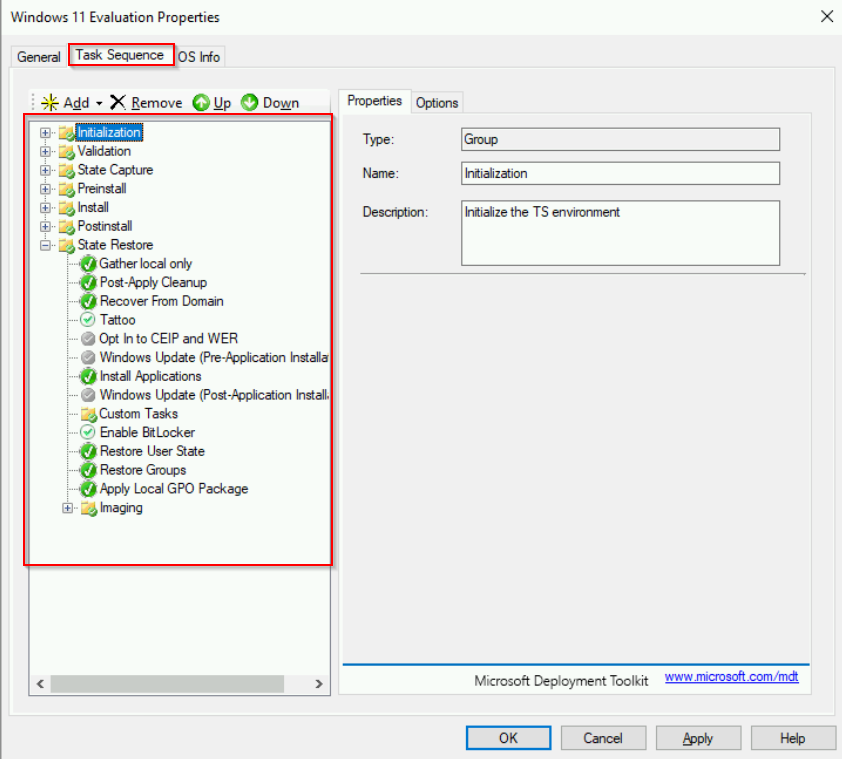
As you can see under Task Sequence tab, there is a list of these steps represented in a sequential order. Each step corresponds to a specific action or task that is performed during the deployment process. These steps can be customized or extended based on the specific requirements of the deployment.
For the purpose of this demonstration, we will leave the steps by the default, we will go deeper in configuring the steps for specific purposes in a later post.
Click “Cancel” to close the Task Sequence Property window.
Step 5: Configure MDT Deployment Share
The MDT Deployment Share is where you can control how MDT operates, including customizing deployment rules, configuring monitoring and security, and managing various aspects of the deployment process.
Right click MDT Deployment Share and choose Properties:
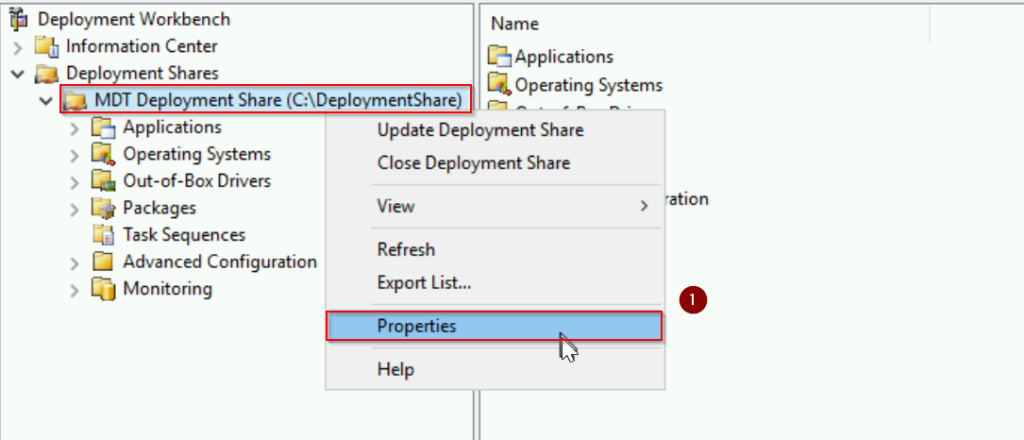
Here is a quick explanation of each tab:
- General: This section provides general information about the deployment share, such as its name, description, and the path where it’s located.
- Rules: This section allows you to define custom rules that control how the deployment process behaves. These rules can include settings like the default time zone, domain join information, application installation preferences, and more.
- Windows PE: This section lets you configure settings related to Windows Pre installation Environment (WinPE), such as specifying additional drivers to include, configuring scratch space, and enabling debugging options.
- Monitoring: Here, you can configure monitoring options to track the progress of deployments and view deployment logs.
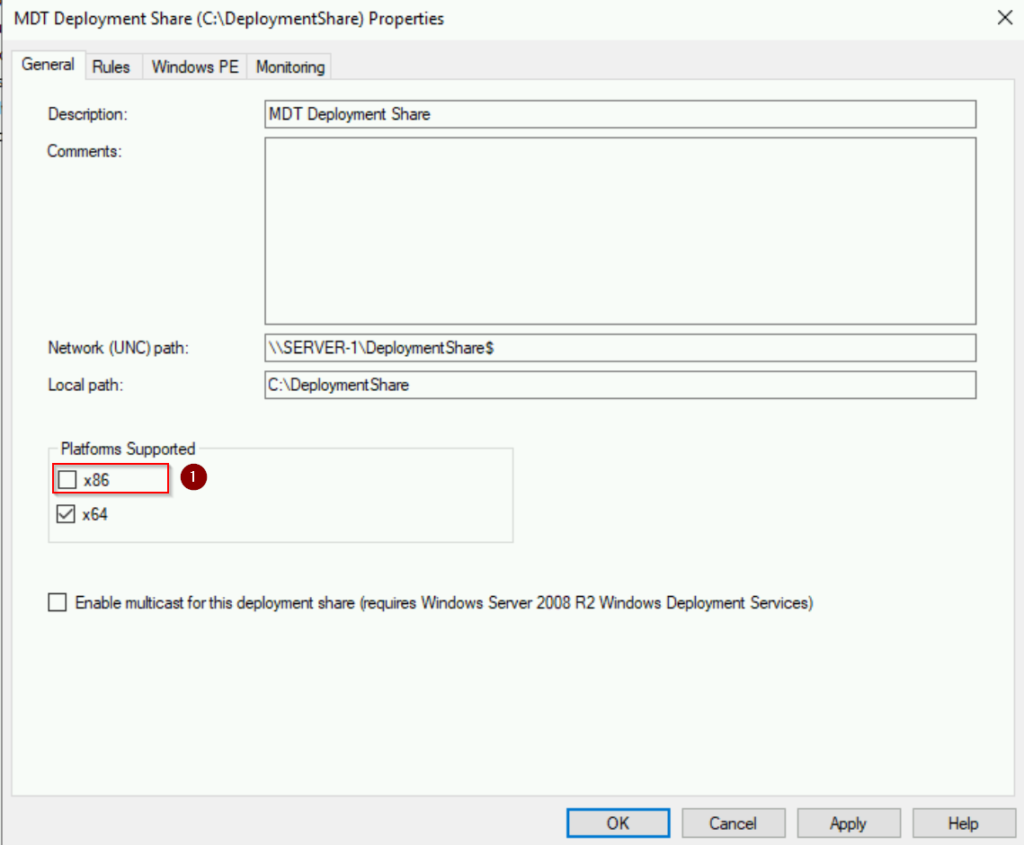
Under General tab, uncheck “x86” at Platforms Supported
Under Rules tab, you will see the following:
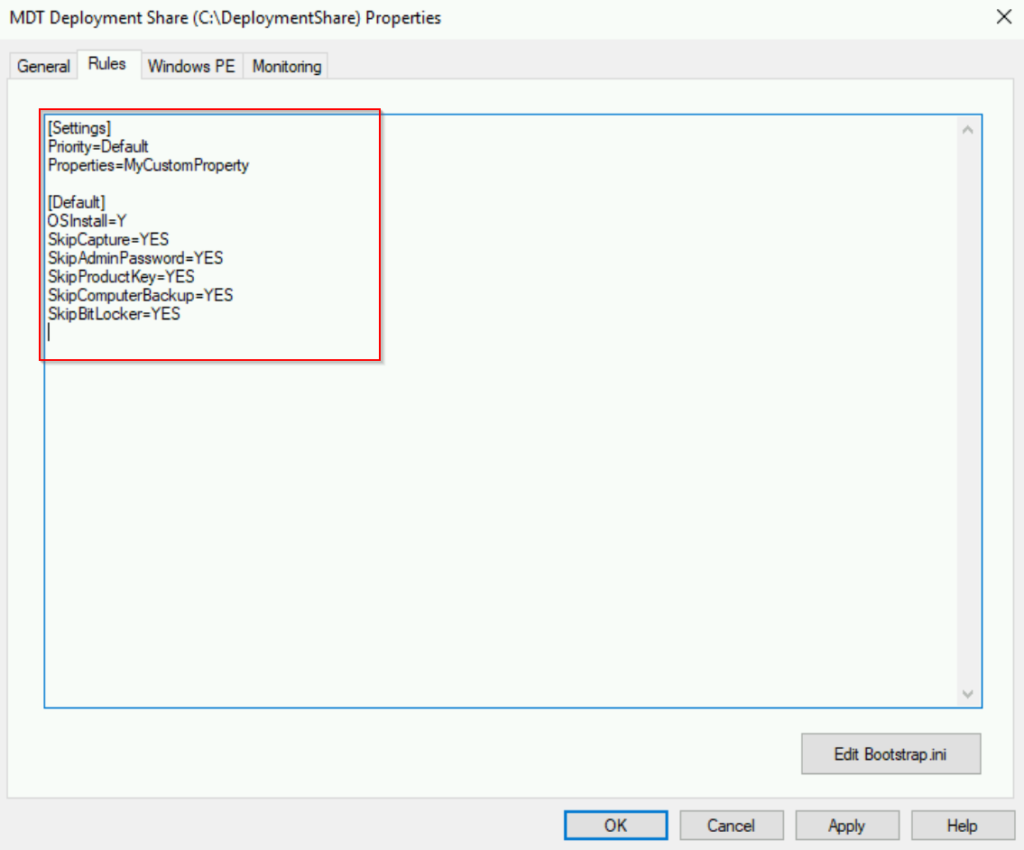
The [Settings] section is the primary section where you can specify various deployment settings.
- Priority=Default: Specifies the priority of the settings. In this case, it’s set to “Default,” meaning these settings will be applied by default unless overridden by more specific settings defined in other sections
- Properties=MyCustomProperty: Specifies additional custom properties that you want to define and use during the deployment process
The [Default] section have various settings like “OSInstall=Y” ; “SkipCapture=YES”; “SkipAdminPassword=YES” indicating whether to skip or enable certain steps during deployment.
We will keep everything by default right now for this lab, we will learn how to modify these rules in a later post.
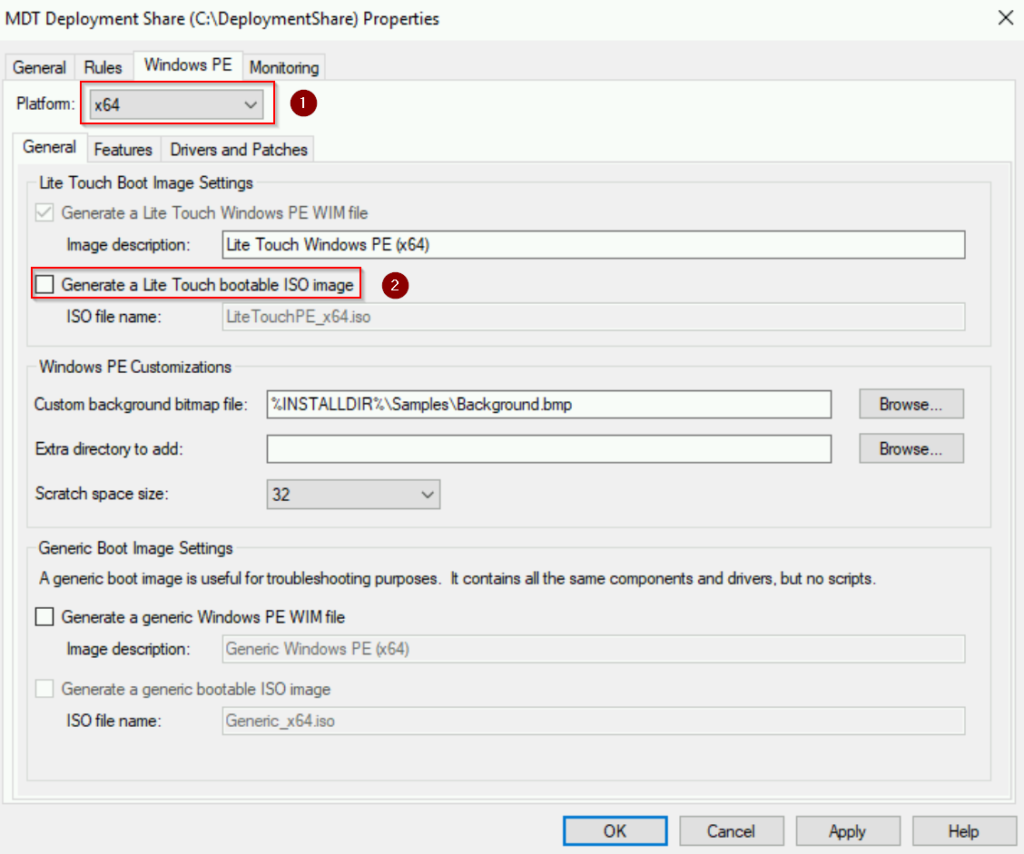
Under Windows PE tab, select “x64” for Platform. Next, uncheck “Generate a Lite Touch bootable ISO image” at Lite Touch Boot Image Settings. We do not need to generate any bootable ISO image in this lab.
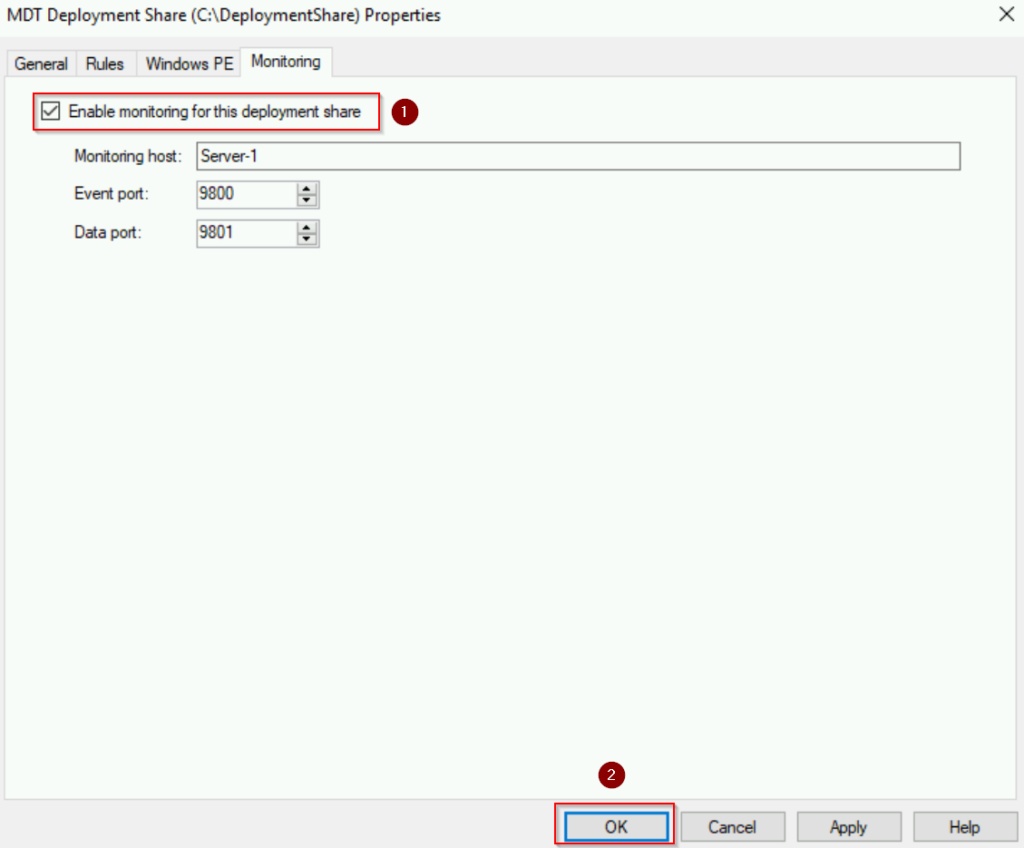
Under Monitoring tab, select “Enable monitoring for this deployment share“. Click “OK” to apply all the settings.
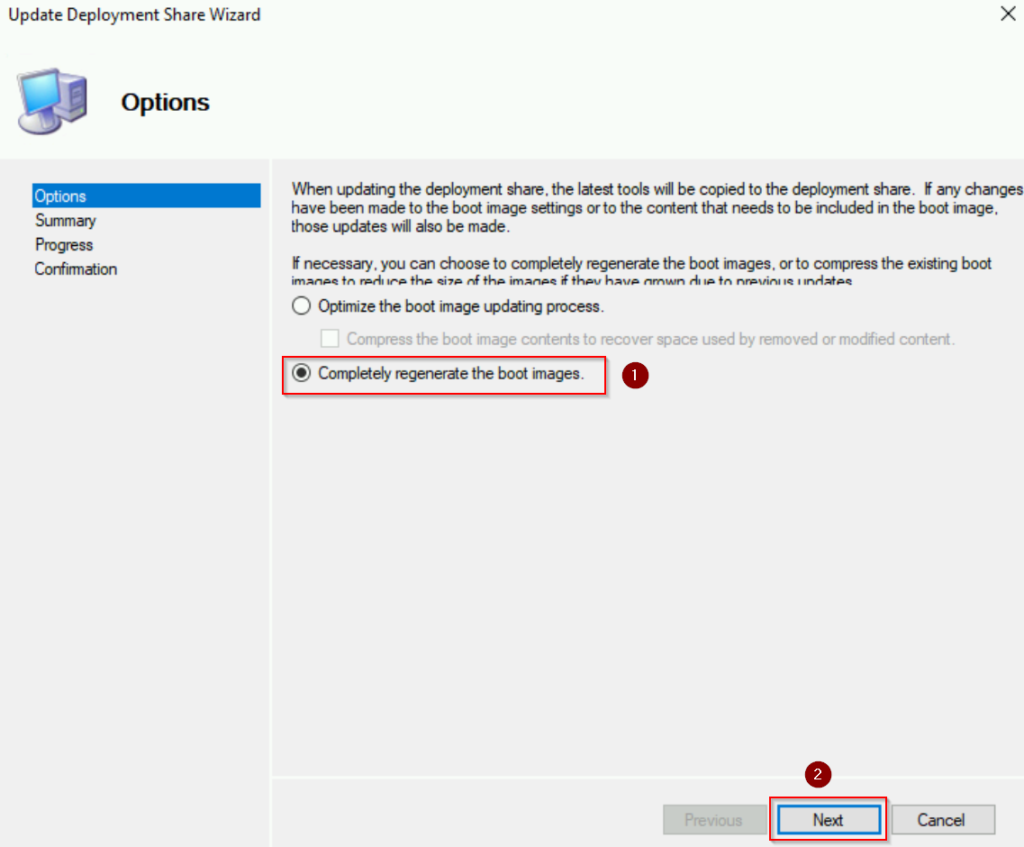
You need to update the deployment share every time you make any changes. So, right click on “MDT Deployment Share” and choose “Update Deployment Share“
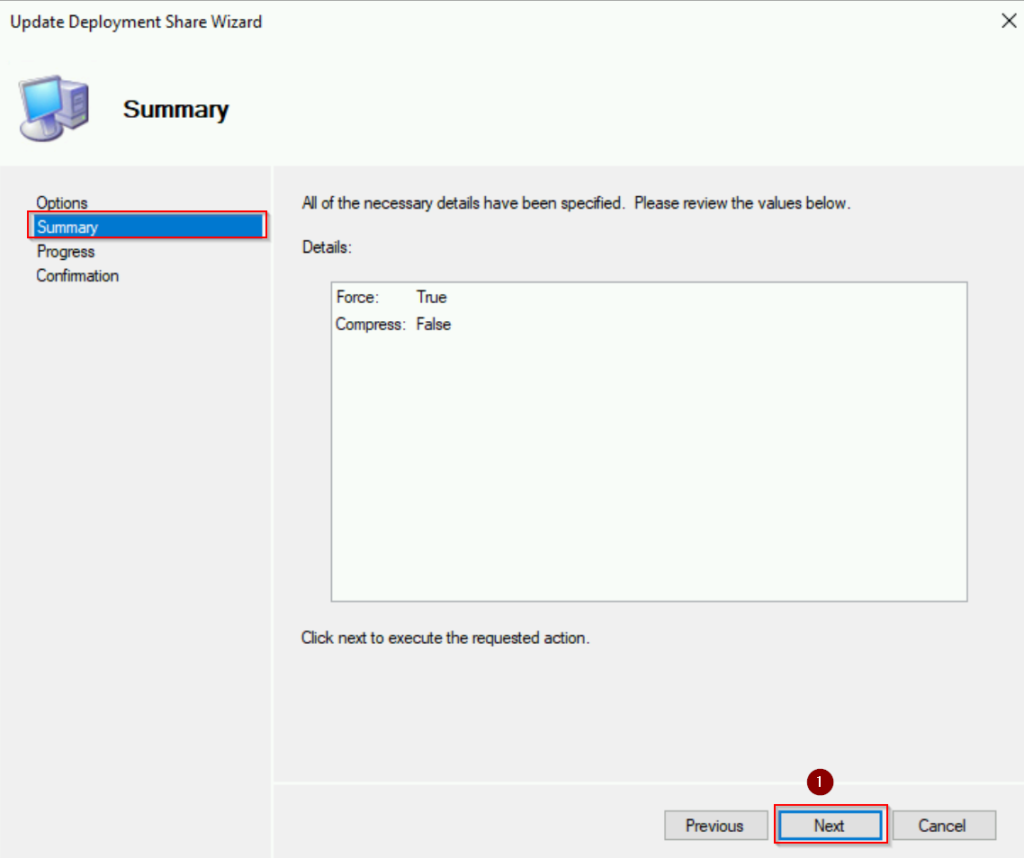
- Check “Completely regenerate the boot image“. Click “Next” and hit “Done” when finish
See screenshots below:

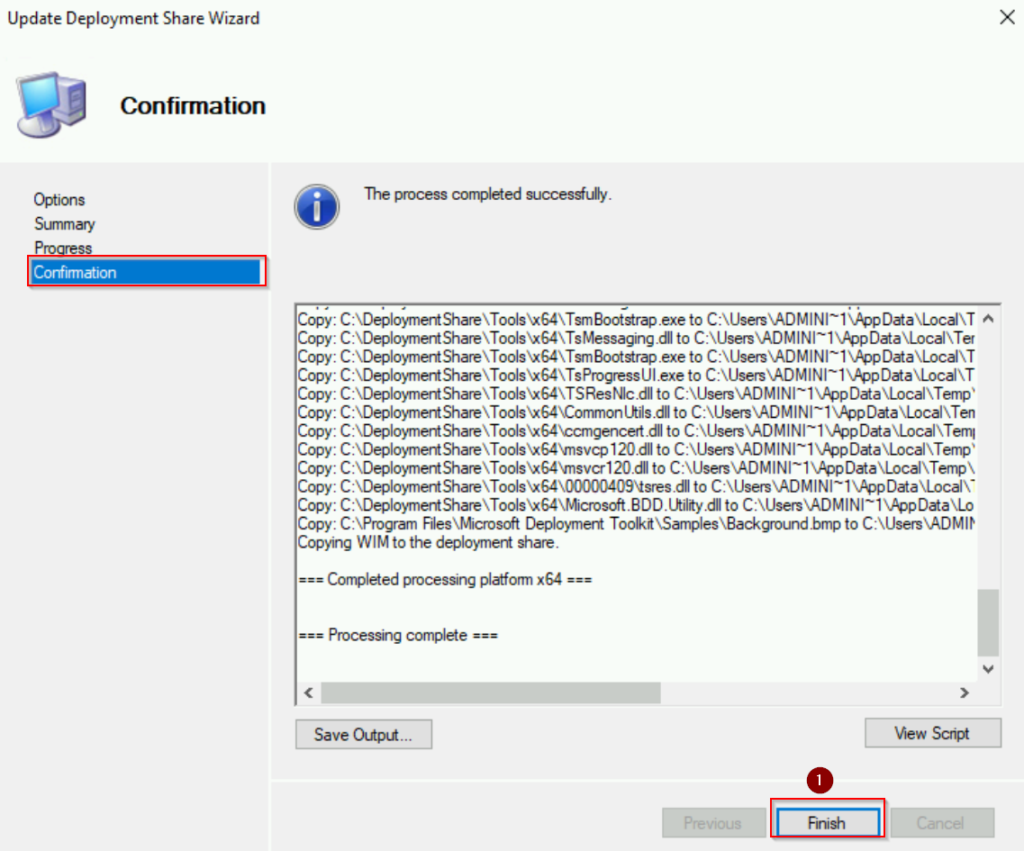
The system will create for us a .wim file under DeploymentShare\Boot. This .wim file can then be imported to Windows Deployment Service to boot and initial the deployment.

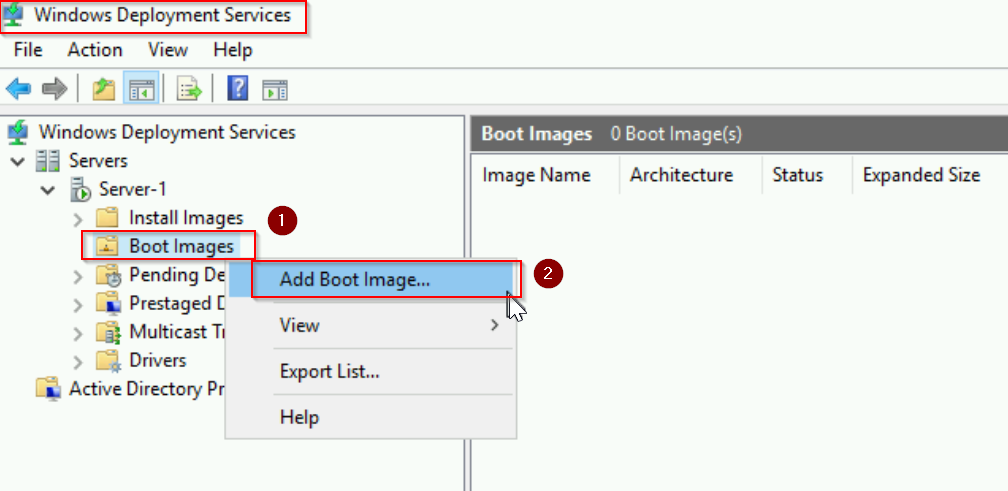
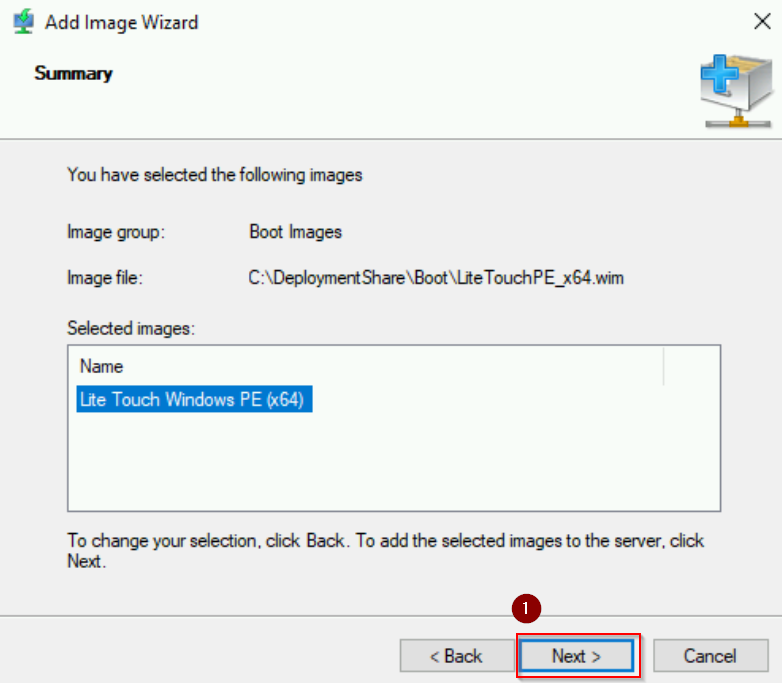
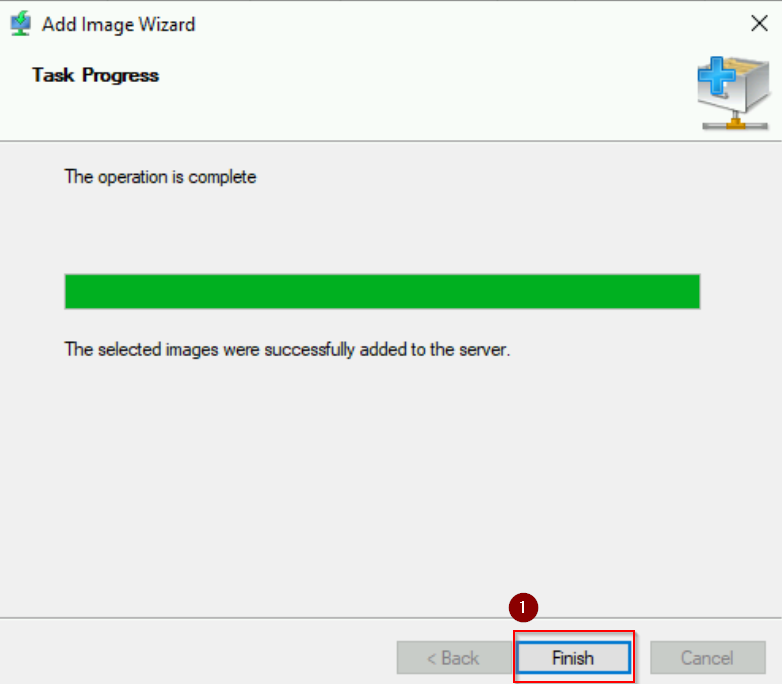
Step 6: Add the boot image into Windows Deployment Services
Go to Windows Deployment Services and begin importing the boot image:
- Double click on Boot Images. Right click and choose “Add Boot Image…“
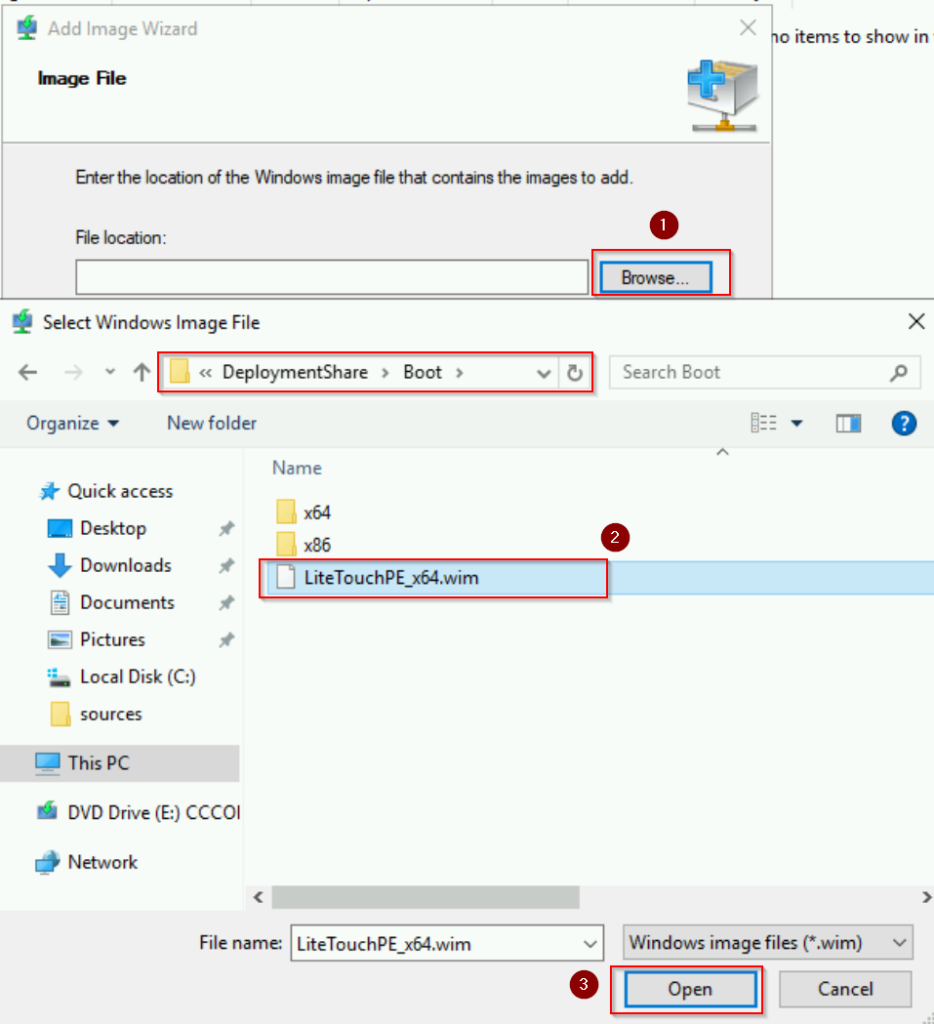
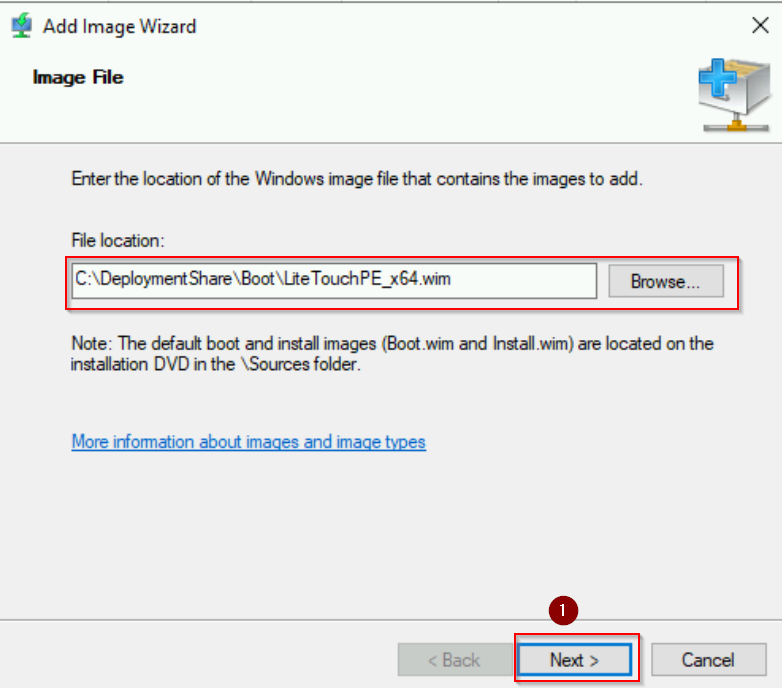
- Select “Browse” and choose the boot image, in this case it named “LiteTouchPE_64.wim“. Click “Open” and “Next“
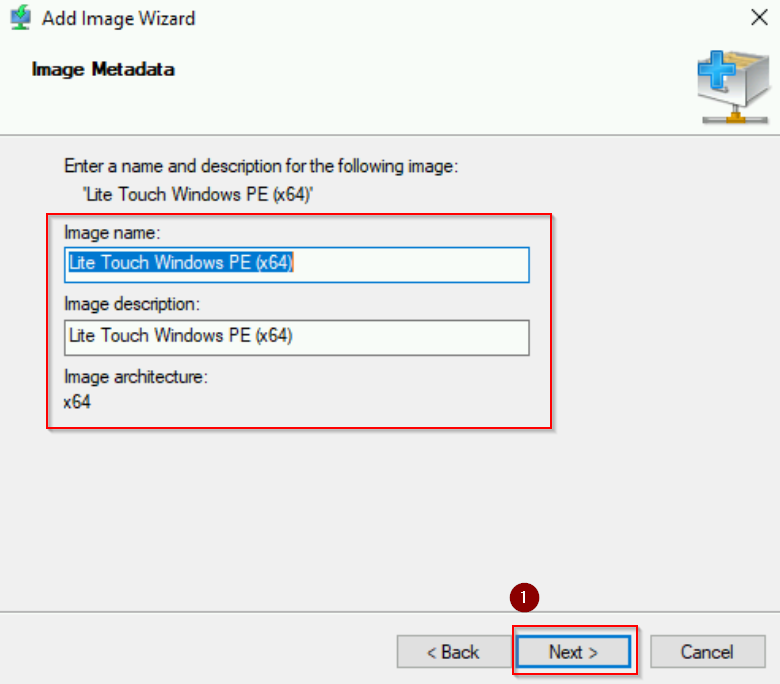
- Keep the Image name and description by default. Hit “Next” and “Finish” when done.
Here are the screenshots:
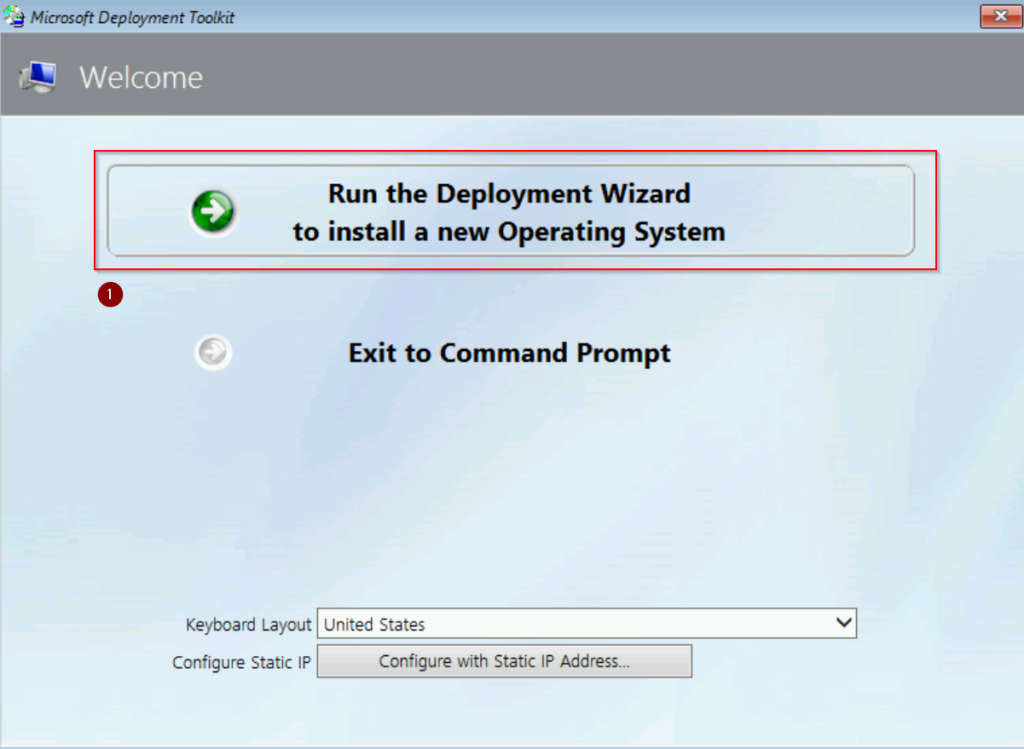
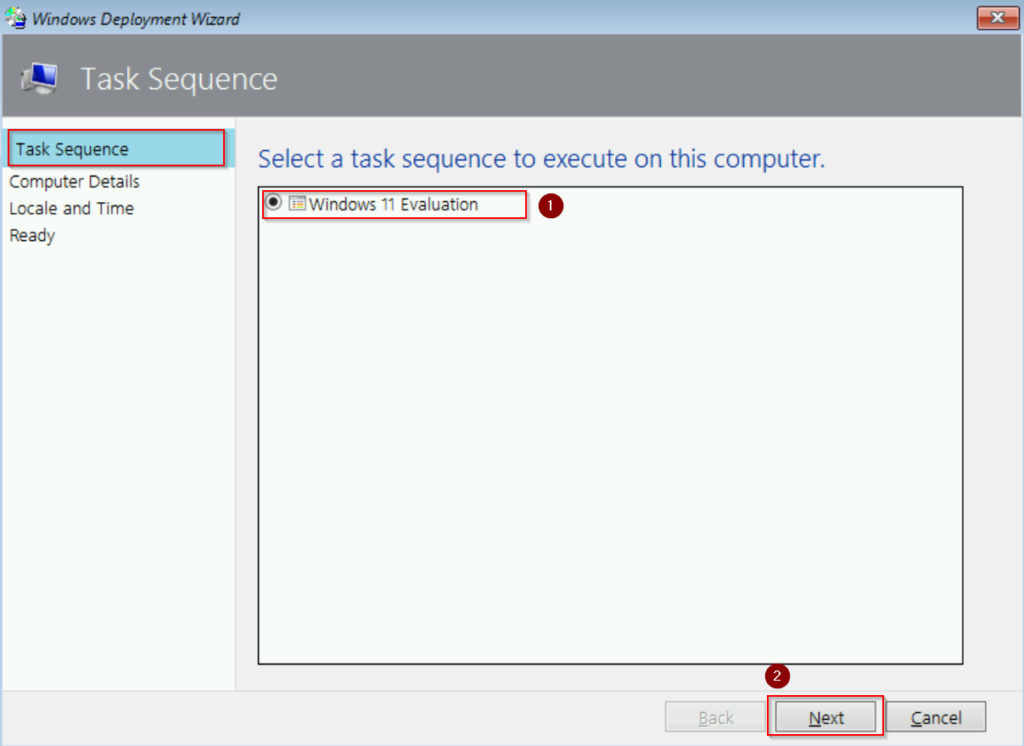
Step 7: PXE Boot
In this last step, we will test by PXE boot the “PC-1” virtual machine. Start the VM and press “Enter” for network boot service.
- In the welcome screen, click on “Run the Deployment Wizard to install a new Operating System“
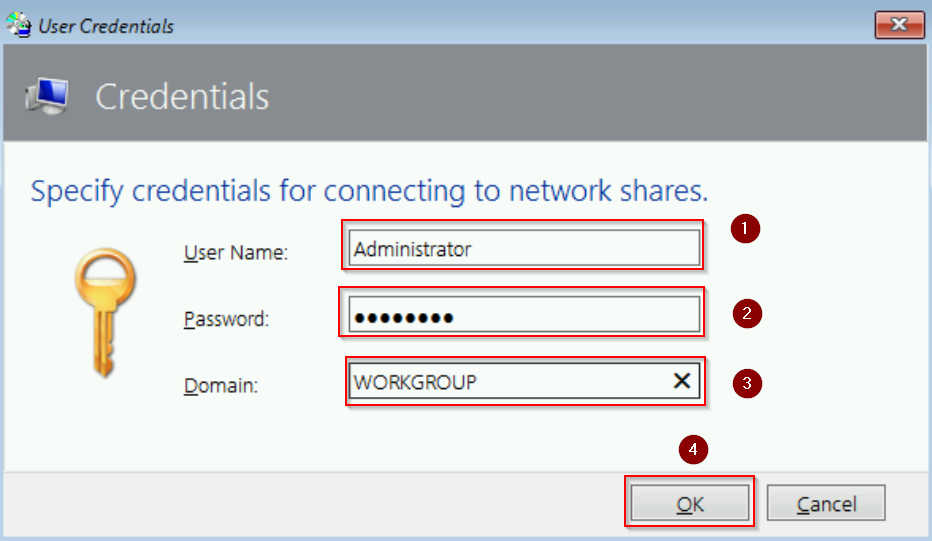
- In the Credential section, type in User Name: “Administrator“; Password: “Local password of the MDT server“; Domain “WORKGROUP“
- Under Task Sequence, choose “Windows 11 Evaluation“. Click “Next“
- Under Computer Details, in Computer name type in “PC-1“; check on “Join a workgroup“. Click “Next“
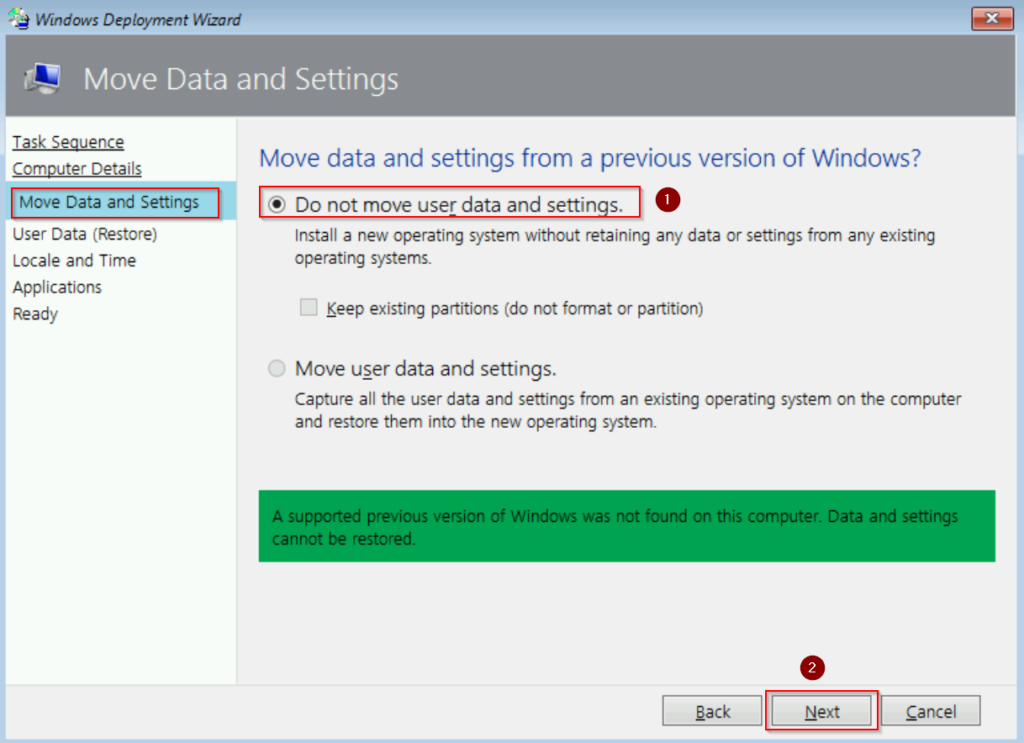
- Under Move Data and Settings, in this case, choose “Do not move user data and settings“. Click “Next“
- Under User Data (Restore), choose “Do not restore user data and settings“. Click “Next“
- Under Locale and Time, choose your prefer time zone, language and Keyboard layout. Click “Next”
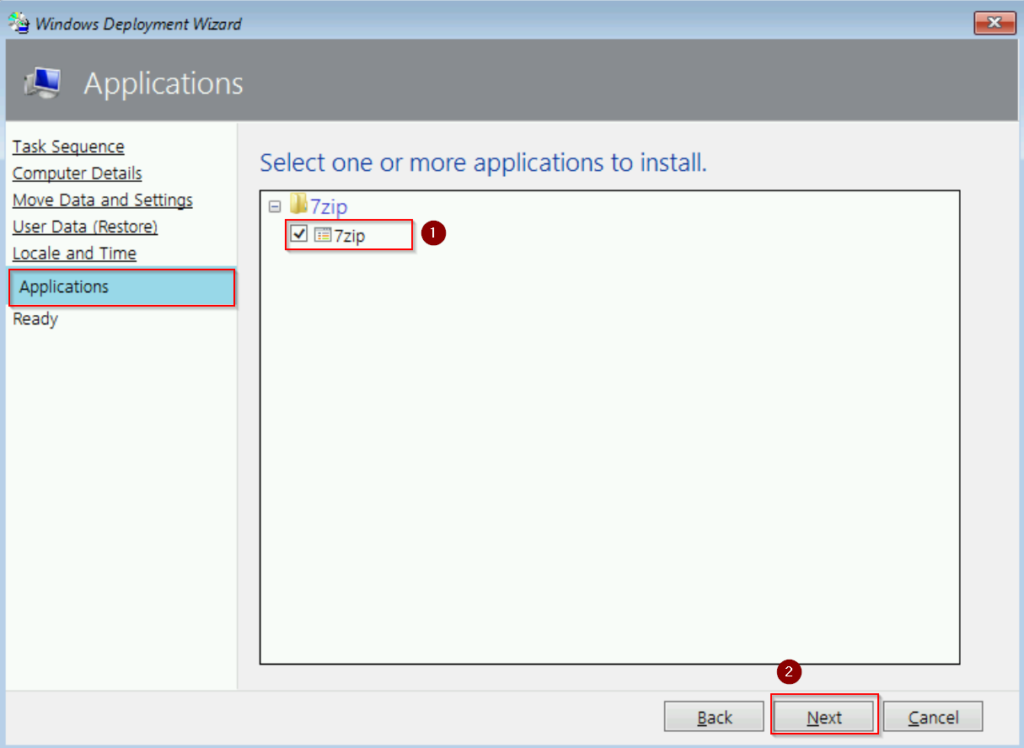
- Under Applications, choose “7zip“. Click “Next“
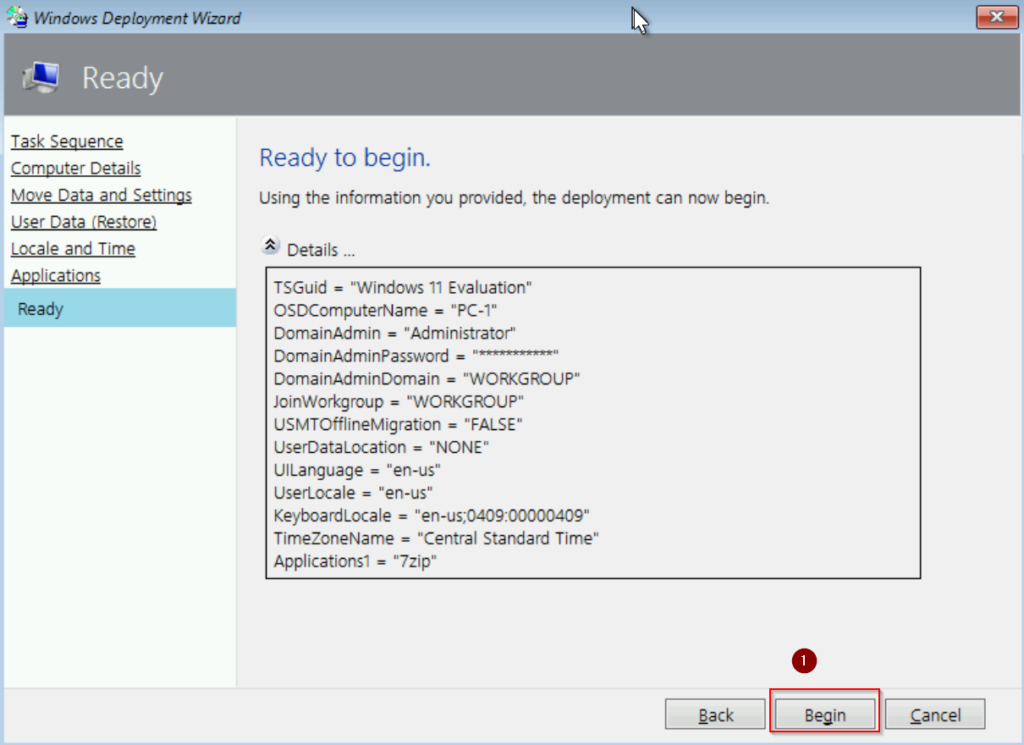
- In the last step, click “Begin” to start the Deployment
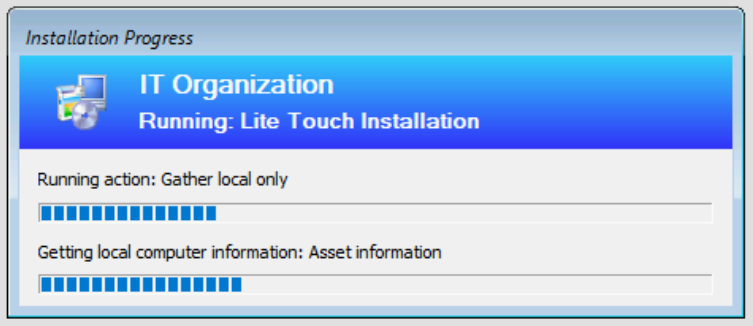
See screenshots below:


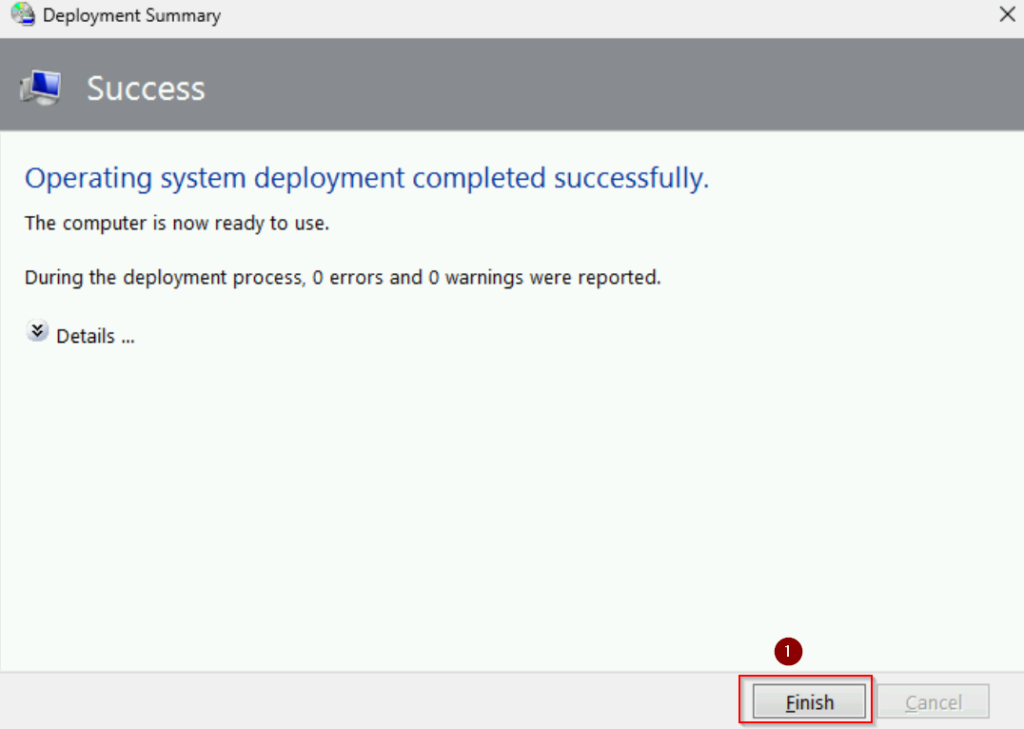
Result
After the deployment finish, you will see a Deployment Summary stating “Operating system deployment completed successfully”. Click “Finish“.
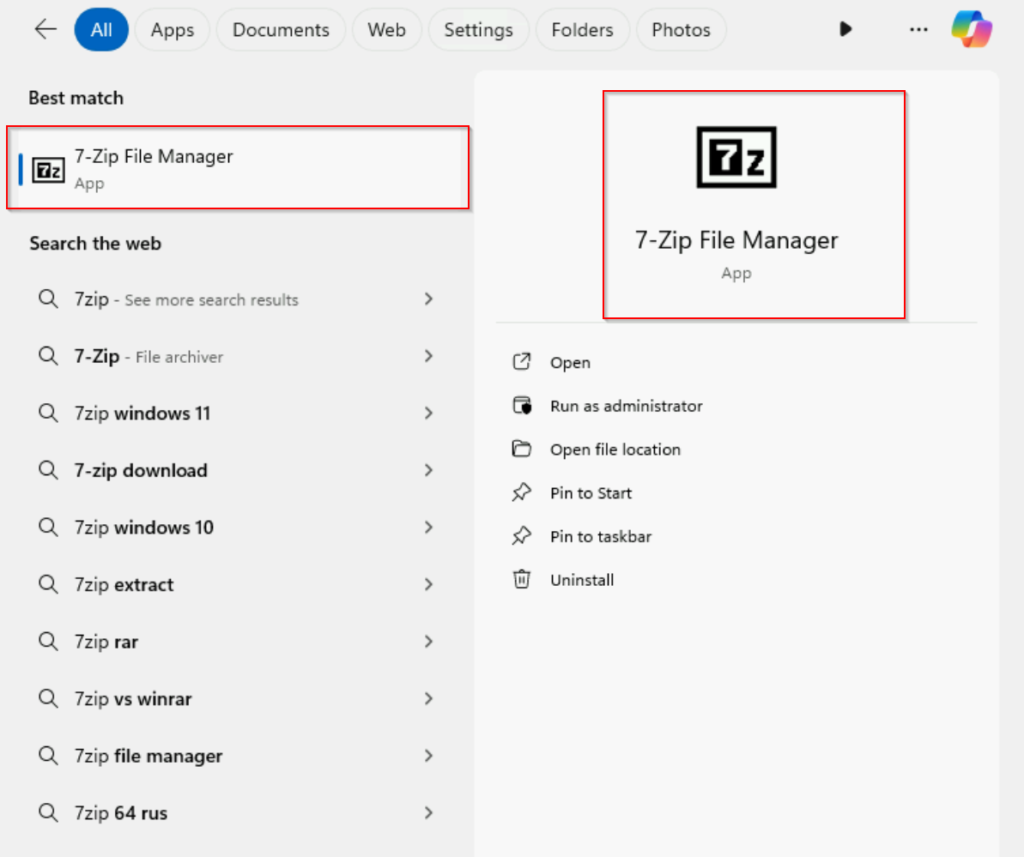
You can also see that 7-zip have been installed successfully too
Conclusion
To sum up, you’ve successfully configured a complete MDT environment for deploying Windows 11. This streamlined process allows for efficient and automated OS and application installations. For further optimization, we will learn how to modify the rules and edit the Bootstrap.ini in MDT Deployment Share to suite our needs in the upcoming posts.