Introduction
In this guide, we’ll show you how to easily make a bootable USB on Windows. We’ll cover downloading the Ubuntu ISO, selecting the right tool, and walking you through the steps to get your USB drive ready. Let’s get started.
What you need
Here is the list of requirements:
- A USB drive (at least 8GB recommended)
- A computer with internet access
- The Ubuntu ISO file
Downloading Ubuntu
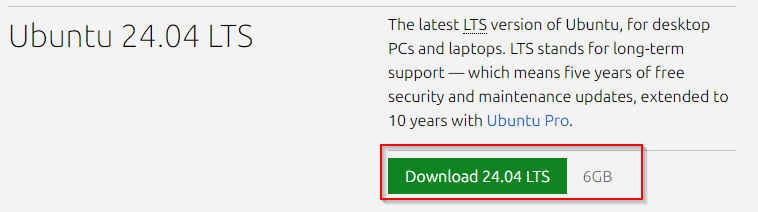
Visit the Ubuntu website to get the ISO file. For most users, the LTS (Long Term Support) version is recommended for its stability and extended support period. In this example we will use the Ubuntu 24.04 LTS Desktop version.
Creating a Bootable USB Drive (Windows)
There are many popular tools for different operating systems:
- Windows: Rufus, UNetbootin
- macOS: Etcher, UNetbootin
- Linux: Startup Disk Creator, Etcher
In this topic we will focus on Rufus for Windows:
Download and Install Rufus:
- Visit the Rufus website and download the latest version of the software.
- Run the downloaded executable file to launch Rufus (no installation required).
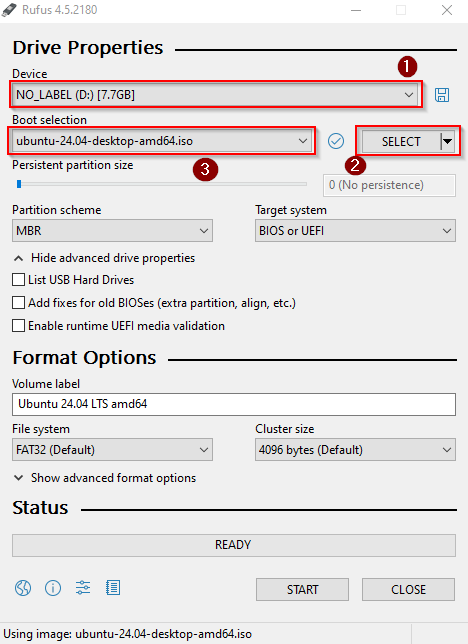
Select USB Drive and Ubuntu ISO file
- Plug your USB drive into your computer. Ensure it has at least 8GB of storage and that you have backed up any important data, as the drive will be formatted during the process.
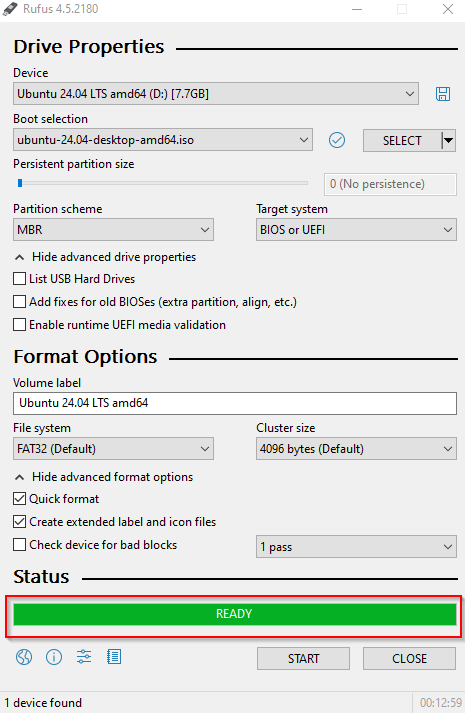
- Open Rufus. You should see the main interface with various options.
- In the “Device” dropdown menu, select your USB drive
- Click on the “Select” button next to the “Boot selection” field.
- Browse to the location where you downloaded the Ubuntu ISO file and select it.
See screenshot below:
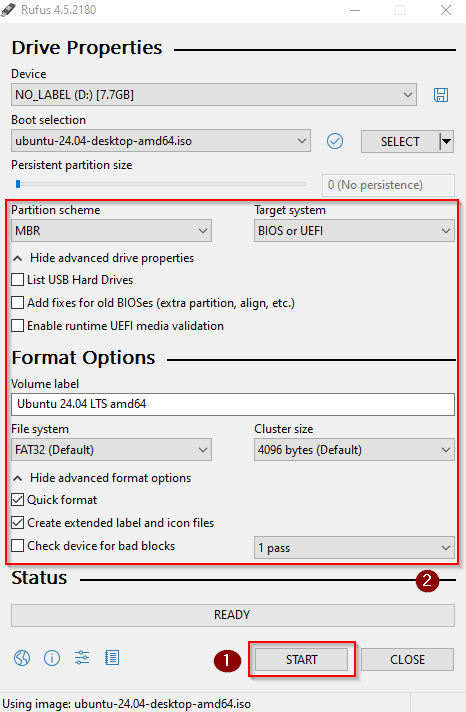
Configuring and Start the process
Choose the appropriate partition scheme:
- MBR for BIOS or UEFI.
- GPT for UEFI
Rufus usually auto-detects the best option based on your system, but you can adjust it if needed. You can leave all other parameters with their default values.
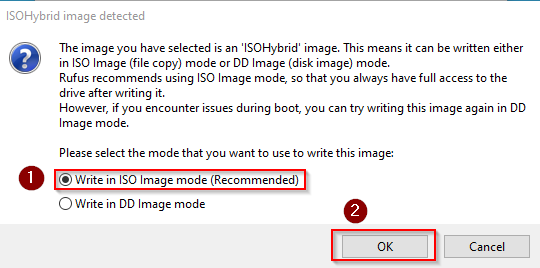
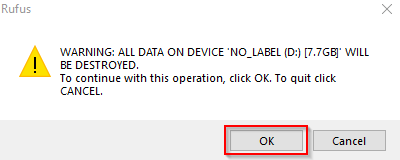
Once everything is set, click on the “Start” button. You might see a warning about data destruction on the USB drive. Confirm to proceed.
Screenshots below:
Wait for the Process to Complete
- Rufus will now create the bootable USB drive. This process may take several minutes. Once done, you will see a “Ready” status.
- Close Rufus and safely eject your USB drive from your computer.
Installing Ubuntu
Now you can install Ubuntu with your bootable USB drive:
- Insert the bootable USB drive into the target computer.
- Restart the computer and boot from the USB drive.
- Follow the on-screen instructions to install Ubuntu.
Go here for a step-by-step guide of installing Ubuntu.
Conclusion
By following the steps outlined in this guide, you can easily create your own bootable USB drive using Windows. Now, you’re ready to explore Ubuntu and experience its powerful features firsthand. If you have any questions or run into issues, feel free to leave a comment below.